How to fix your Razer Orochi's mouse switches
I've been using a Razer Orochi mouse for the past two years with very little to complain about. The size is just right, the side buttons are great for switching between spaces in OS X, the sensitivity is perfect for Windows gaming, it doesn't need a wireless USB dongle, and its Mac/Windows-compatible driver allows me to switch between "gaming" and "work" modes with a click of a side button. It's a nice little mouse, despite its intimidating looks.
Unfortunately, like any mouse, the Orochi isn't invincible. Mouse switches inevitably begin to fail, and in early December both my middle mouse button and one of my side buttons began to flake out. Razer offers a two-year limited warranty on the Orochi, but dead mouse switches are considered "normal wear and tear" and not a hardware defect.
The Orochi isn't a particularly cheap mouse either. I paid roughly $70-$80 for it two years ago, and today it costs $60-$70 on Amazon. That's right up there with Logitech's well-regarded MX Mouse and Apple's less-well-regarded Magic Mouse for $70 each.
Throwing out a perfectly fine motherboard and plastic housing because of a simple switch seemed wasteful to me, so I decided to try repairing my Orochi's mouse switches myself. I'm glad to report that I actually repaired it successfully, and with a few parts and some patience, you can too.
Note 1:
Some of the parts I used were shipped from China, which means they'll take at least a week or two before they get to your house. If you need a quick fix for a broken switch so you can get back to work, you might want to either find a spare mouse or get a new "backup" mouse.
Note 2:
I only own a Razer Orochi and can only confirm that the guide below works for this particular mouse. The parts I used might work on other Razer or (potentially) Logitech mice as well, but I haven't confirmed that. Please don't blame me for "promising" anything or voiding your warranty if anything bad happens. I'm just providing this guide for people (probably gamers) who want to fix their Orochi for sentimental or practical reasons.
Here's what you'll need:
1) iFixIt's 26 Bit Driver Kit
You only actually need two of the bits included in this kit (a small hexalobe and small Phillips), but it's a good thing to have for future projects anyway.
2) Soldering Iron (and extra solder)
Available at your local hardware store, or Amazon. Basically it's a little poker with a really hot tip that can melt the flexible tin/lead alloy known as solder. You'll need one of these to remove the old mouse switch and put a new one in its place.
Depending on which of your mouse's switches are broken, here's what you'll need:
Left/Right Click buttons:
Omron D2FC-F-7N Microswitch
Available from eBay. You can probably find someone selling just 1 or 2 at a time, but you may as well get 10-20. Some of them may be duds, and Omron switches are very common in mice.
Side buttons:
PCB Momentary Tactile Button Switch
Also eBay. Make sure that the switches you order only have two metal legs and not four.
Middle scroll wheel button:
Panasonic Tactile Switch ECG EVQ-P0E07K (Octopart or Digi-Key)
This one isn't available on eBay, but you can get it from these common electronics suppliers.
Phase 1: Disassembly
Once you've received all the tools and parts you need, it's time to start dissecting.
Tip: click any image for a larger view
Step 1: Prepare your mouse and work area
Unplug the USB cable, clear a table, plug in your soldering iron, set up your screwdriver kit, and mentally prepare yourself for surgery.

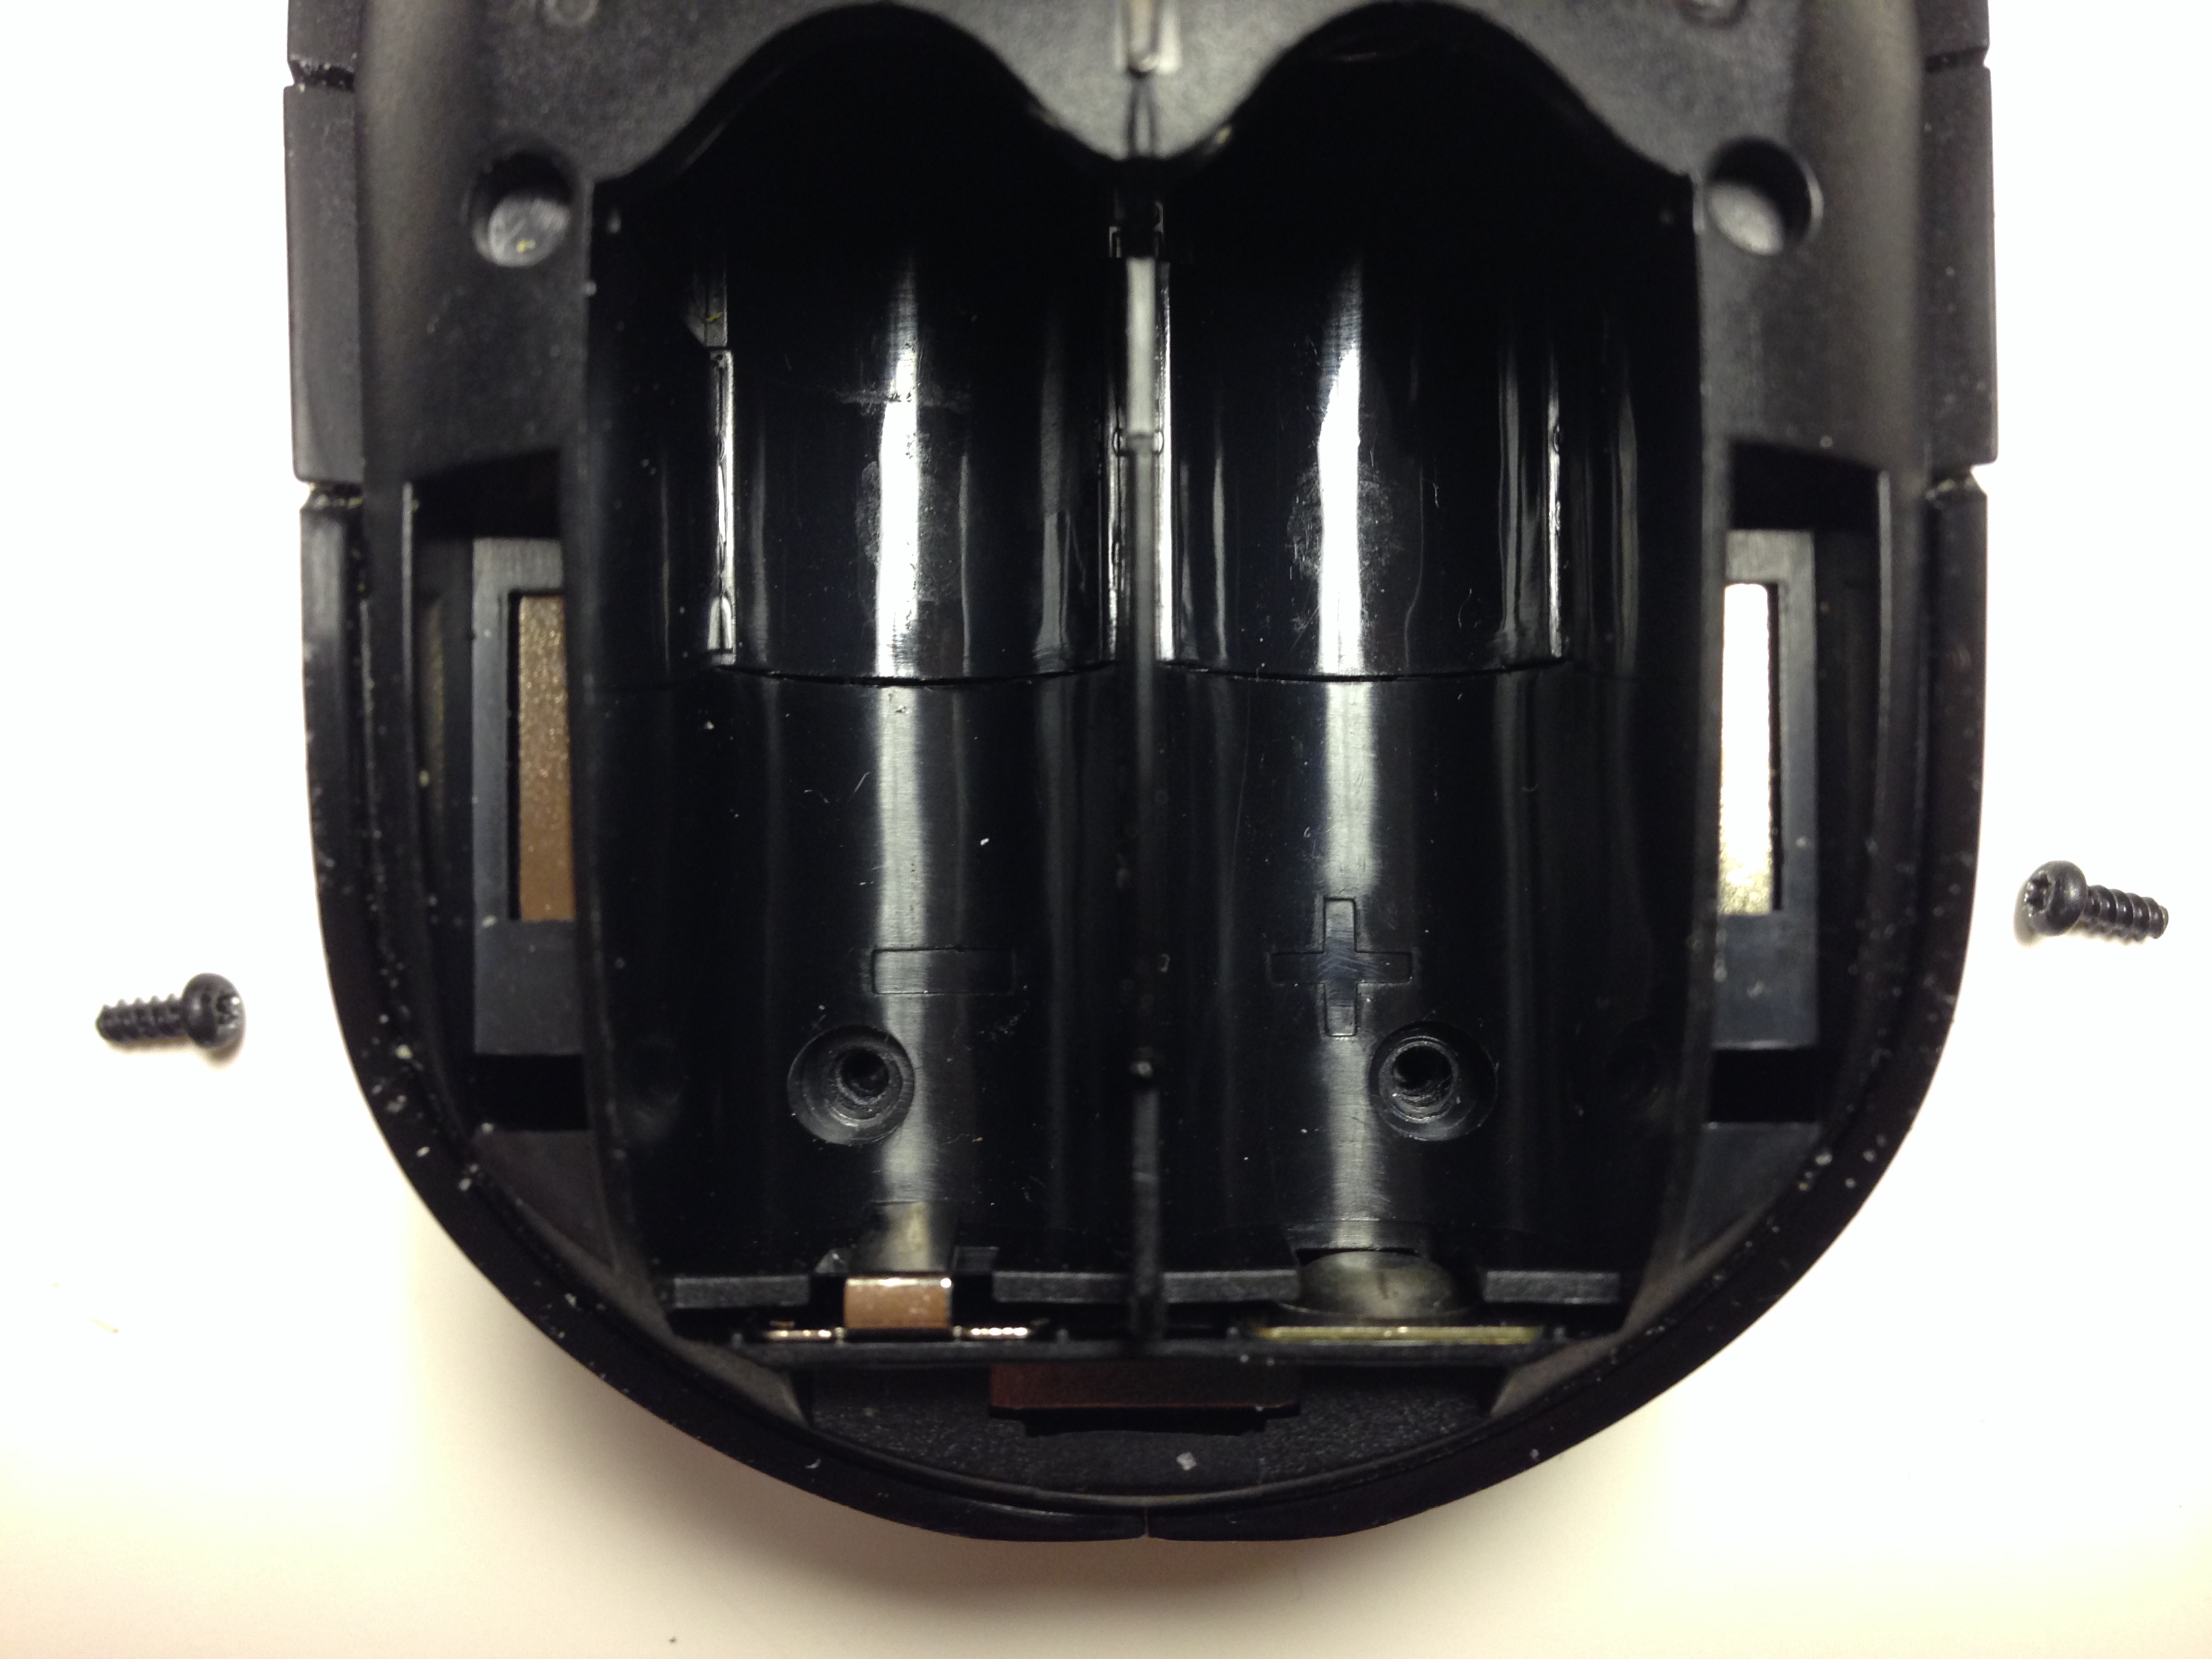
Step 2: Open the battery compartment
You've probably done this before, but just to be thorough; in the very back of the mouse you'll see a little inlet for your finger to slip under where the top shell and glossy sides meet. Push up against the top shell and it'll pop right off.

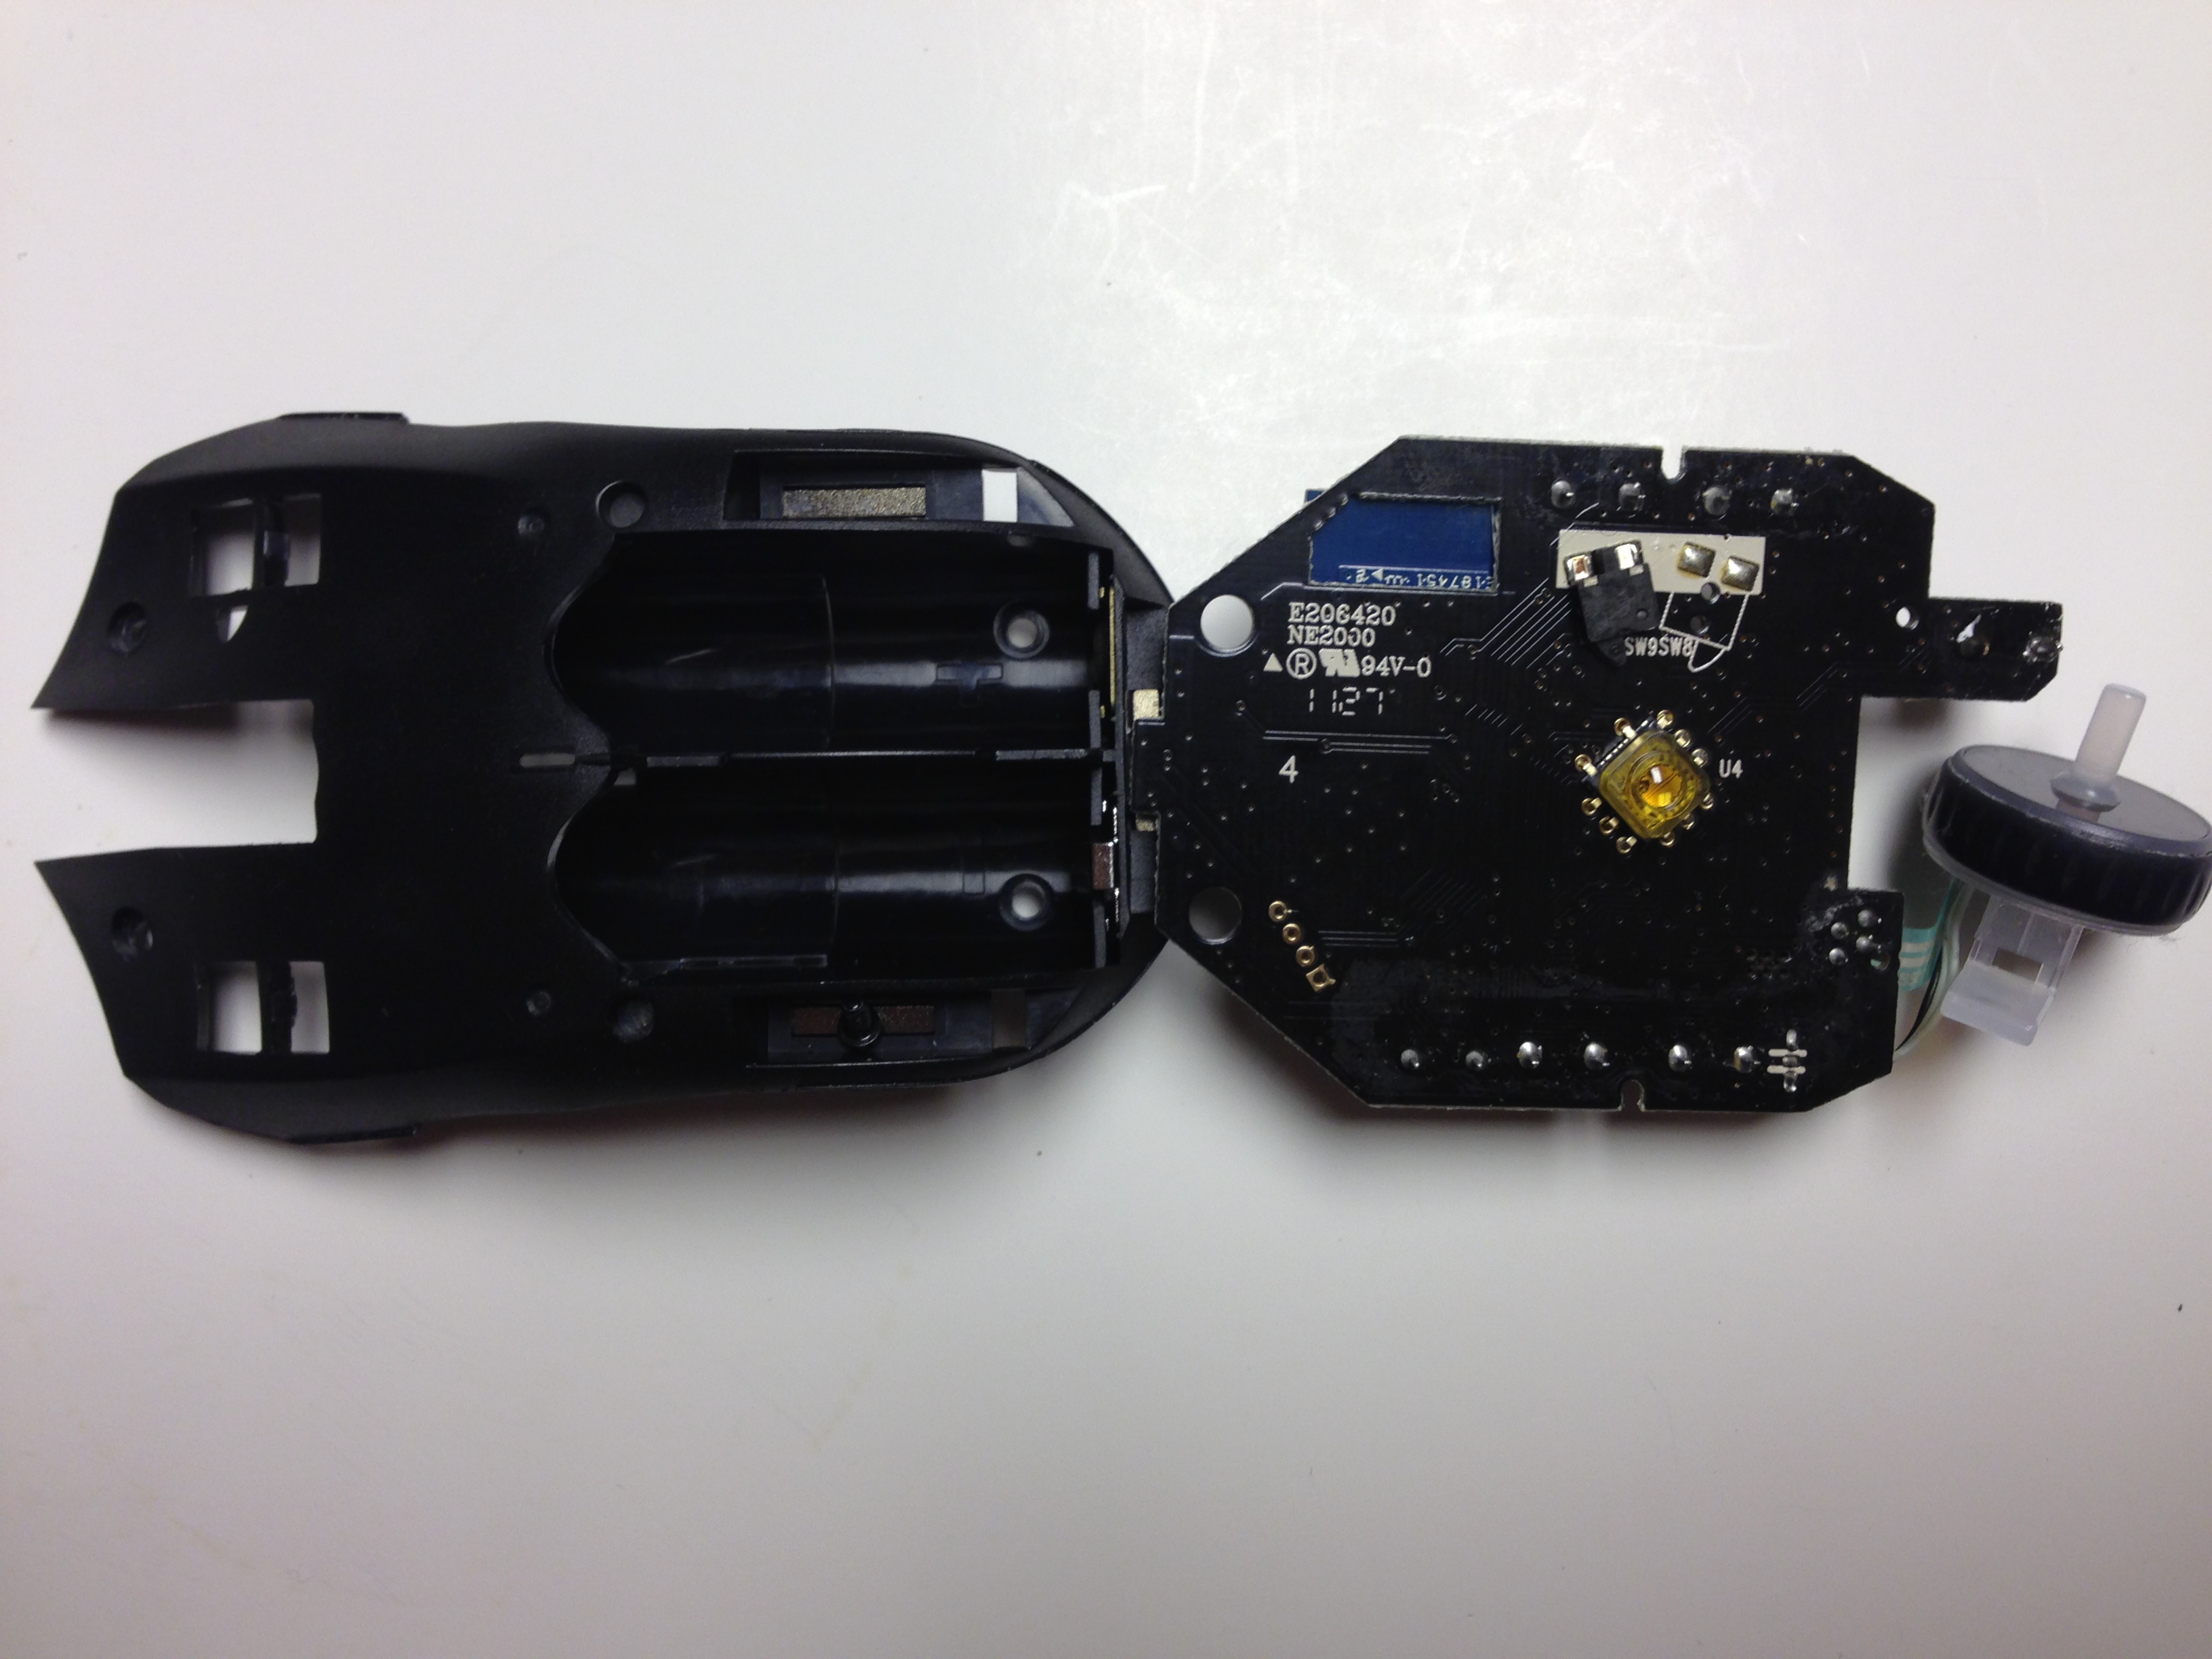
Remove the batteries, and this is what you'll see inside.
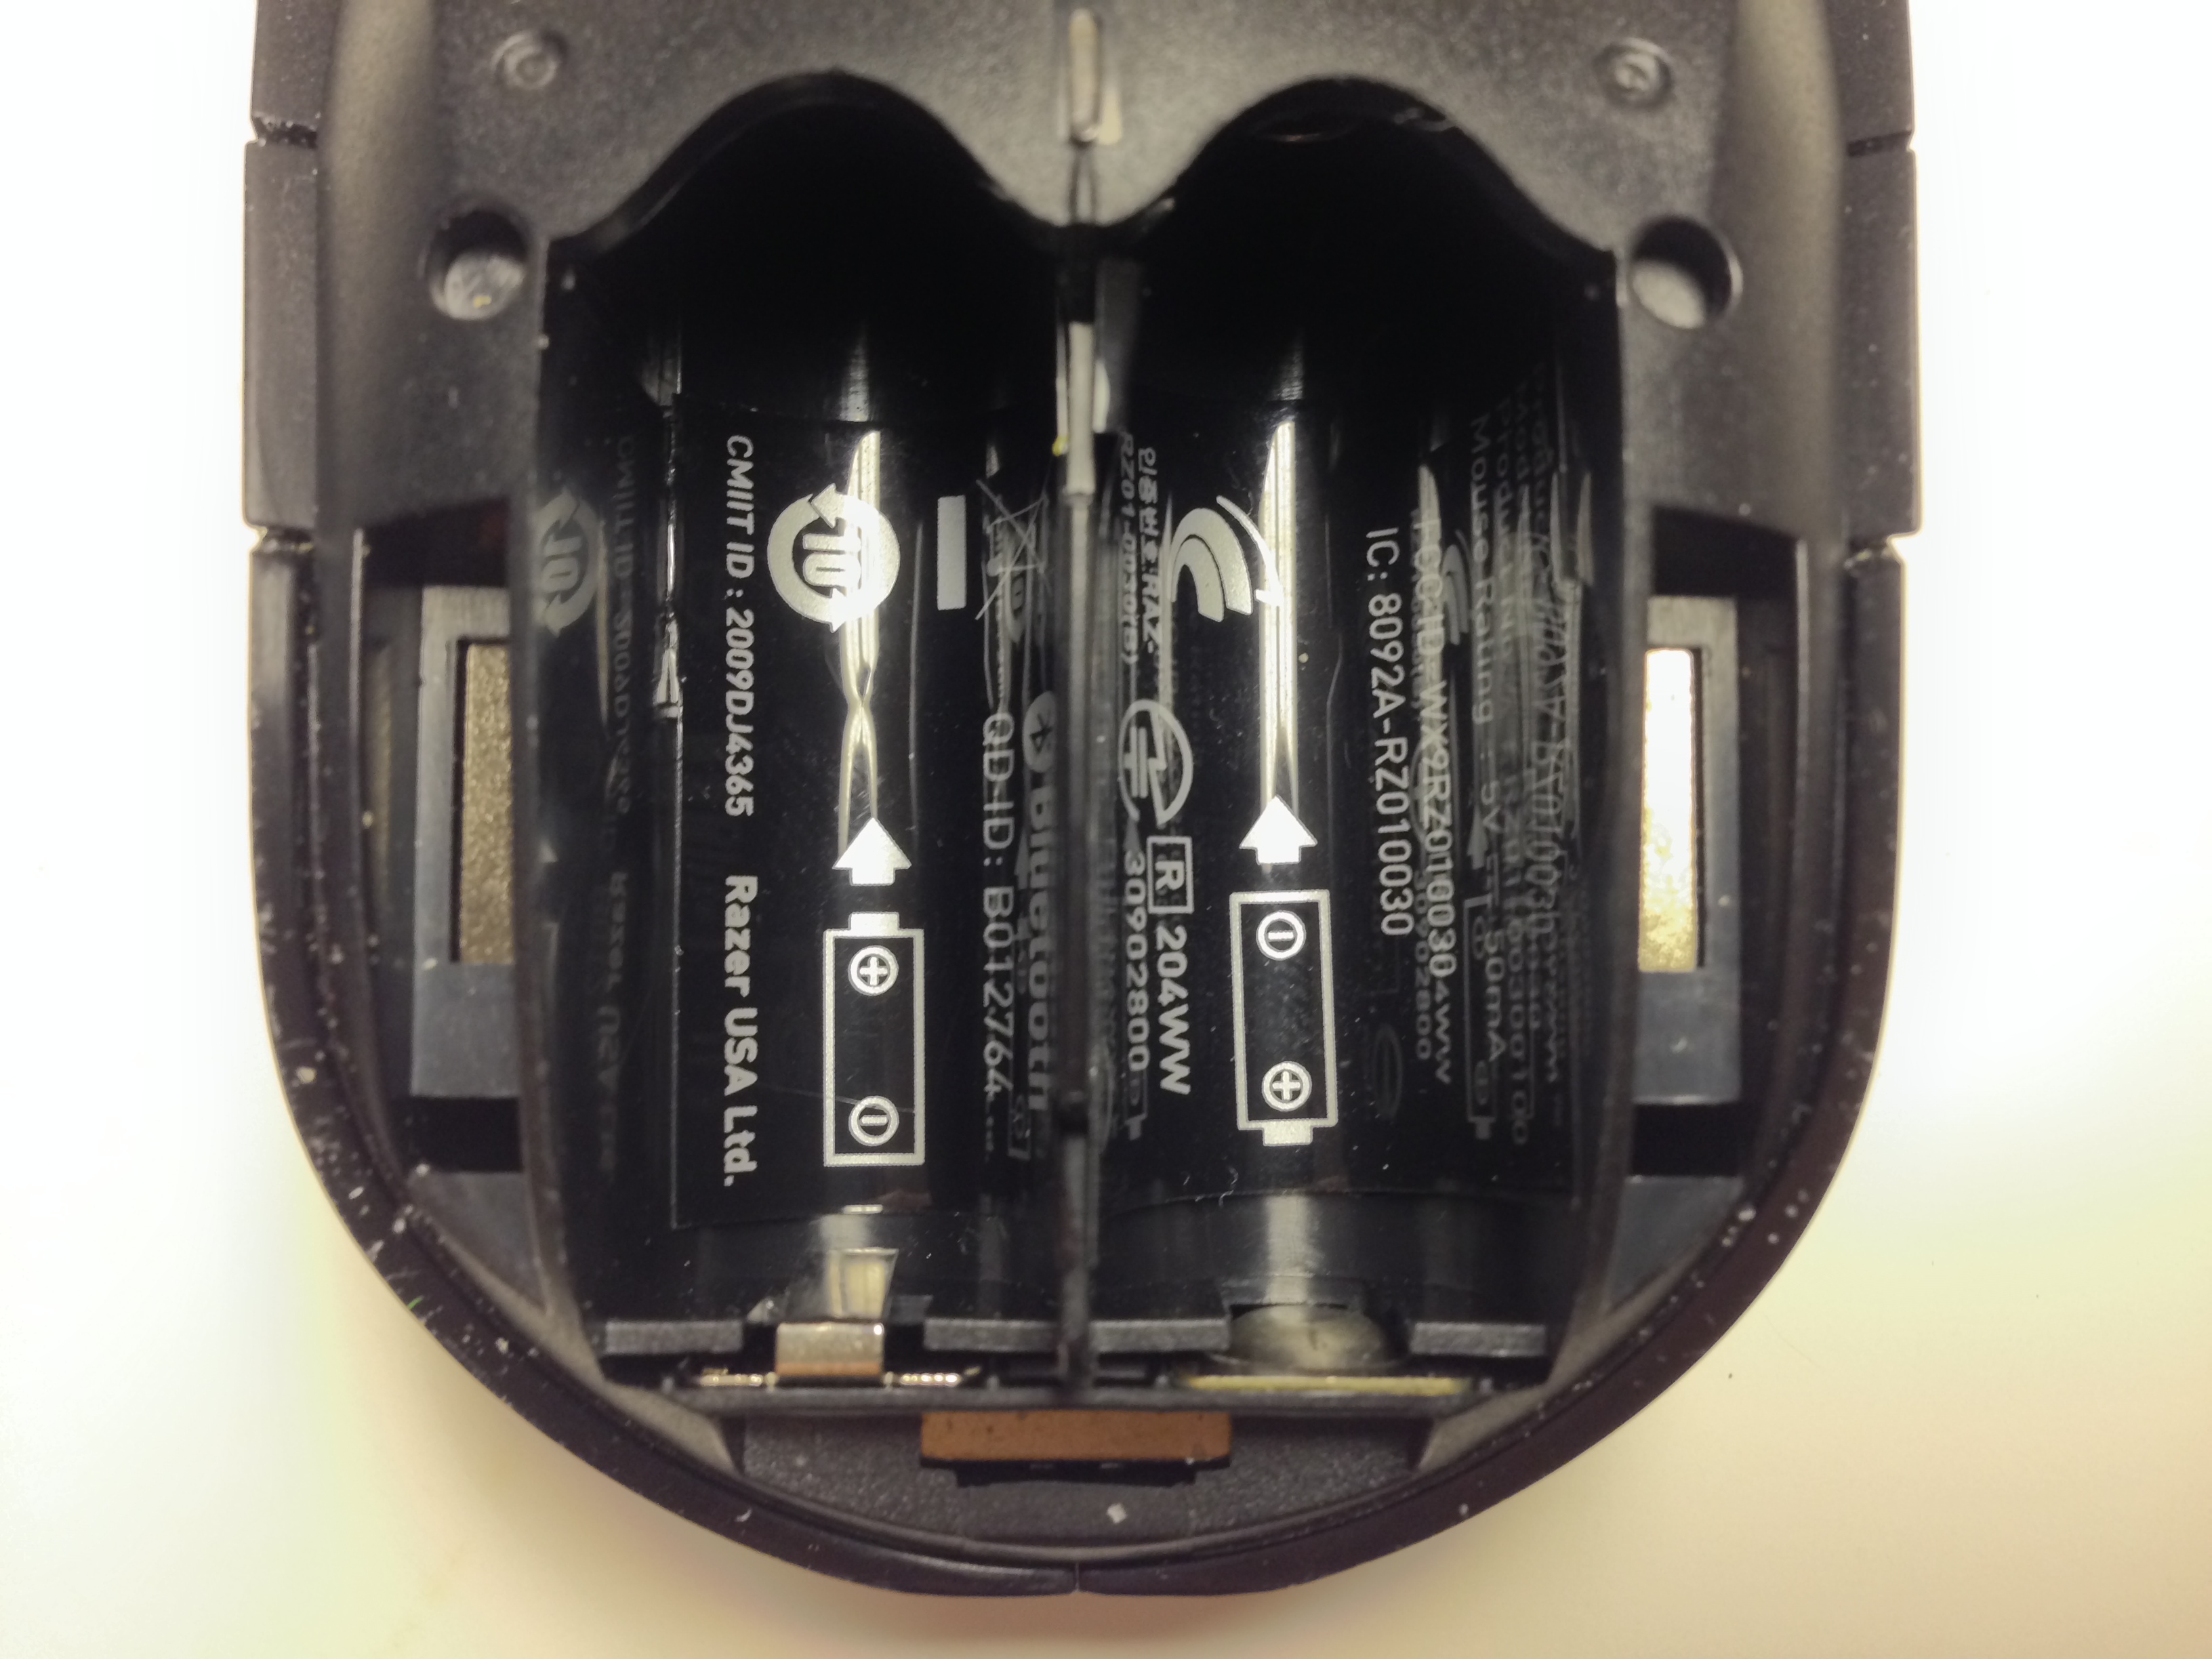
Now here's a secret: the stickers that show which way to place the batteries are removable. Peel them away to reveal two sneaky screws.
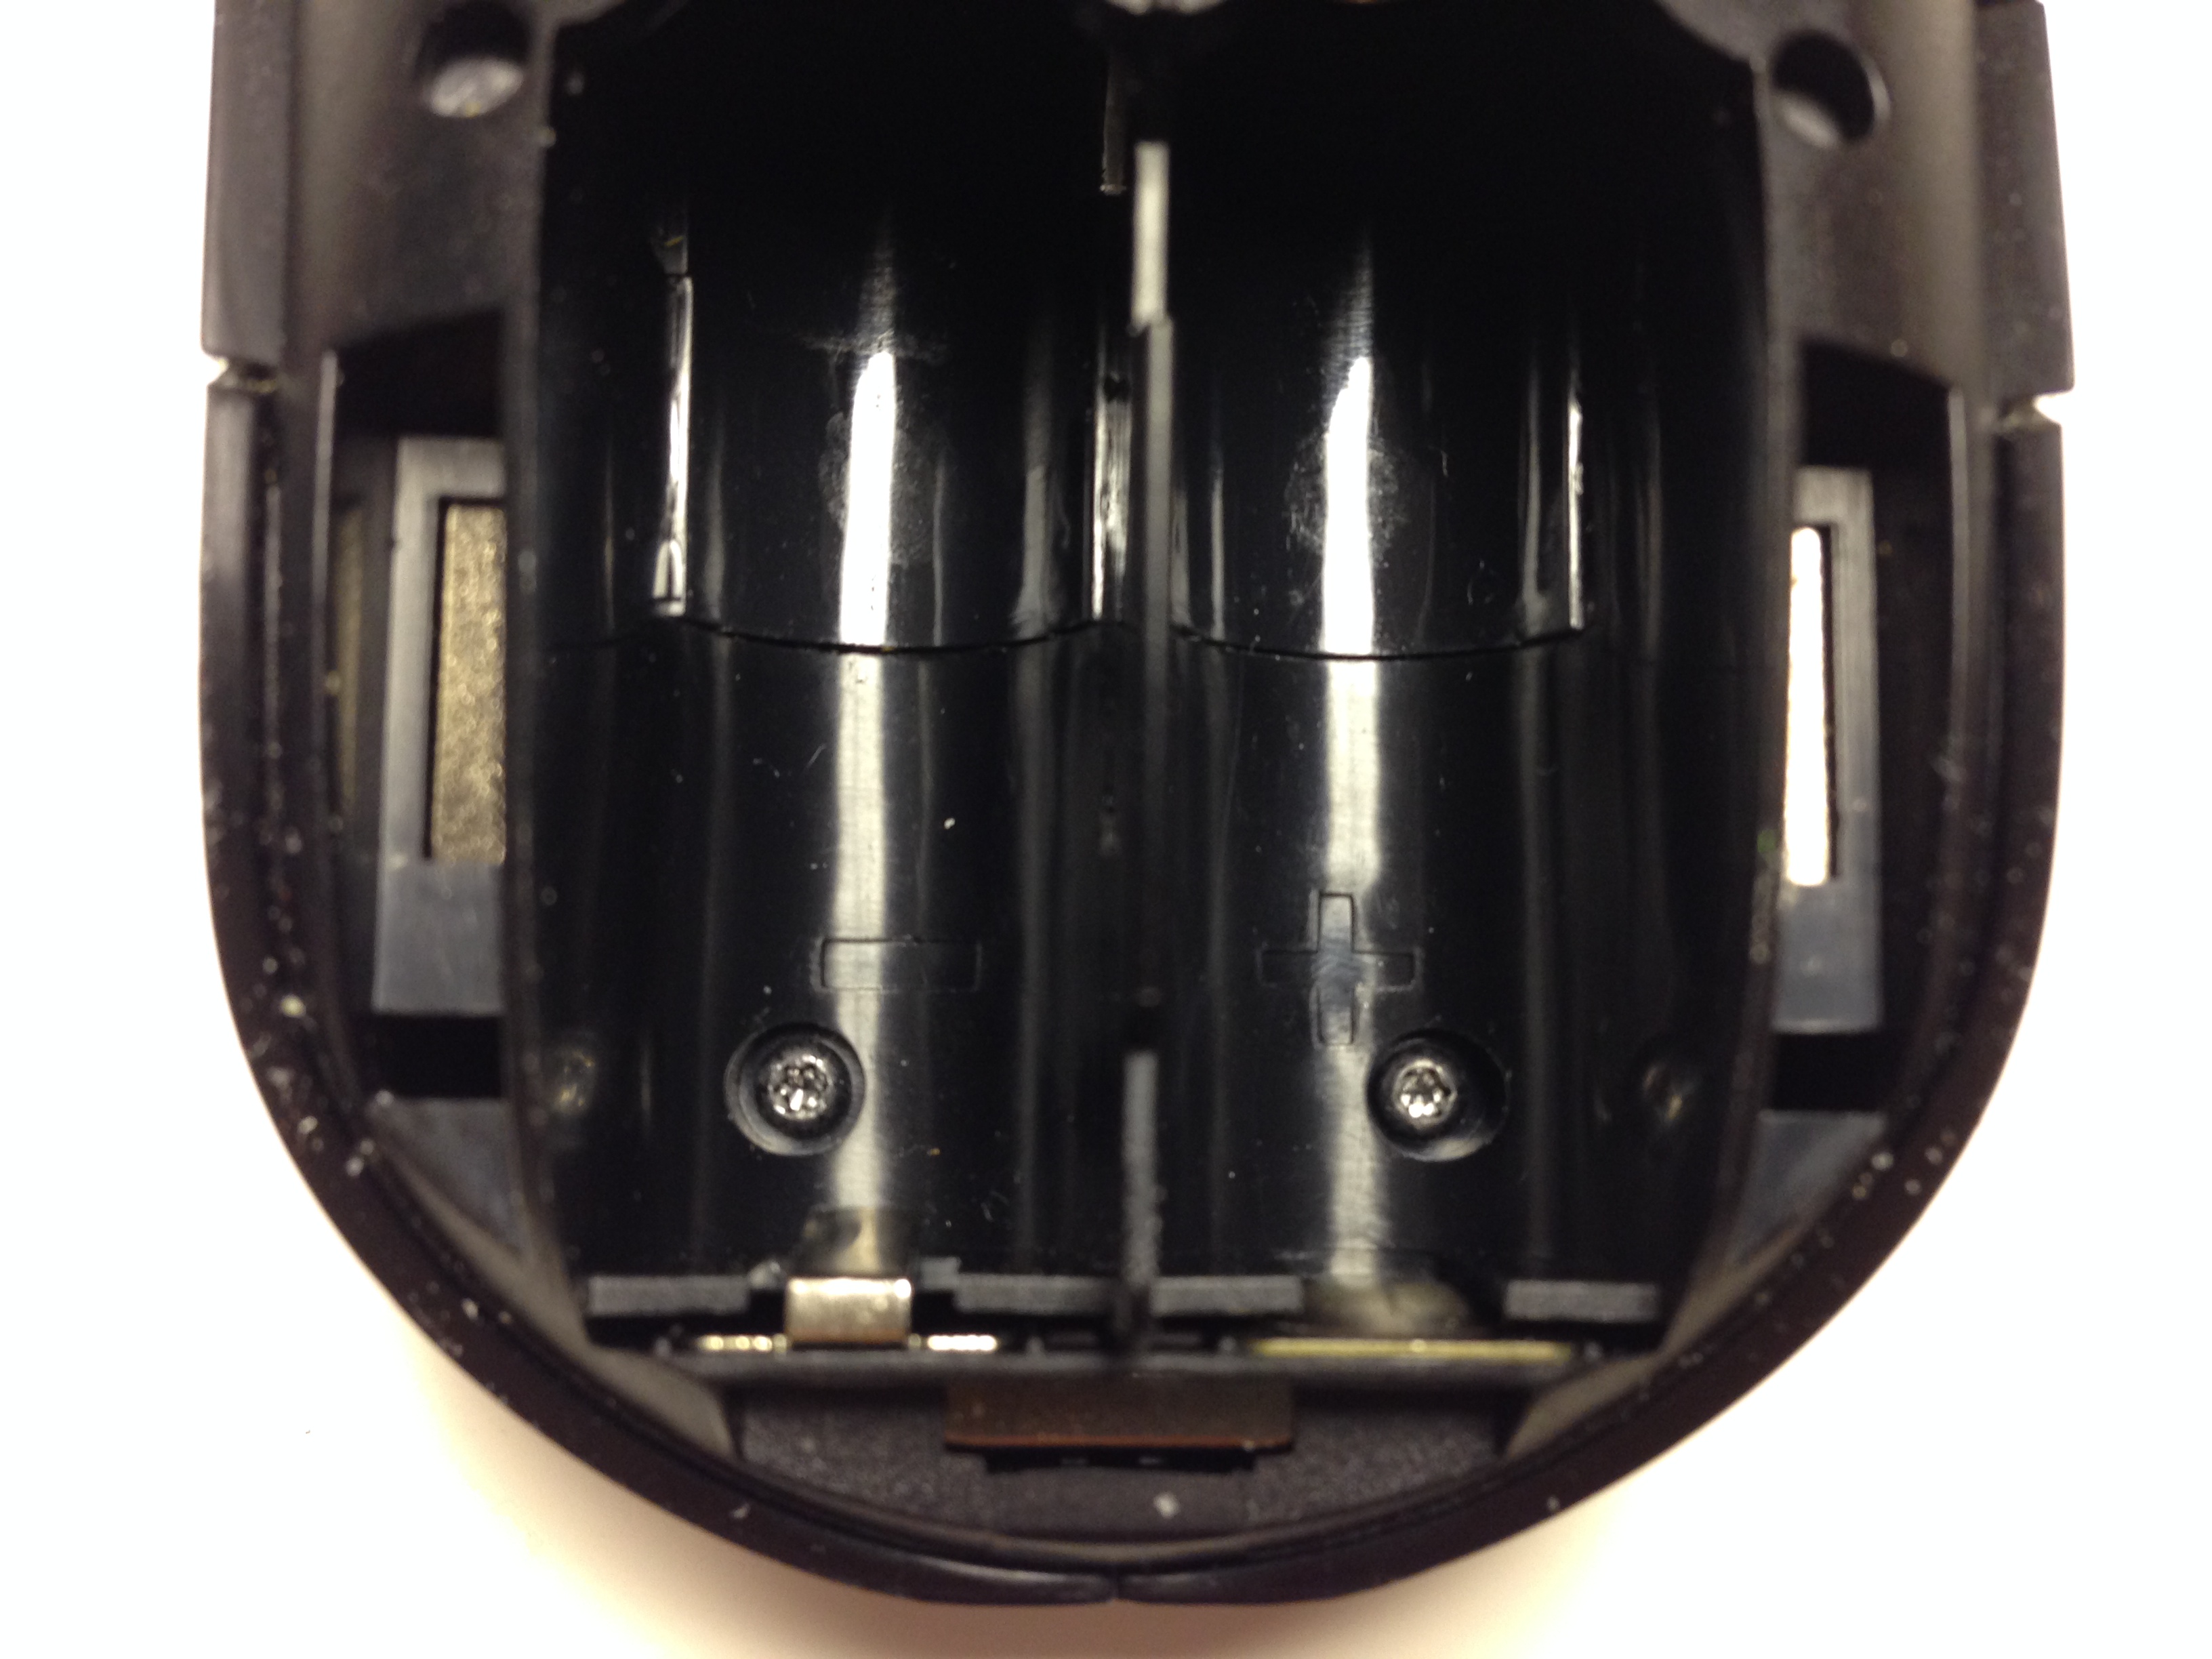
Step 4: Unscrew 4 screws
Use one of the hexalobe bits in your screwdriver kit to remove the two battery compartment screws. Be sure to push down while unscrewing to prevent the screw from stripping - you don't want to tear apart the grooves with your screwdriver tip.
Now, unscrew the two screws near the front of the mouse as well, seen below.
Good. Now your mouse should look like this.
Step 5: Remove the top cover
Put a finger into the battery compartment and carefully lift it up while holding the bottom half of the mouse in your other hand.
Basically you want to take take that top shell off without breaking the two +/- wires that connect the battery compartment to the circuitry underneath.
Once you pull away the compartment, rest the whole thing on a table like this.
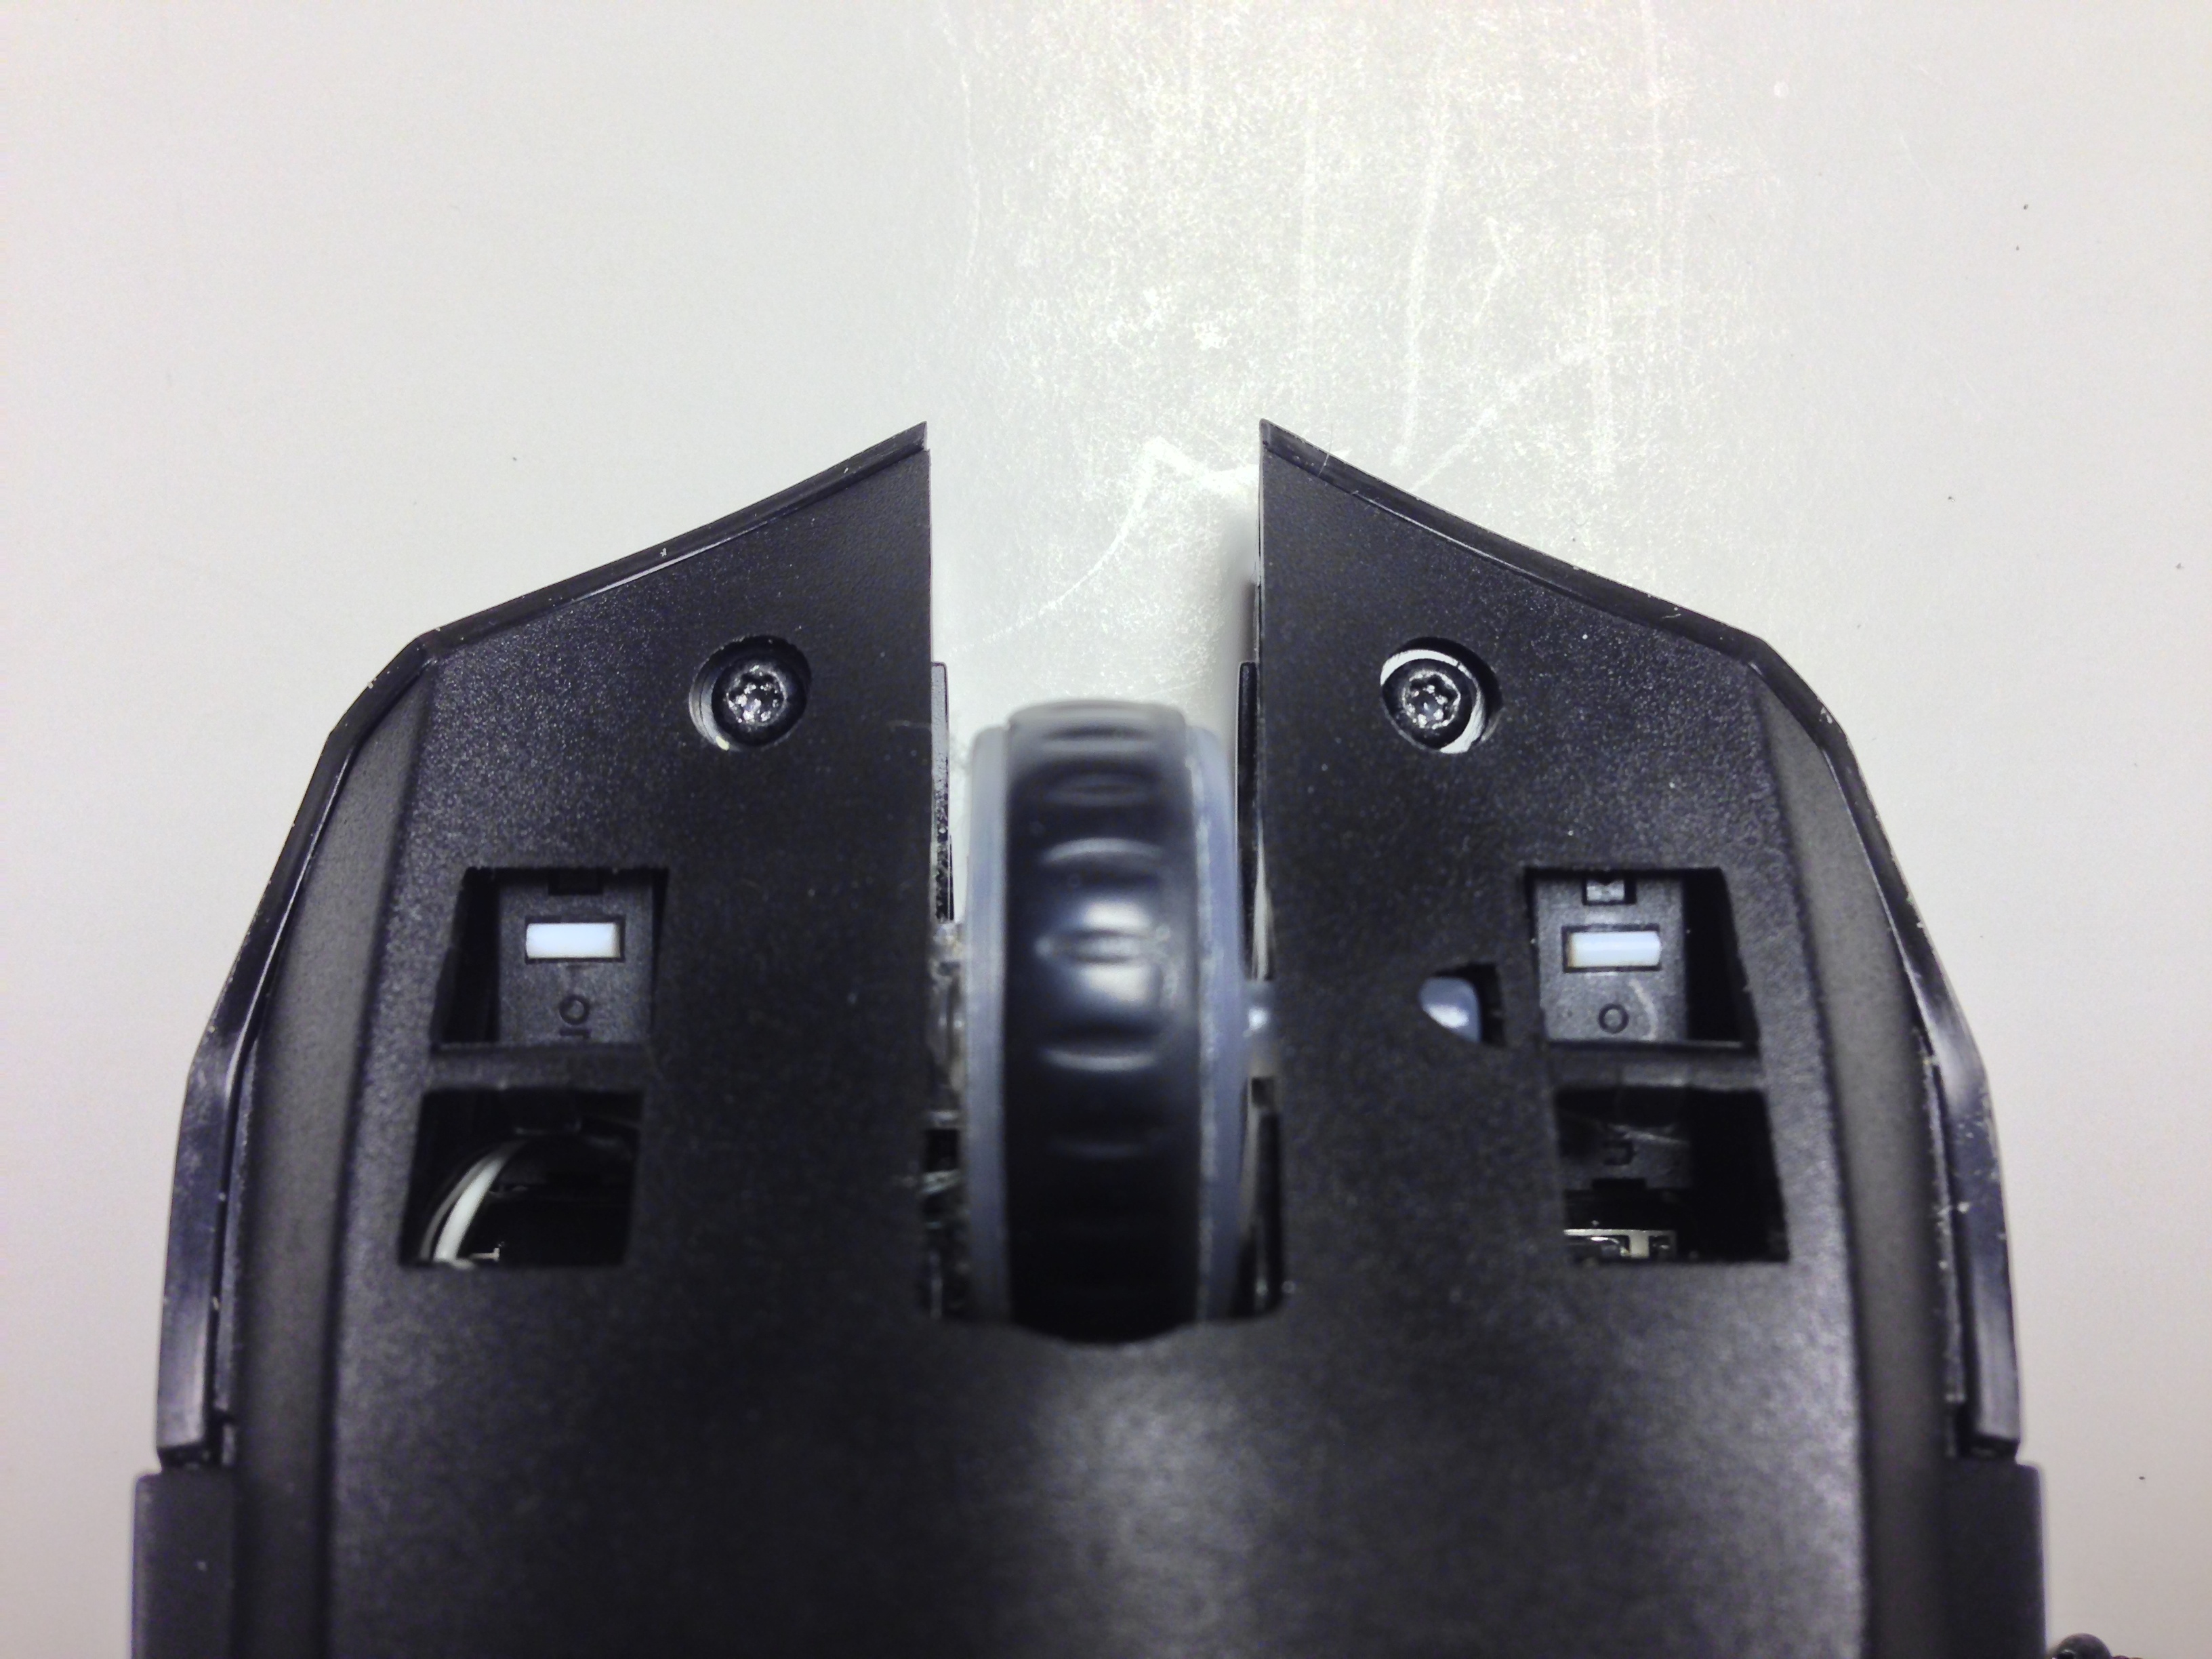
Step 6: Pull the mouse sides away
The glossy left and right sides of the mouse can be pulled away as well. You can put one finger gently on the circuit board and pull each side away one at a time. The sides attach to the places you removes screws from, as seen below.
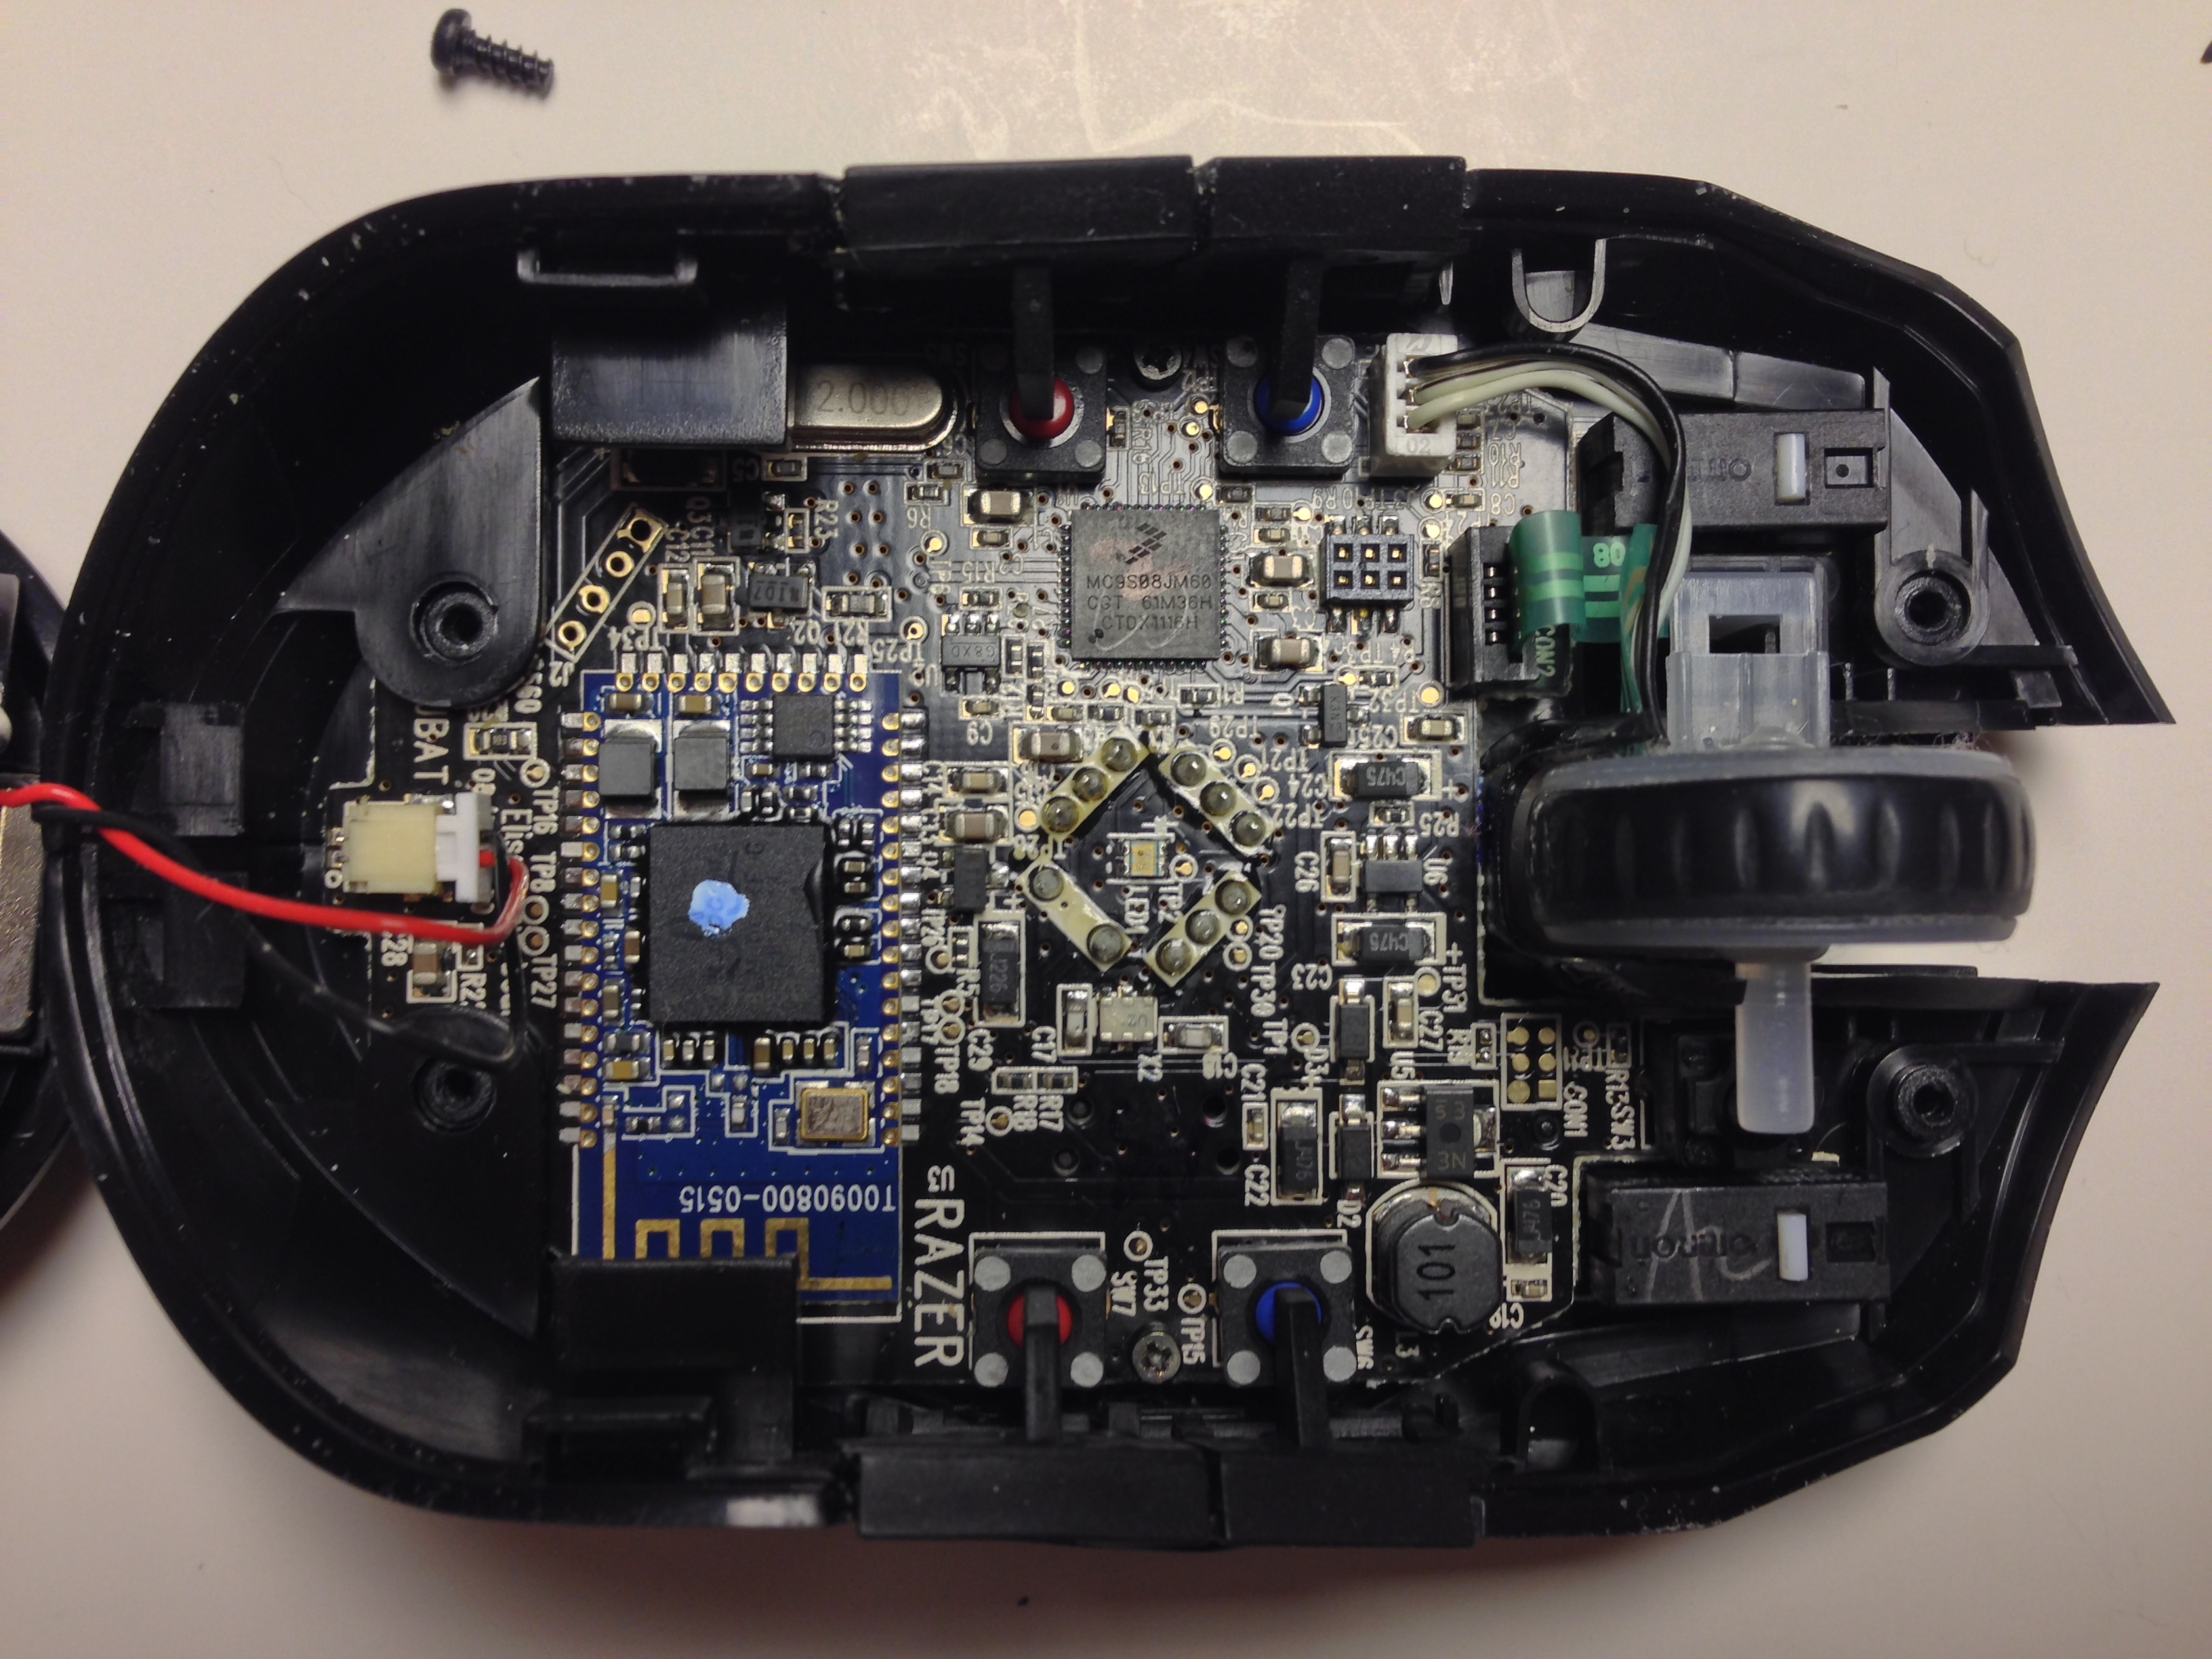
Here's what your mouse should look like now.
Good? Good. Almost done.
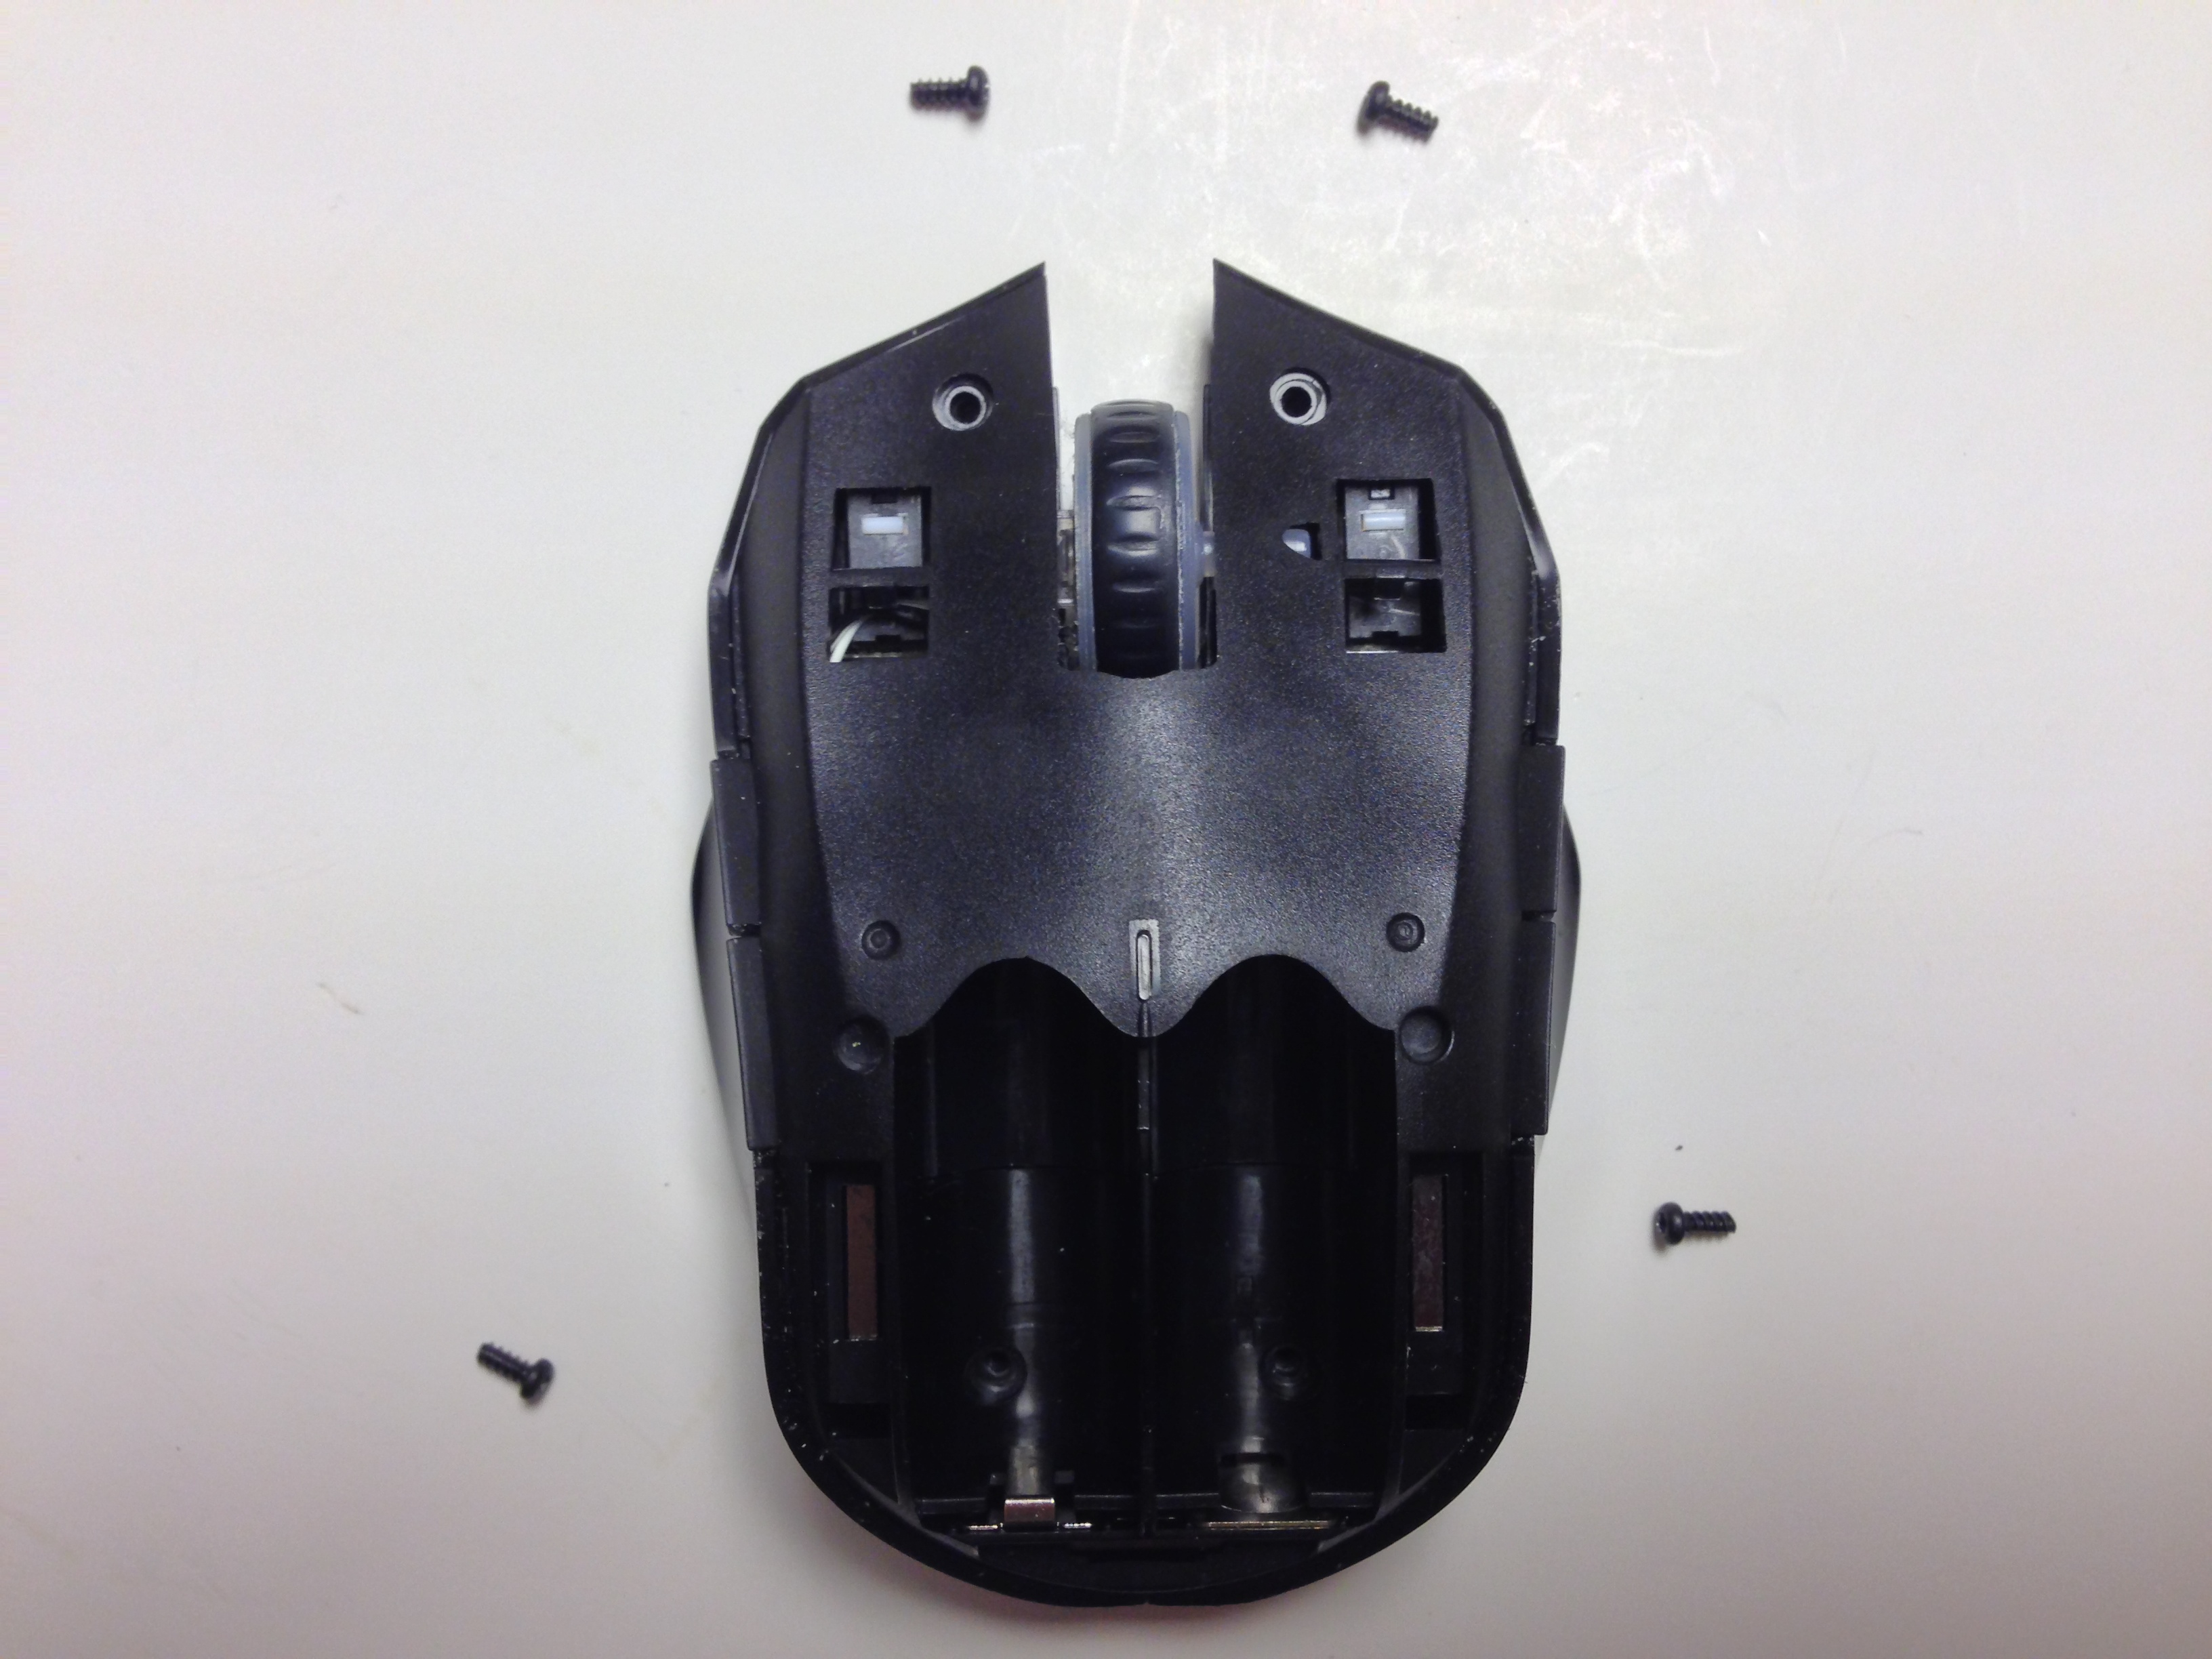
Step 7: Unscrew two more screws
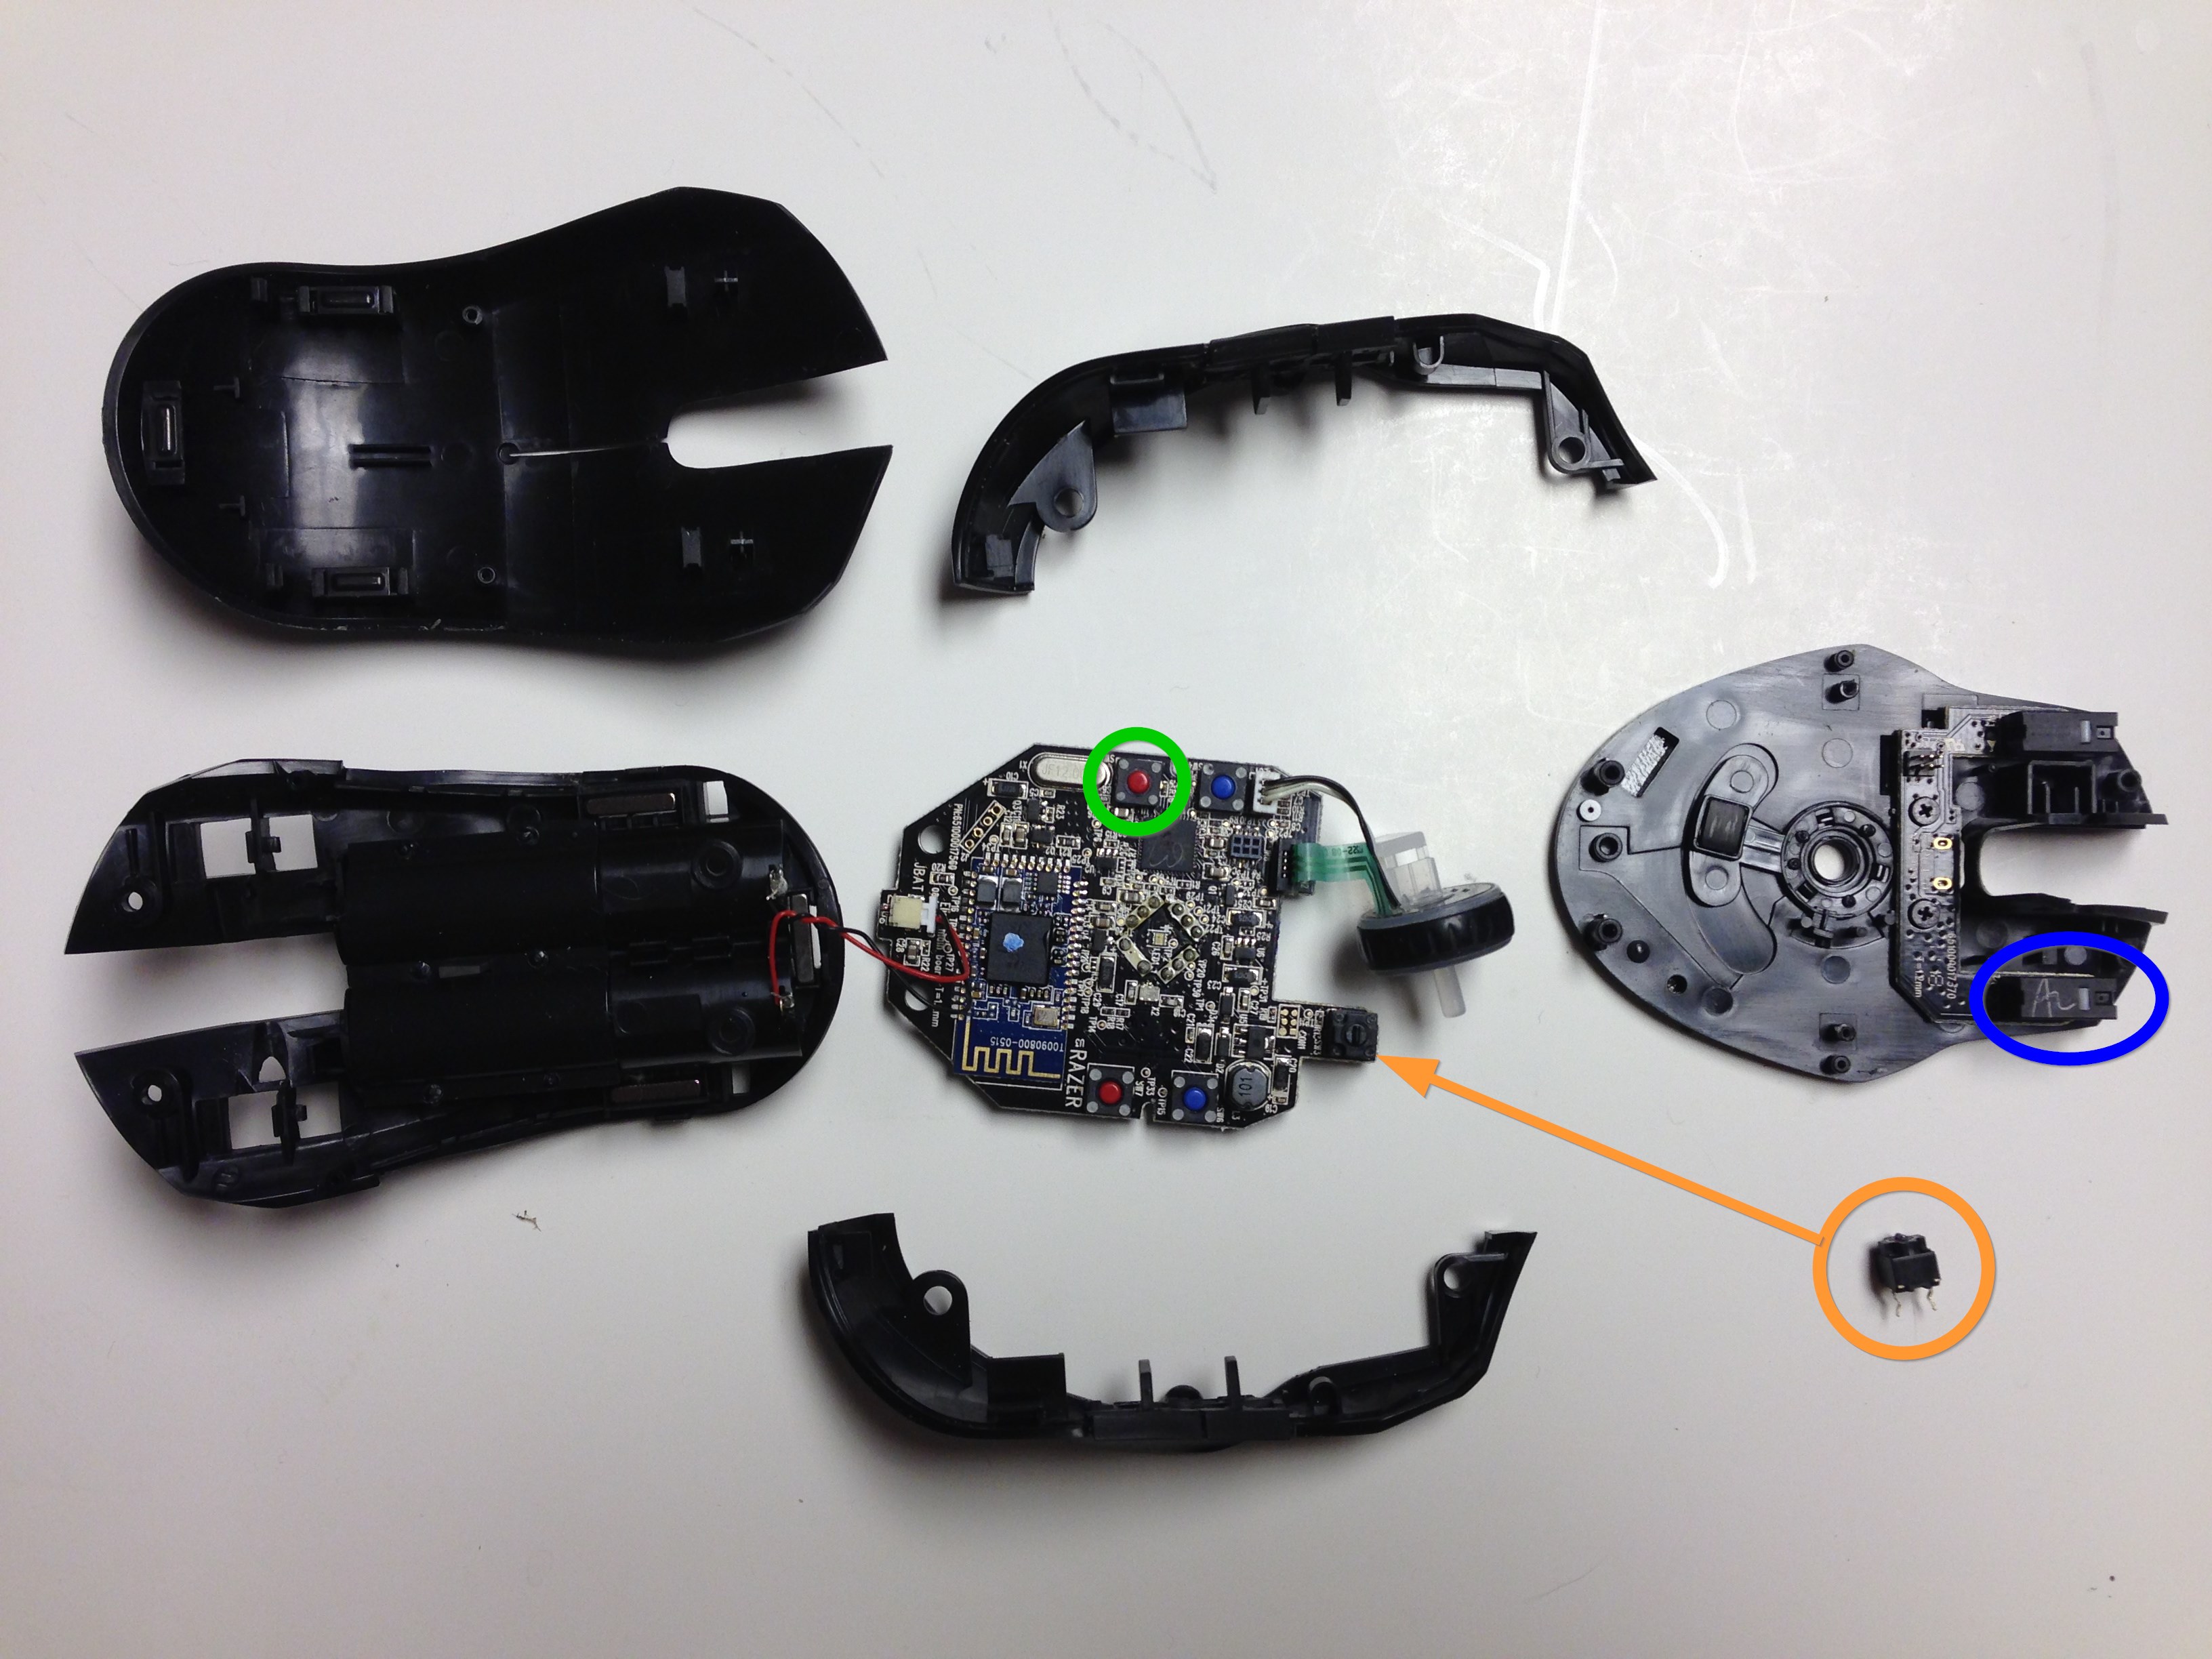
There are two screws that attach the main circuit board to the plastic bottom. They're marked in orange below.
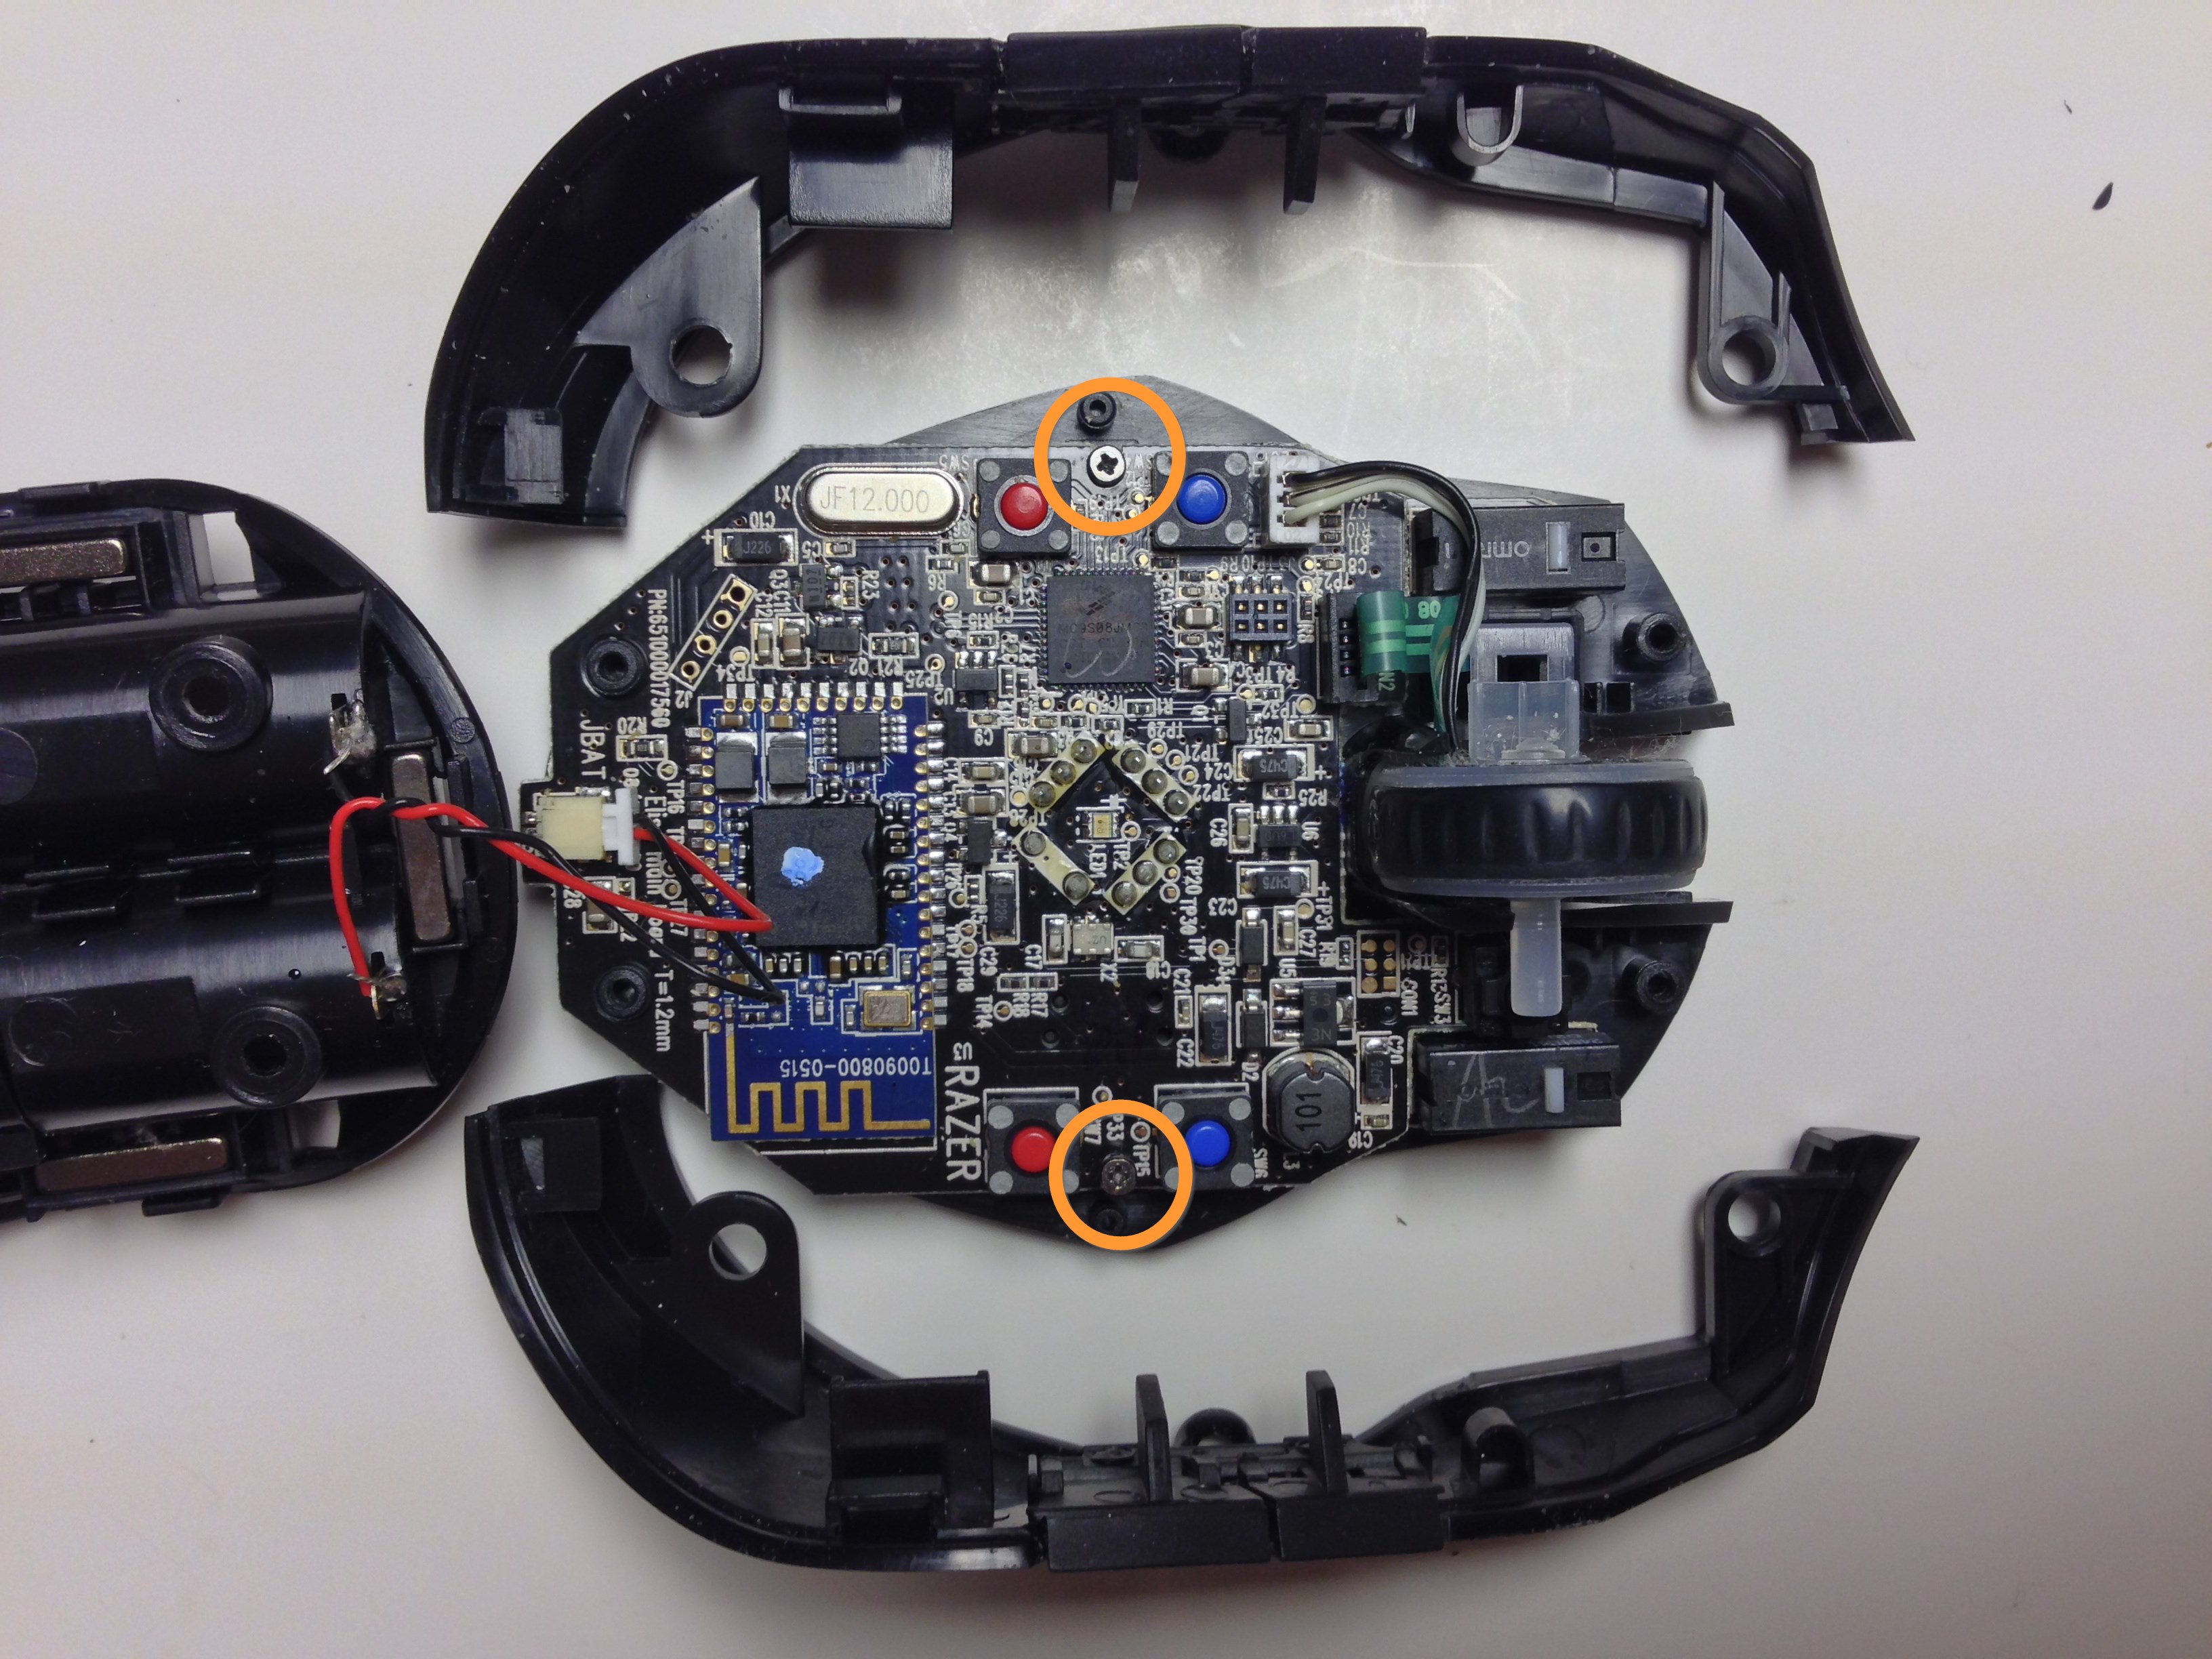
Remove the screws and keep them safe somewhere. Moving away the plastic sides you removed is also a good idea. Give yourself room.
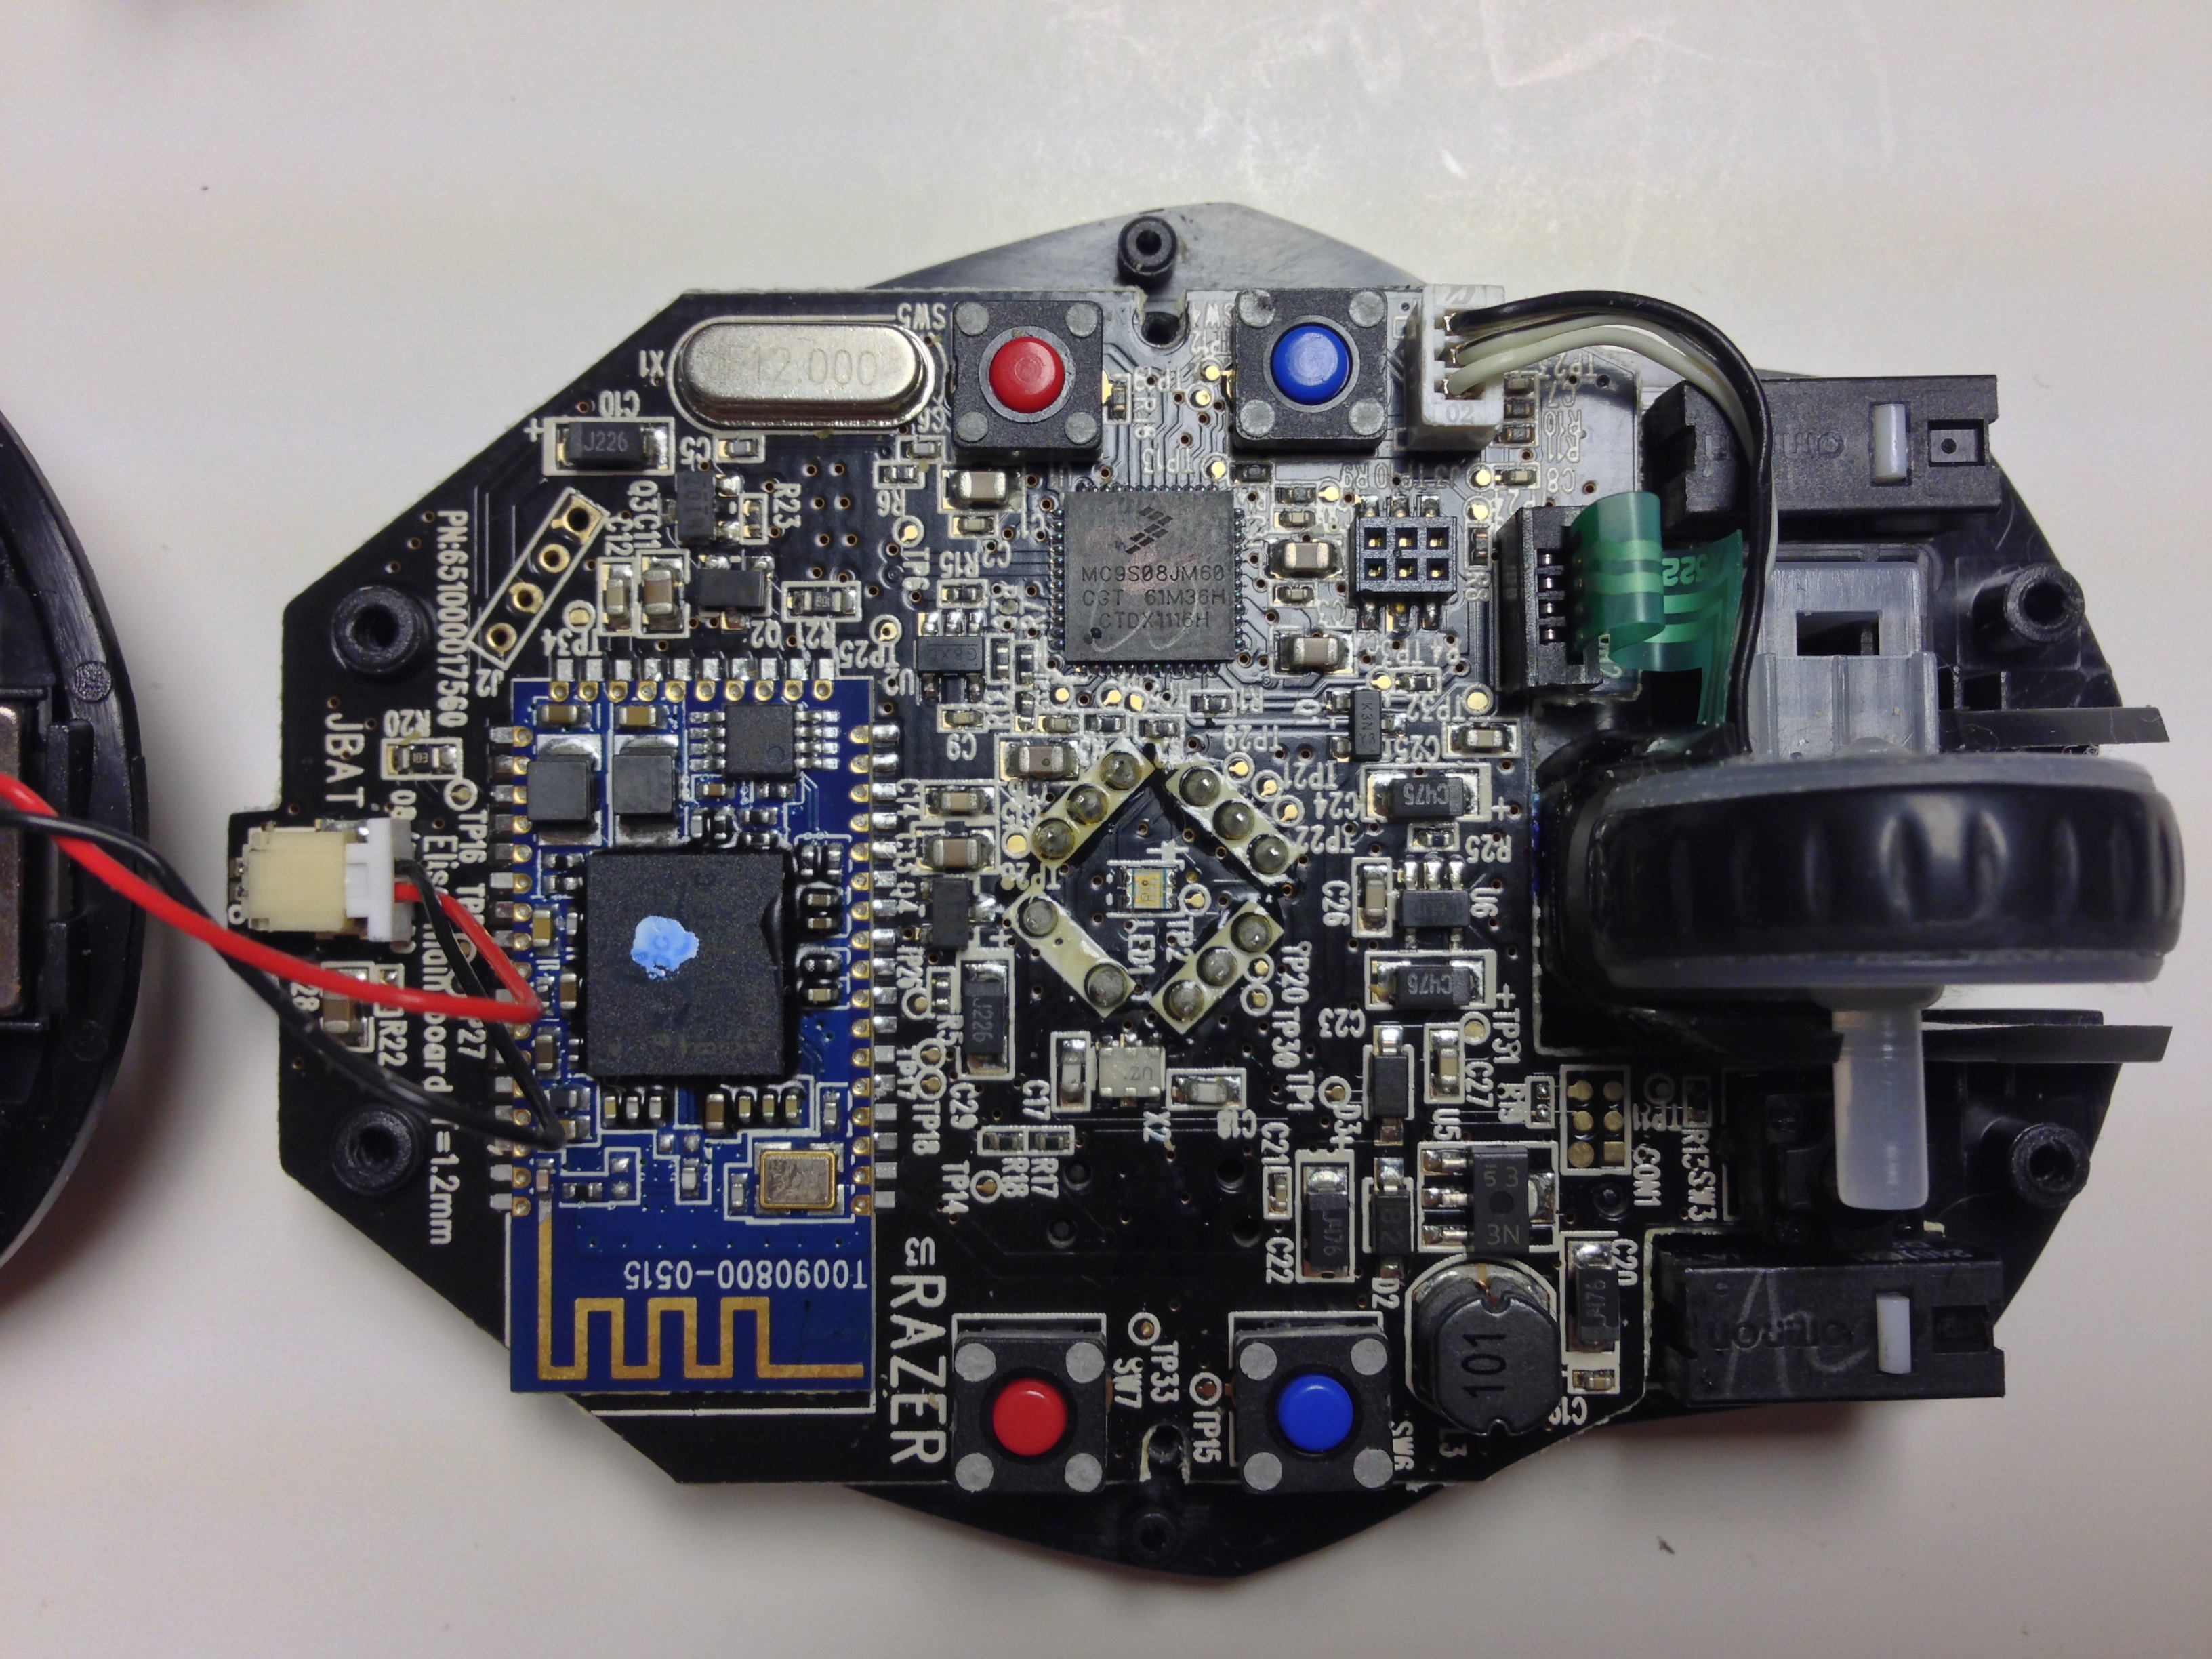
Here's what things should look like now:
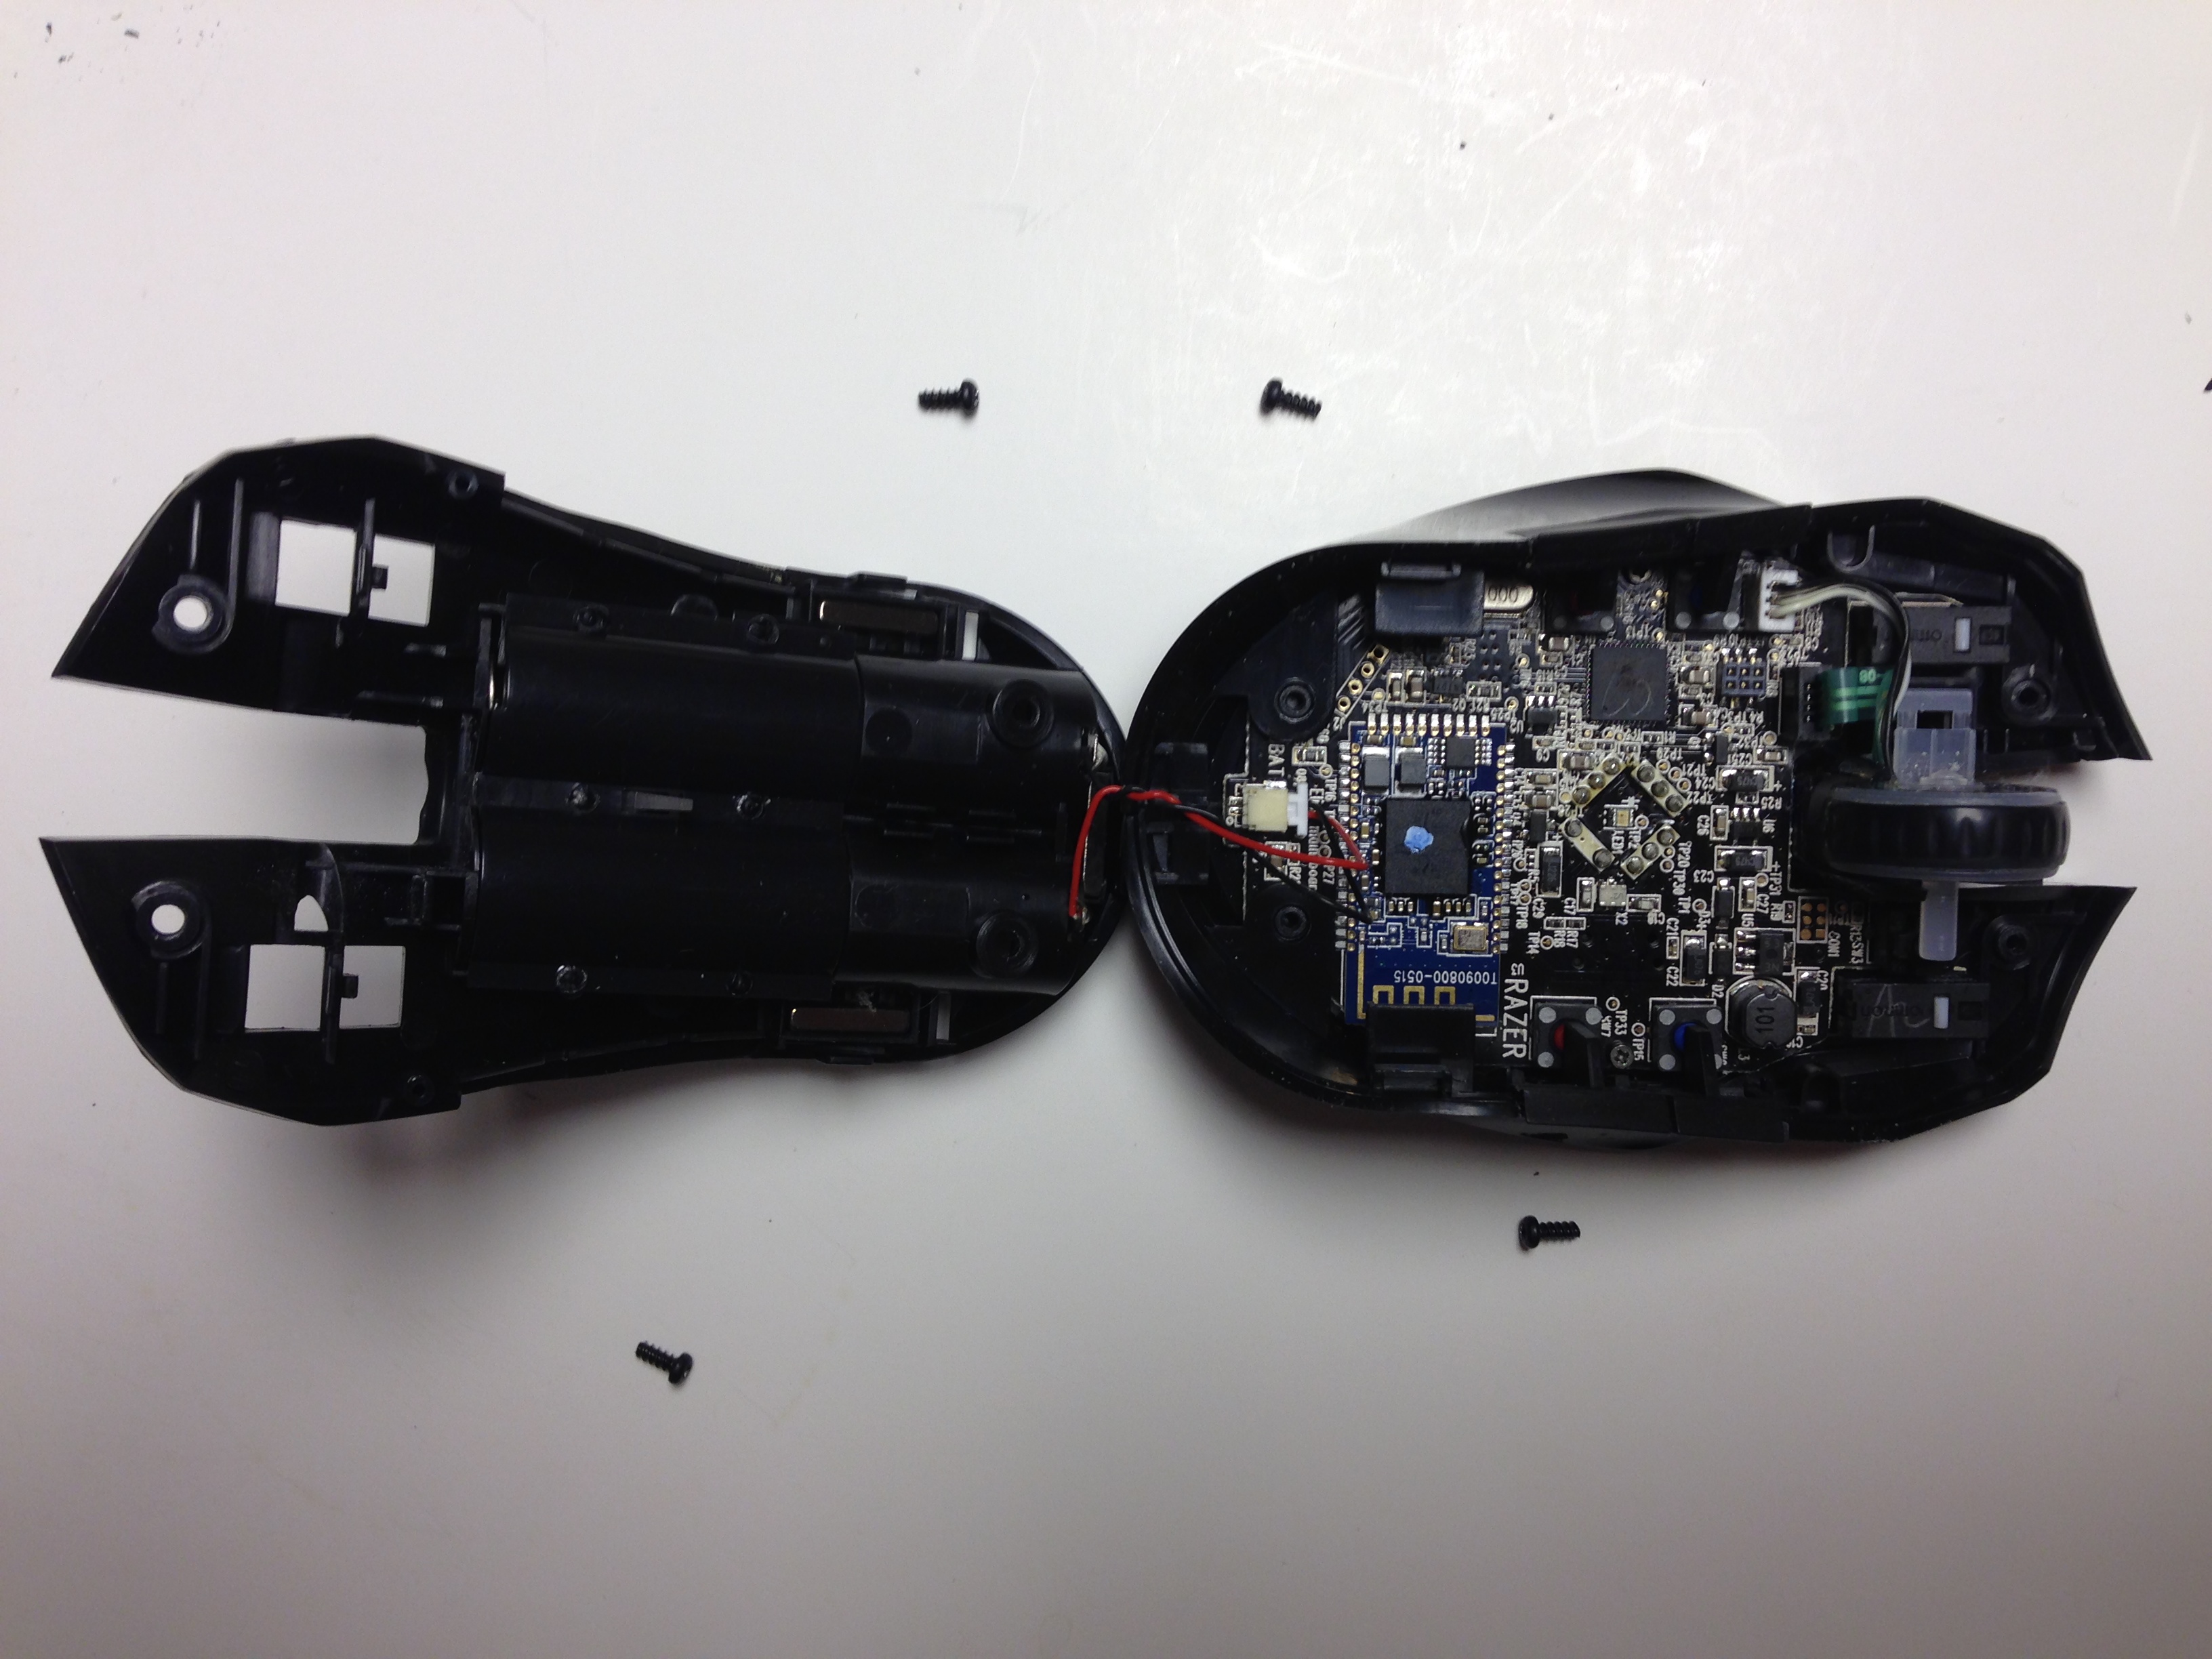
Step 8: Lift up the mouse wheel
Simple enough. Lift the mouse wheel up from its holder. Kinda neat to see how it works huh?
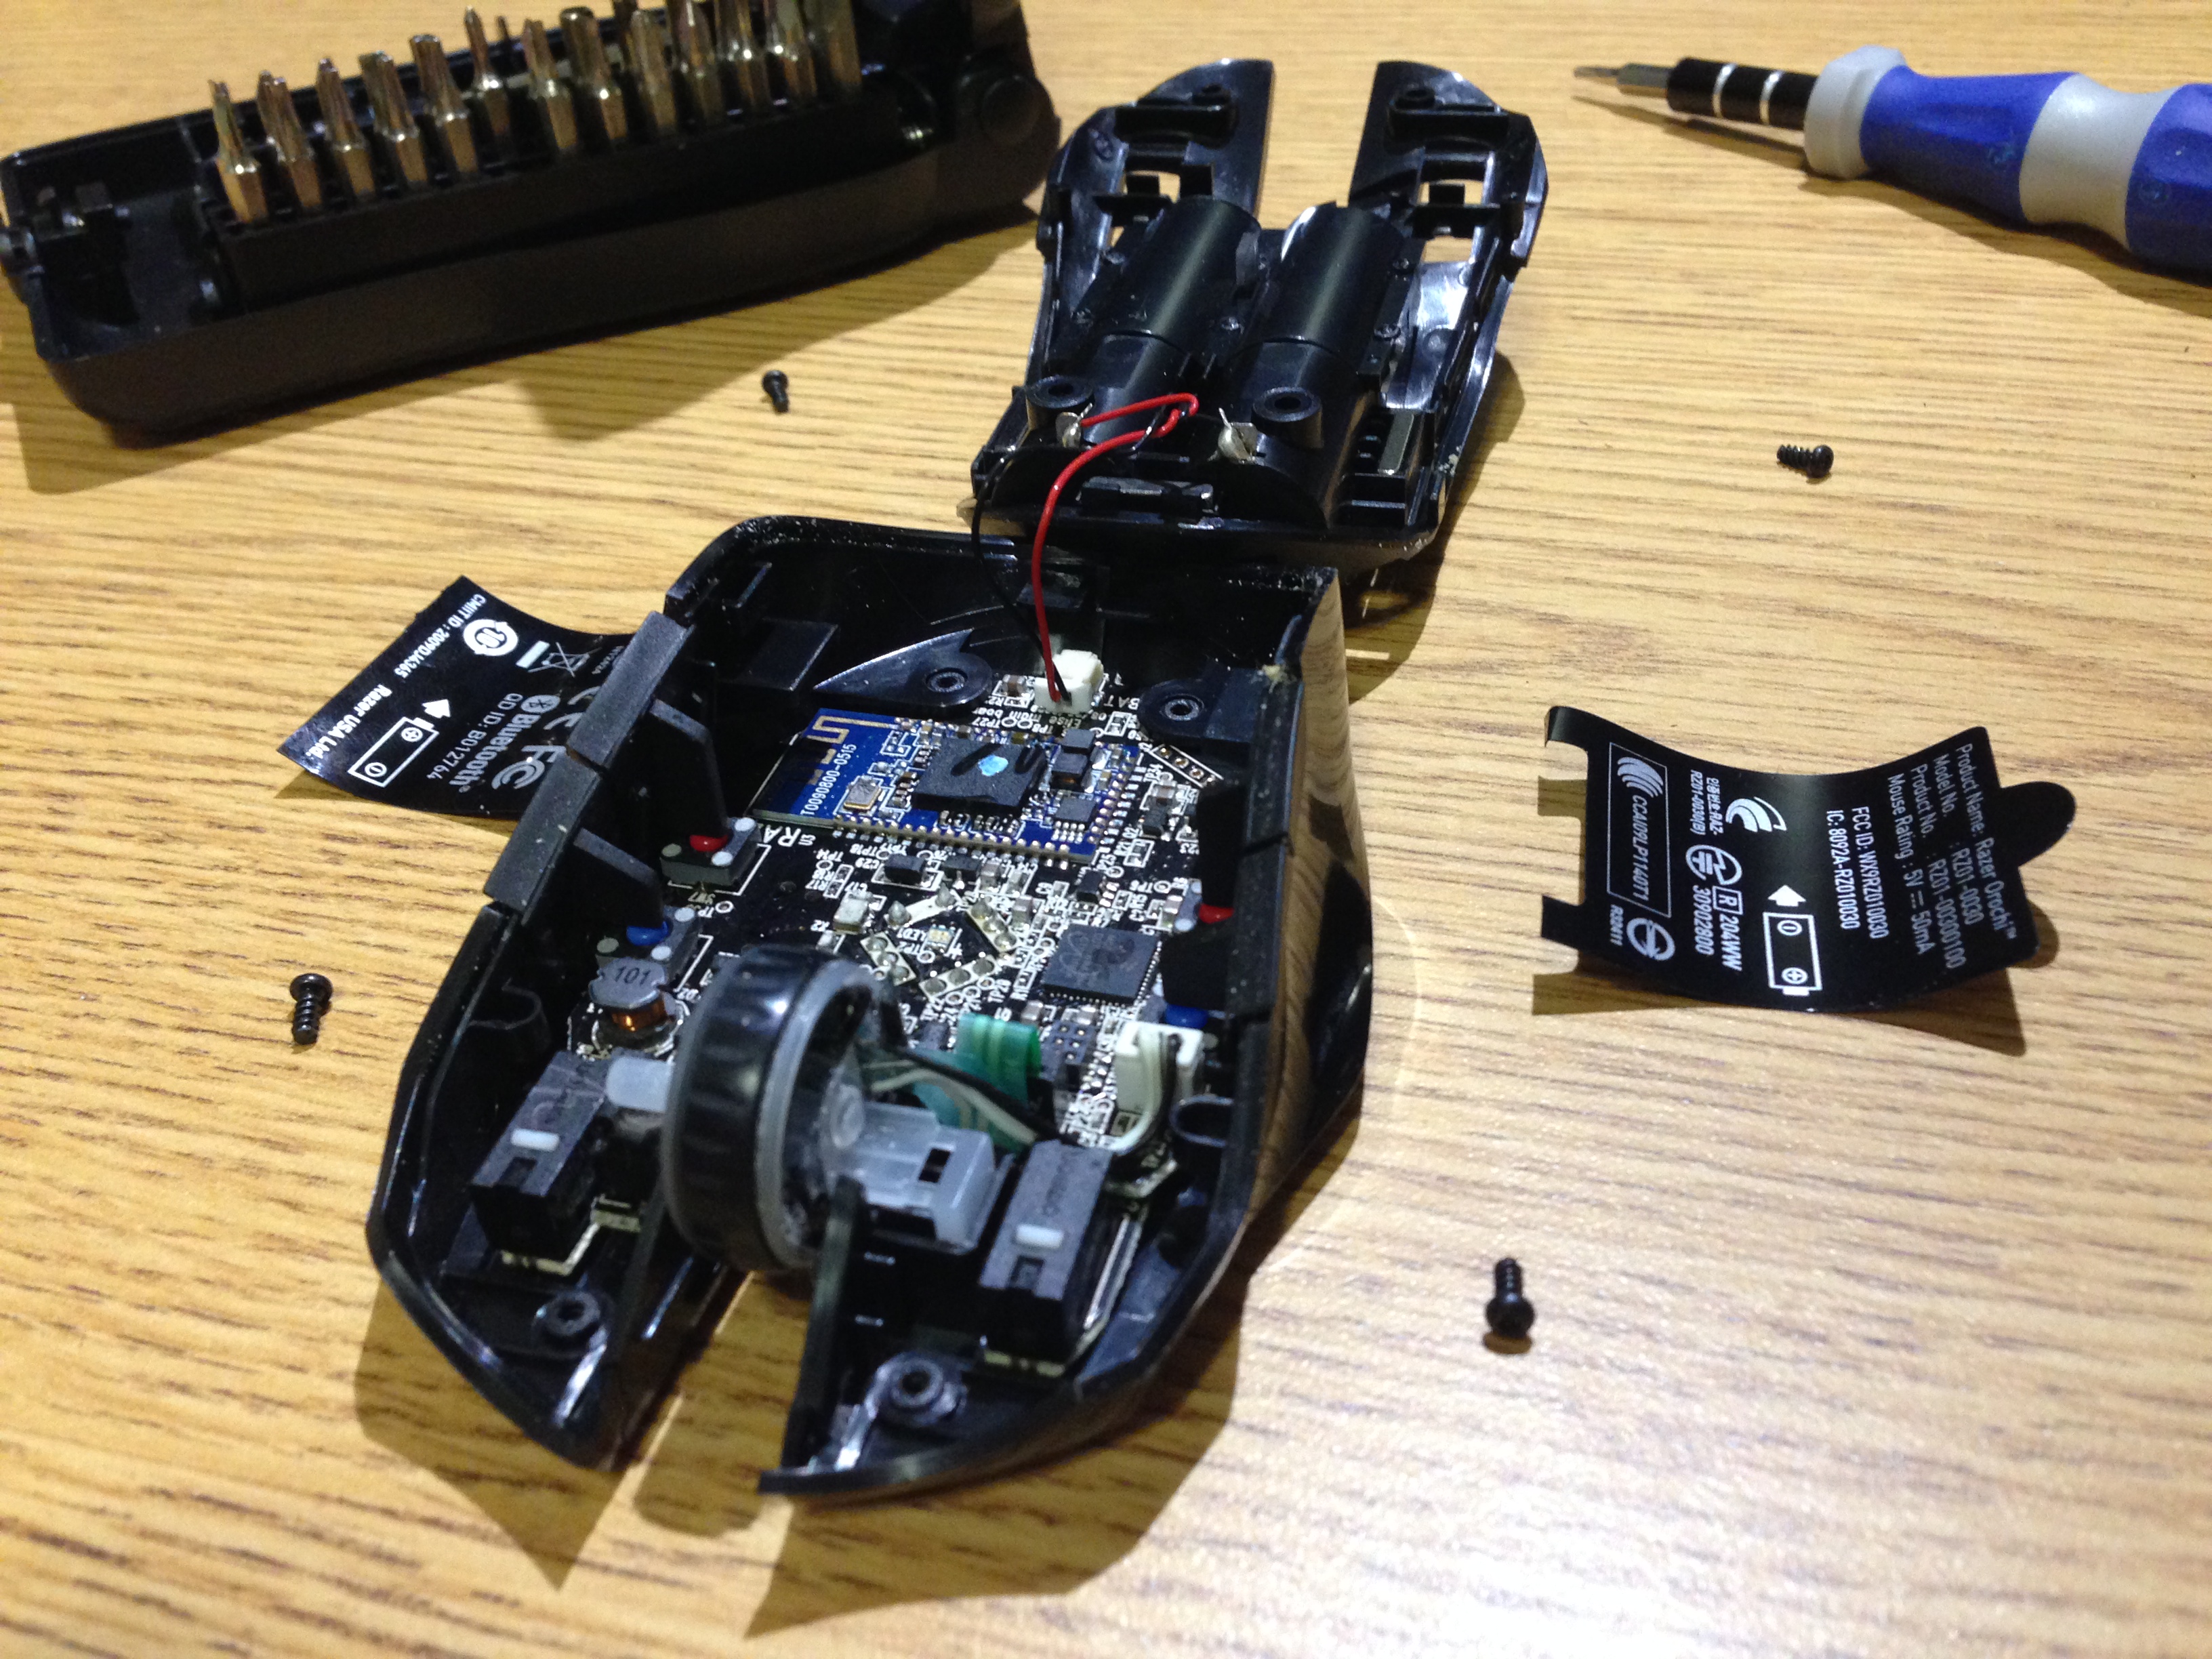
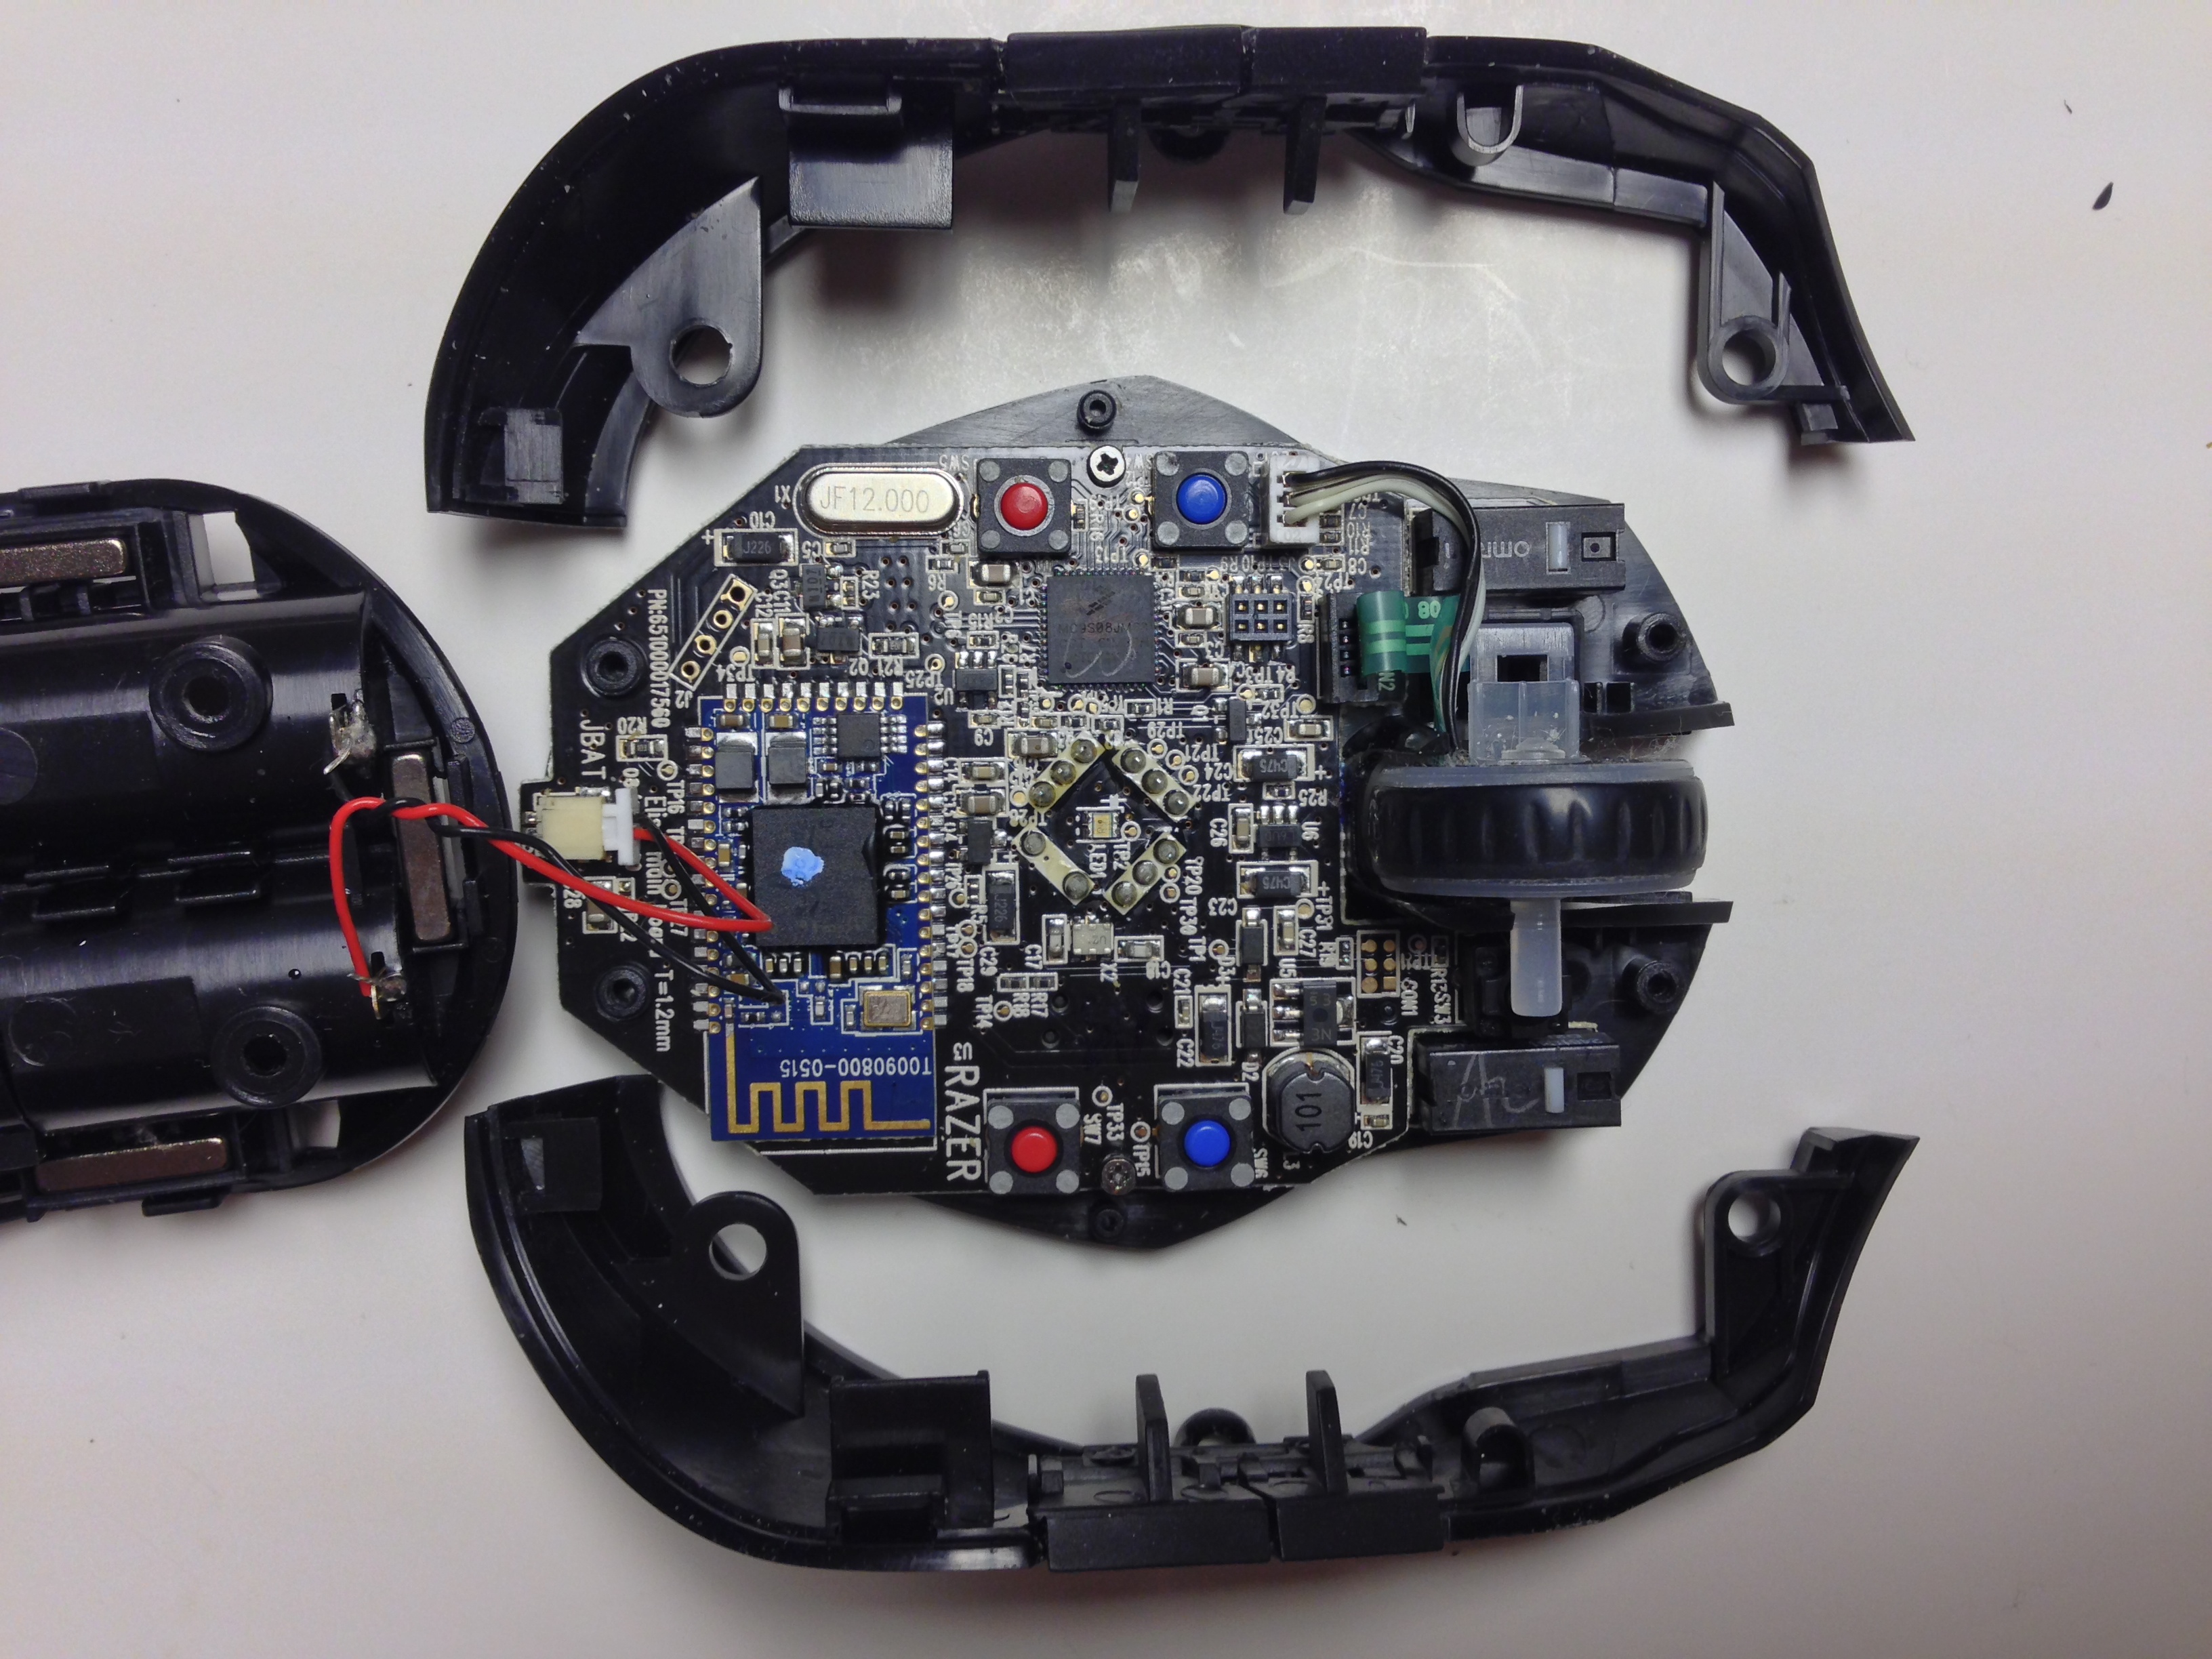
Step 9: Pull the main circuit board away
Be careful with this! Hold the board by the sides with one hand and pull it perpendicularly away from the bottom piece of plastic. It's important that you don't slide the circuit board away - pull it directly up and away.
Why? See the pins and pin receiver in the image below (highlighted in orange)? You don't want those vertical pins to bend, which is why you need to pull directly upward.
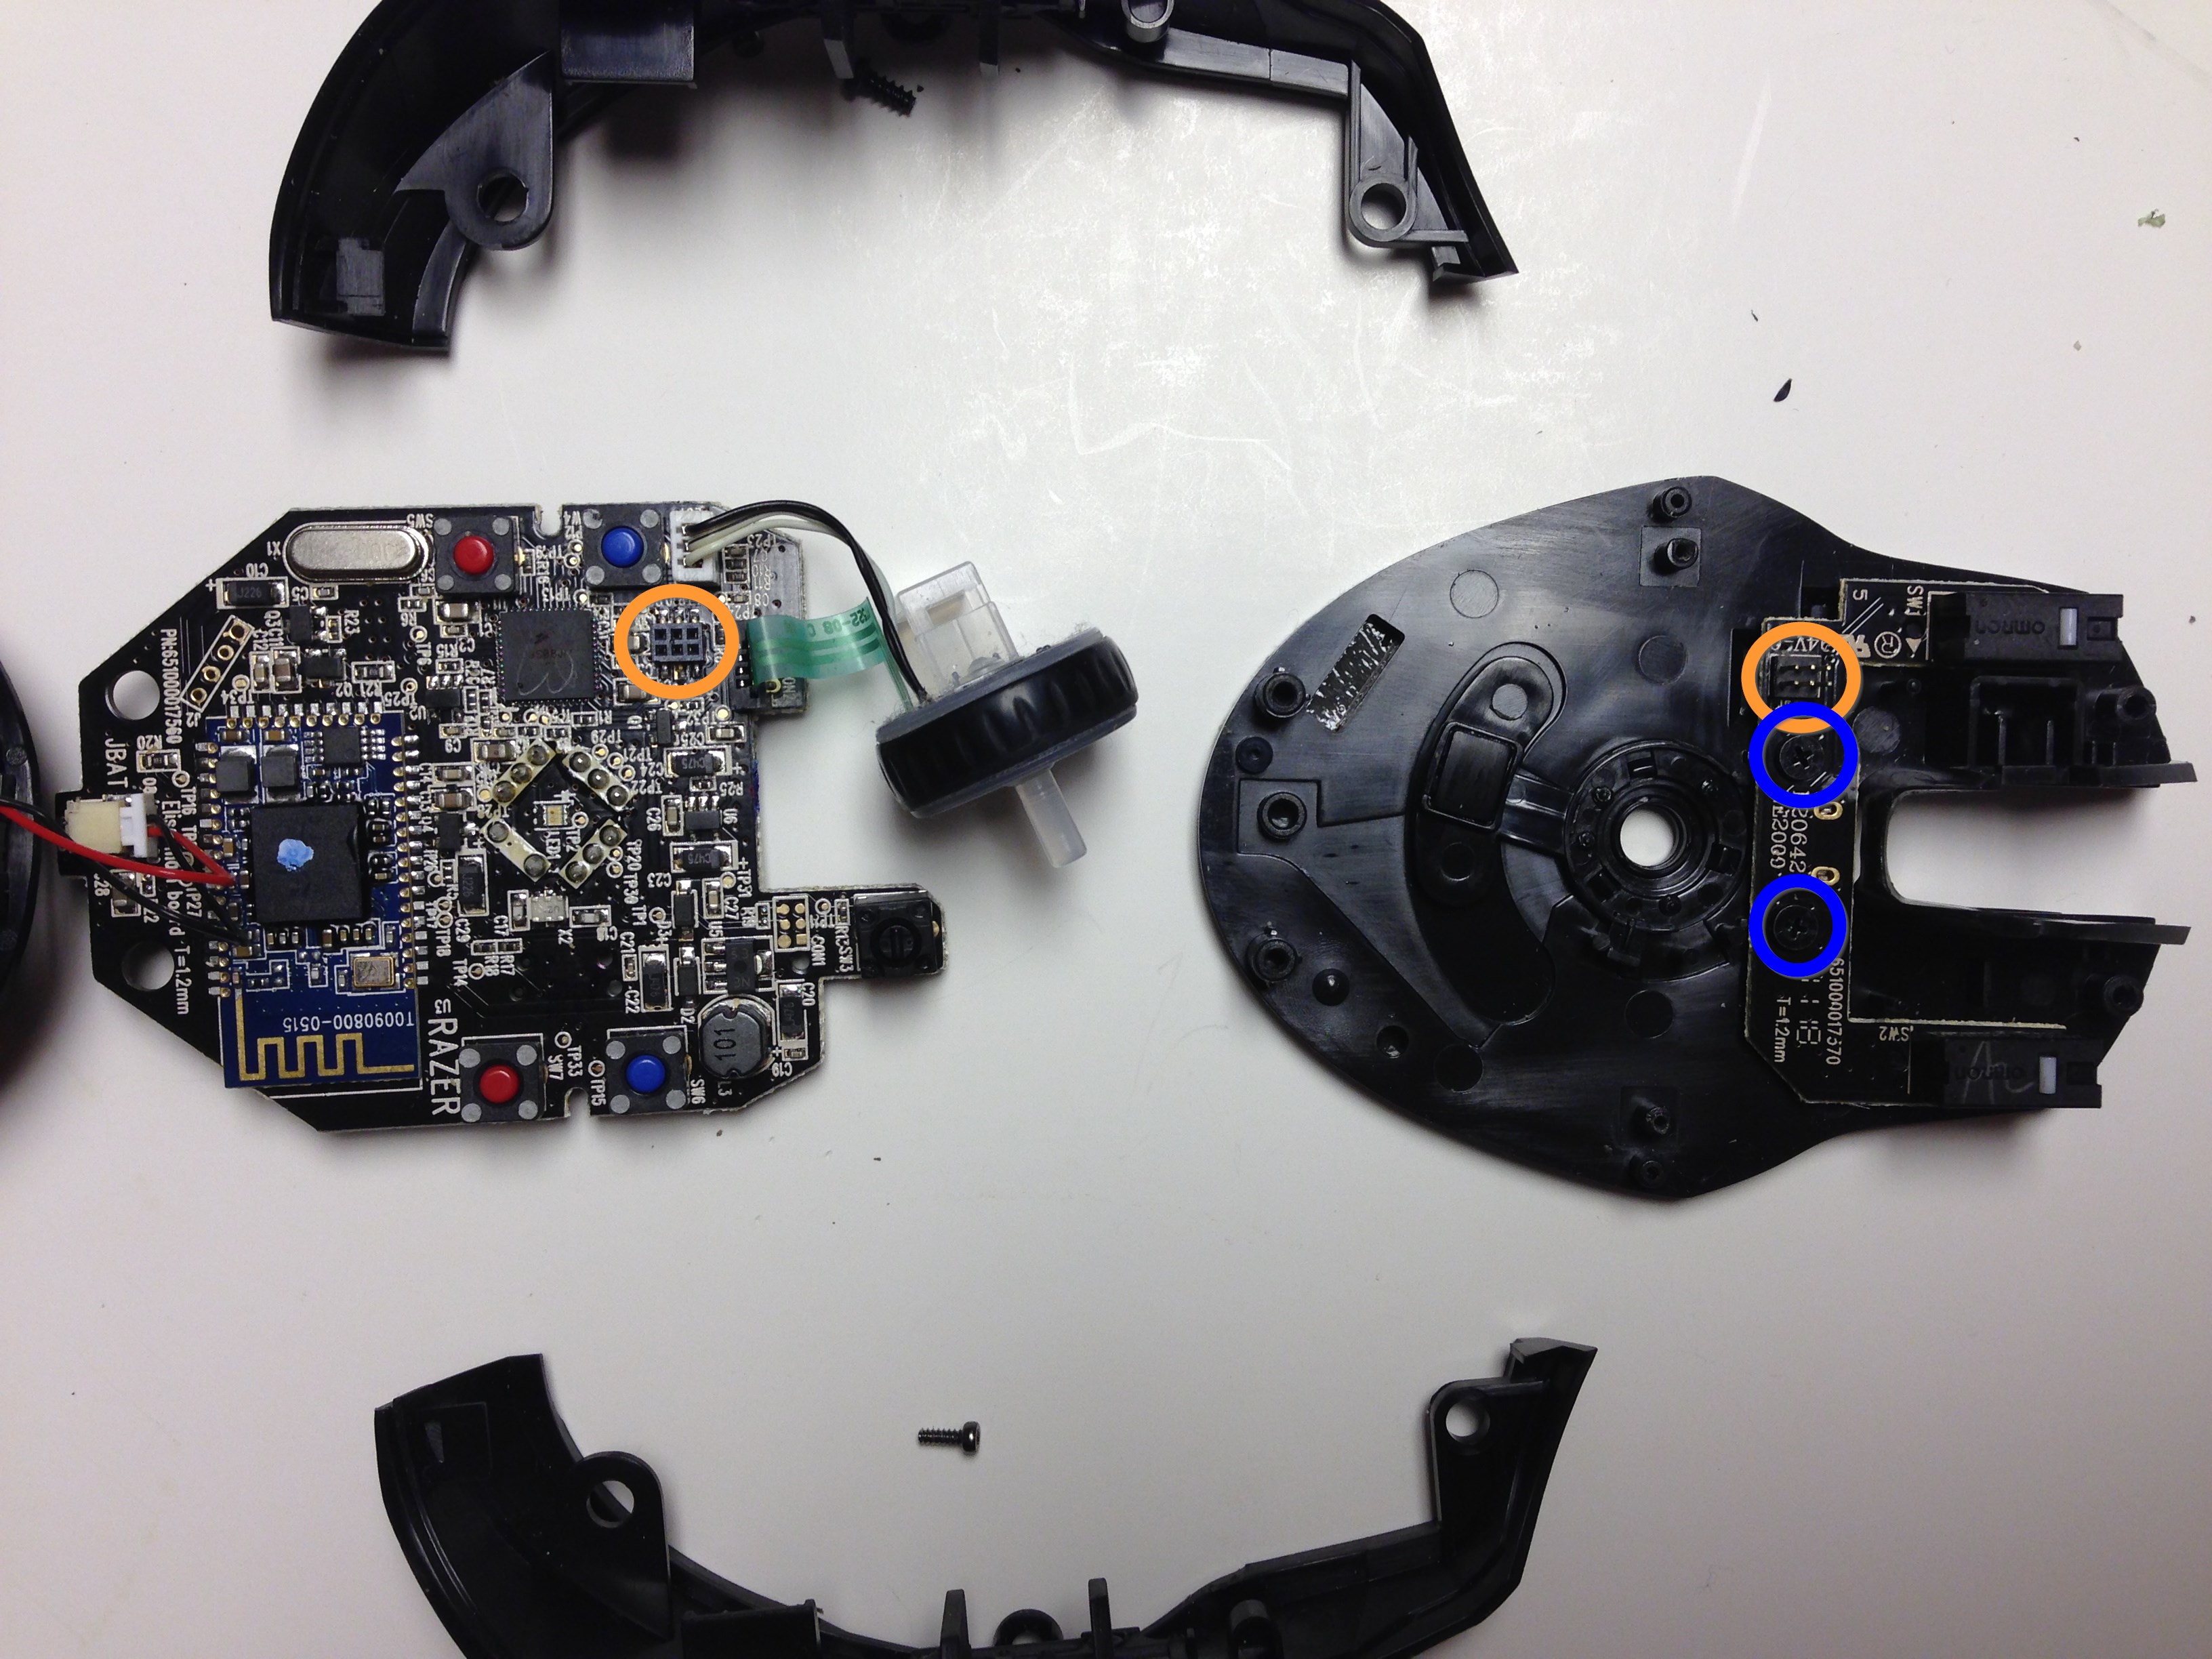
If you want to replace the left/right click switches, you'll also need to unscrew the two screws located in the blue circles above. The smaller board should then just fall away.
You're done with disassembly! Nicely done. Now onto the harder part.
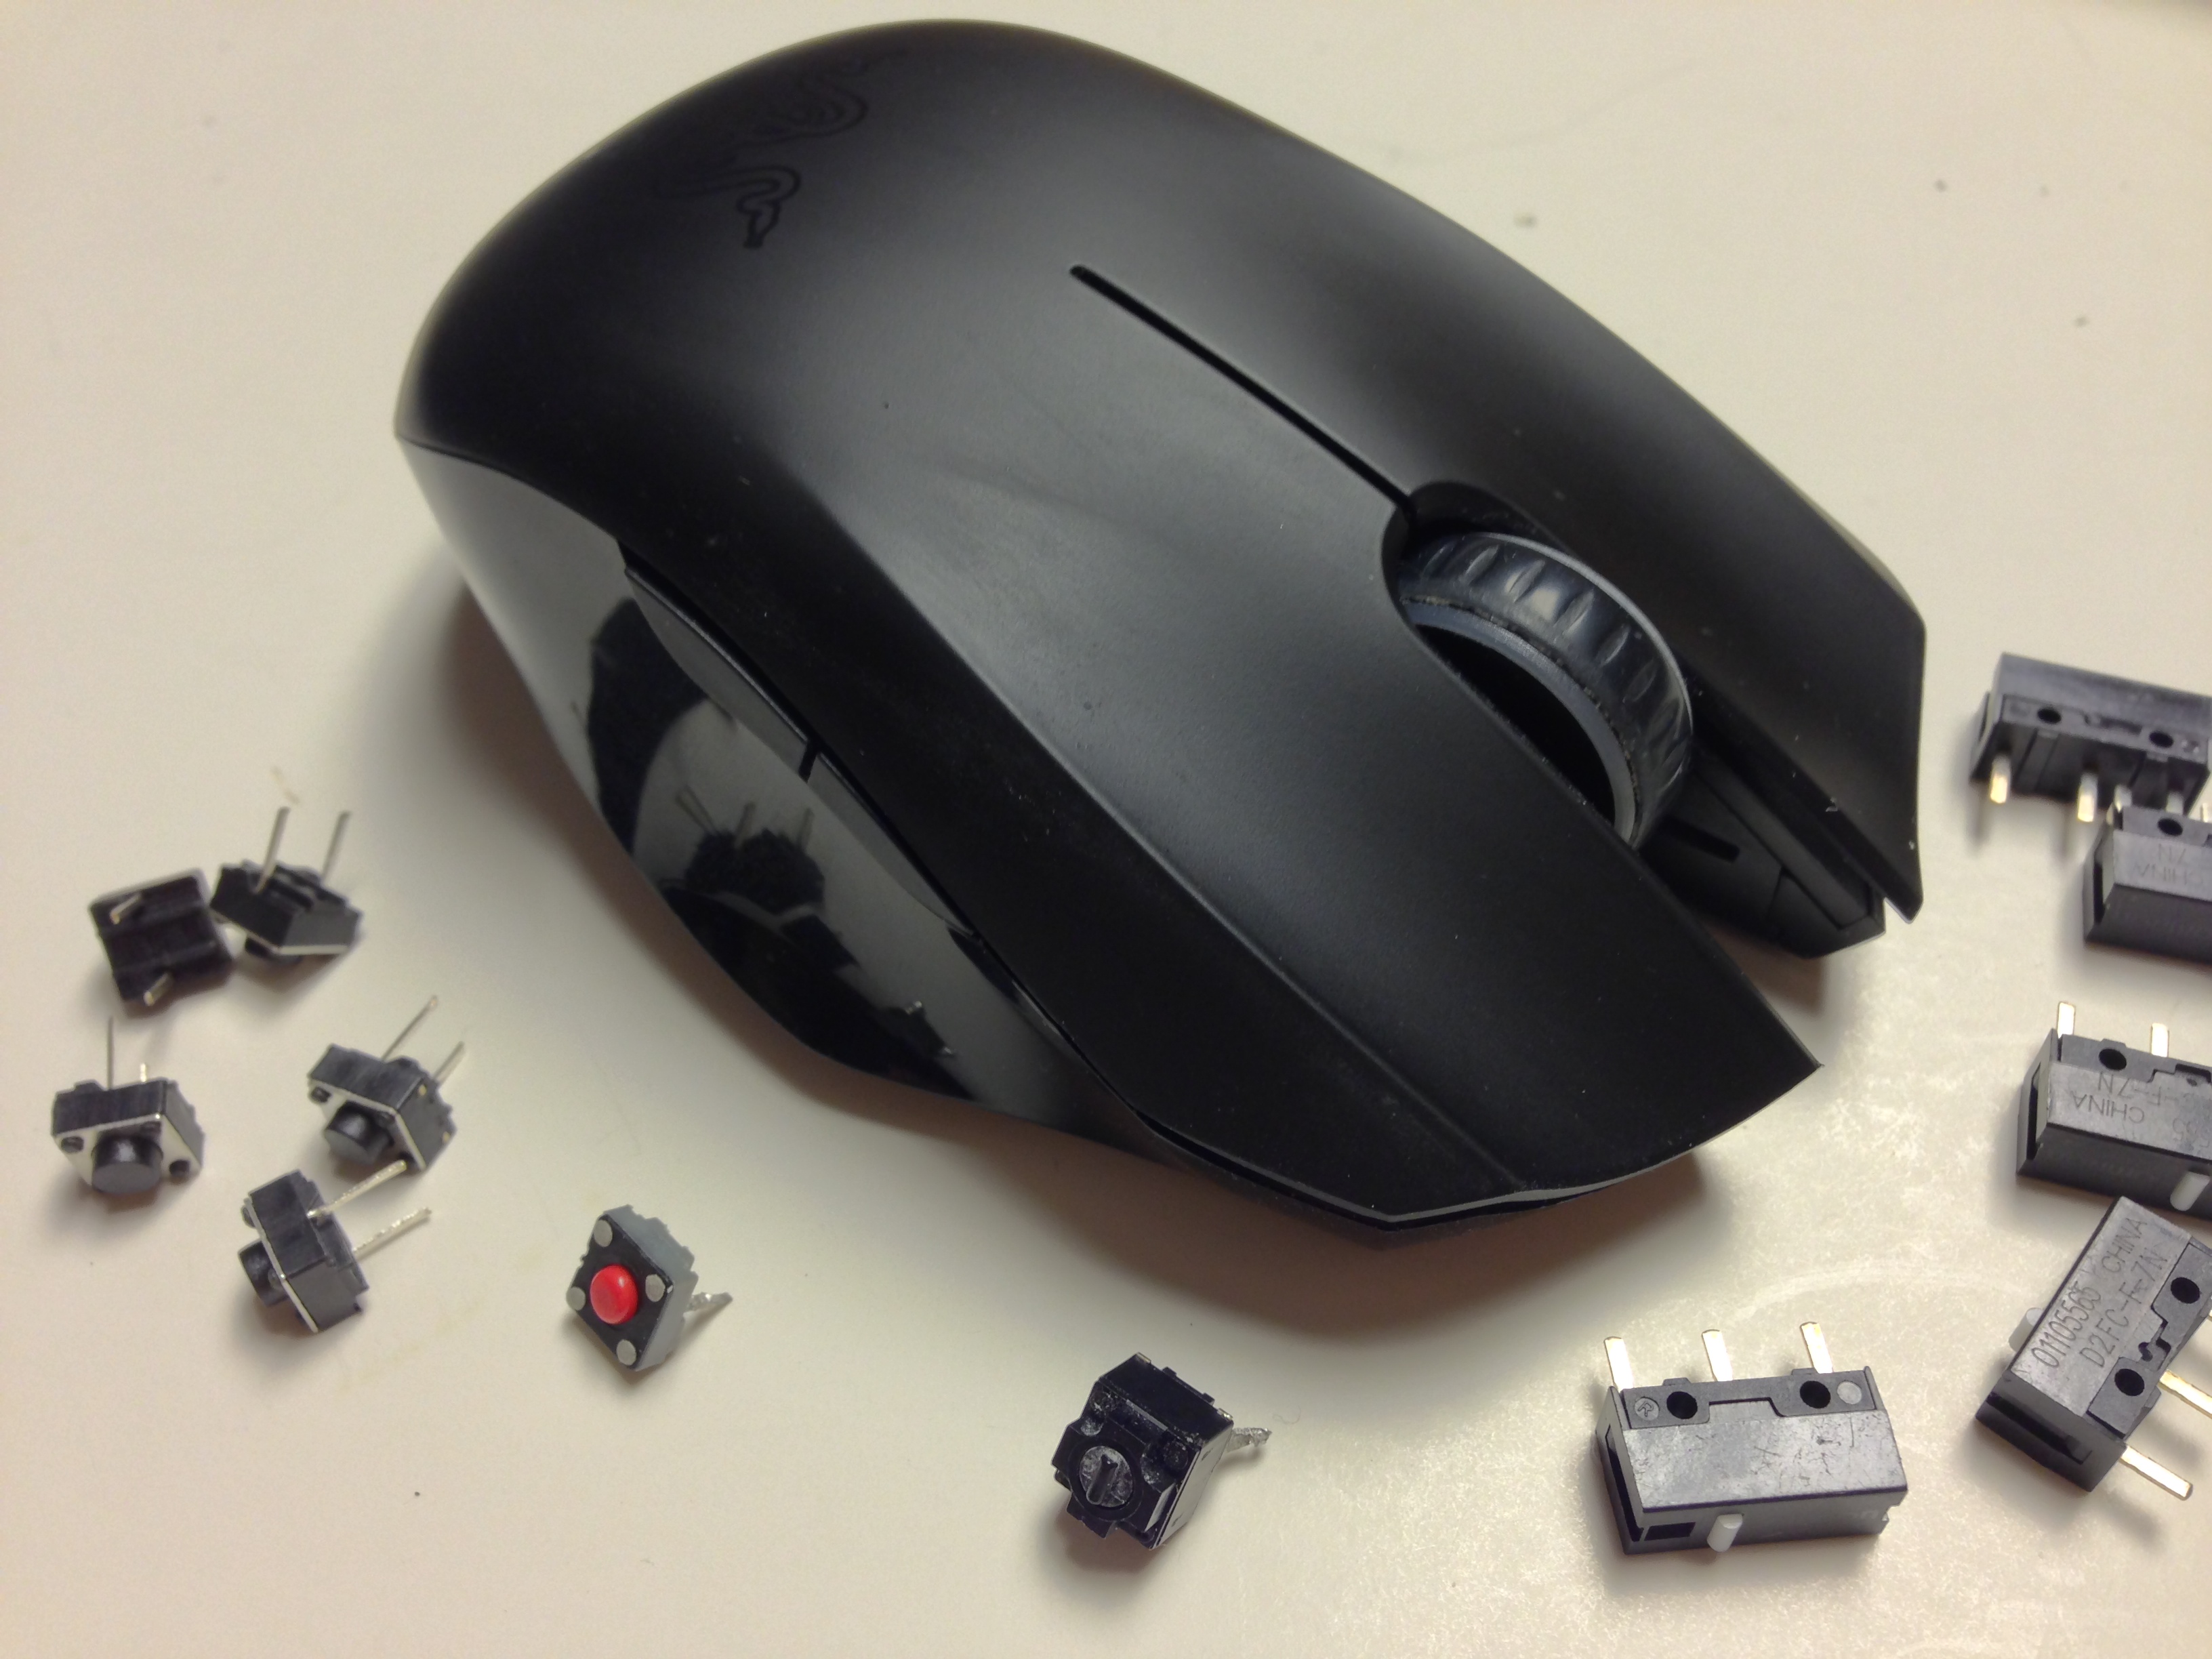
Phase 2: Replacing Switches
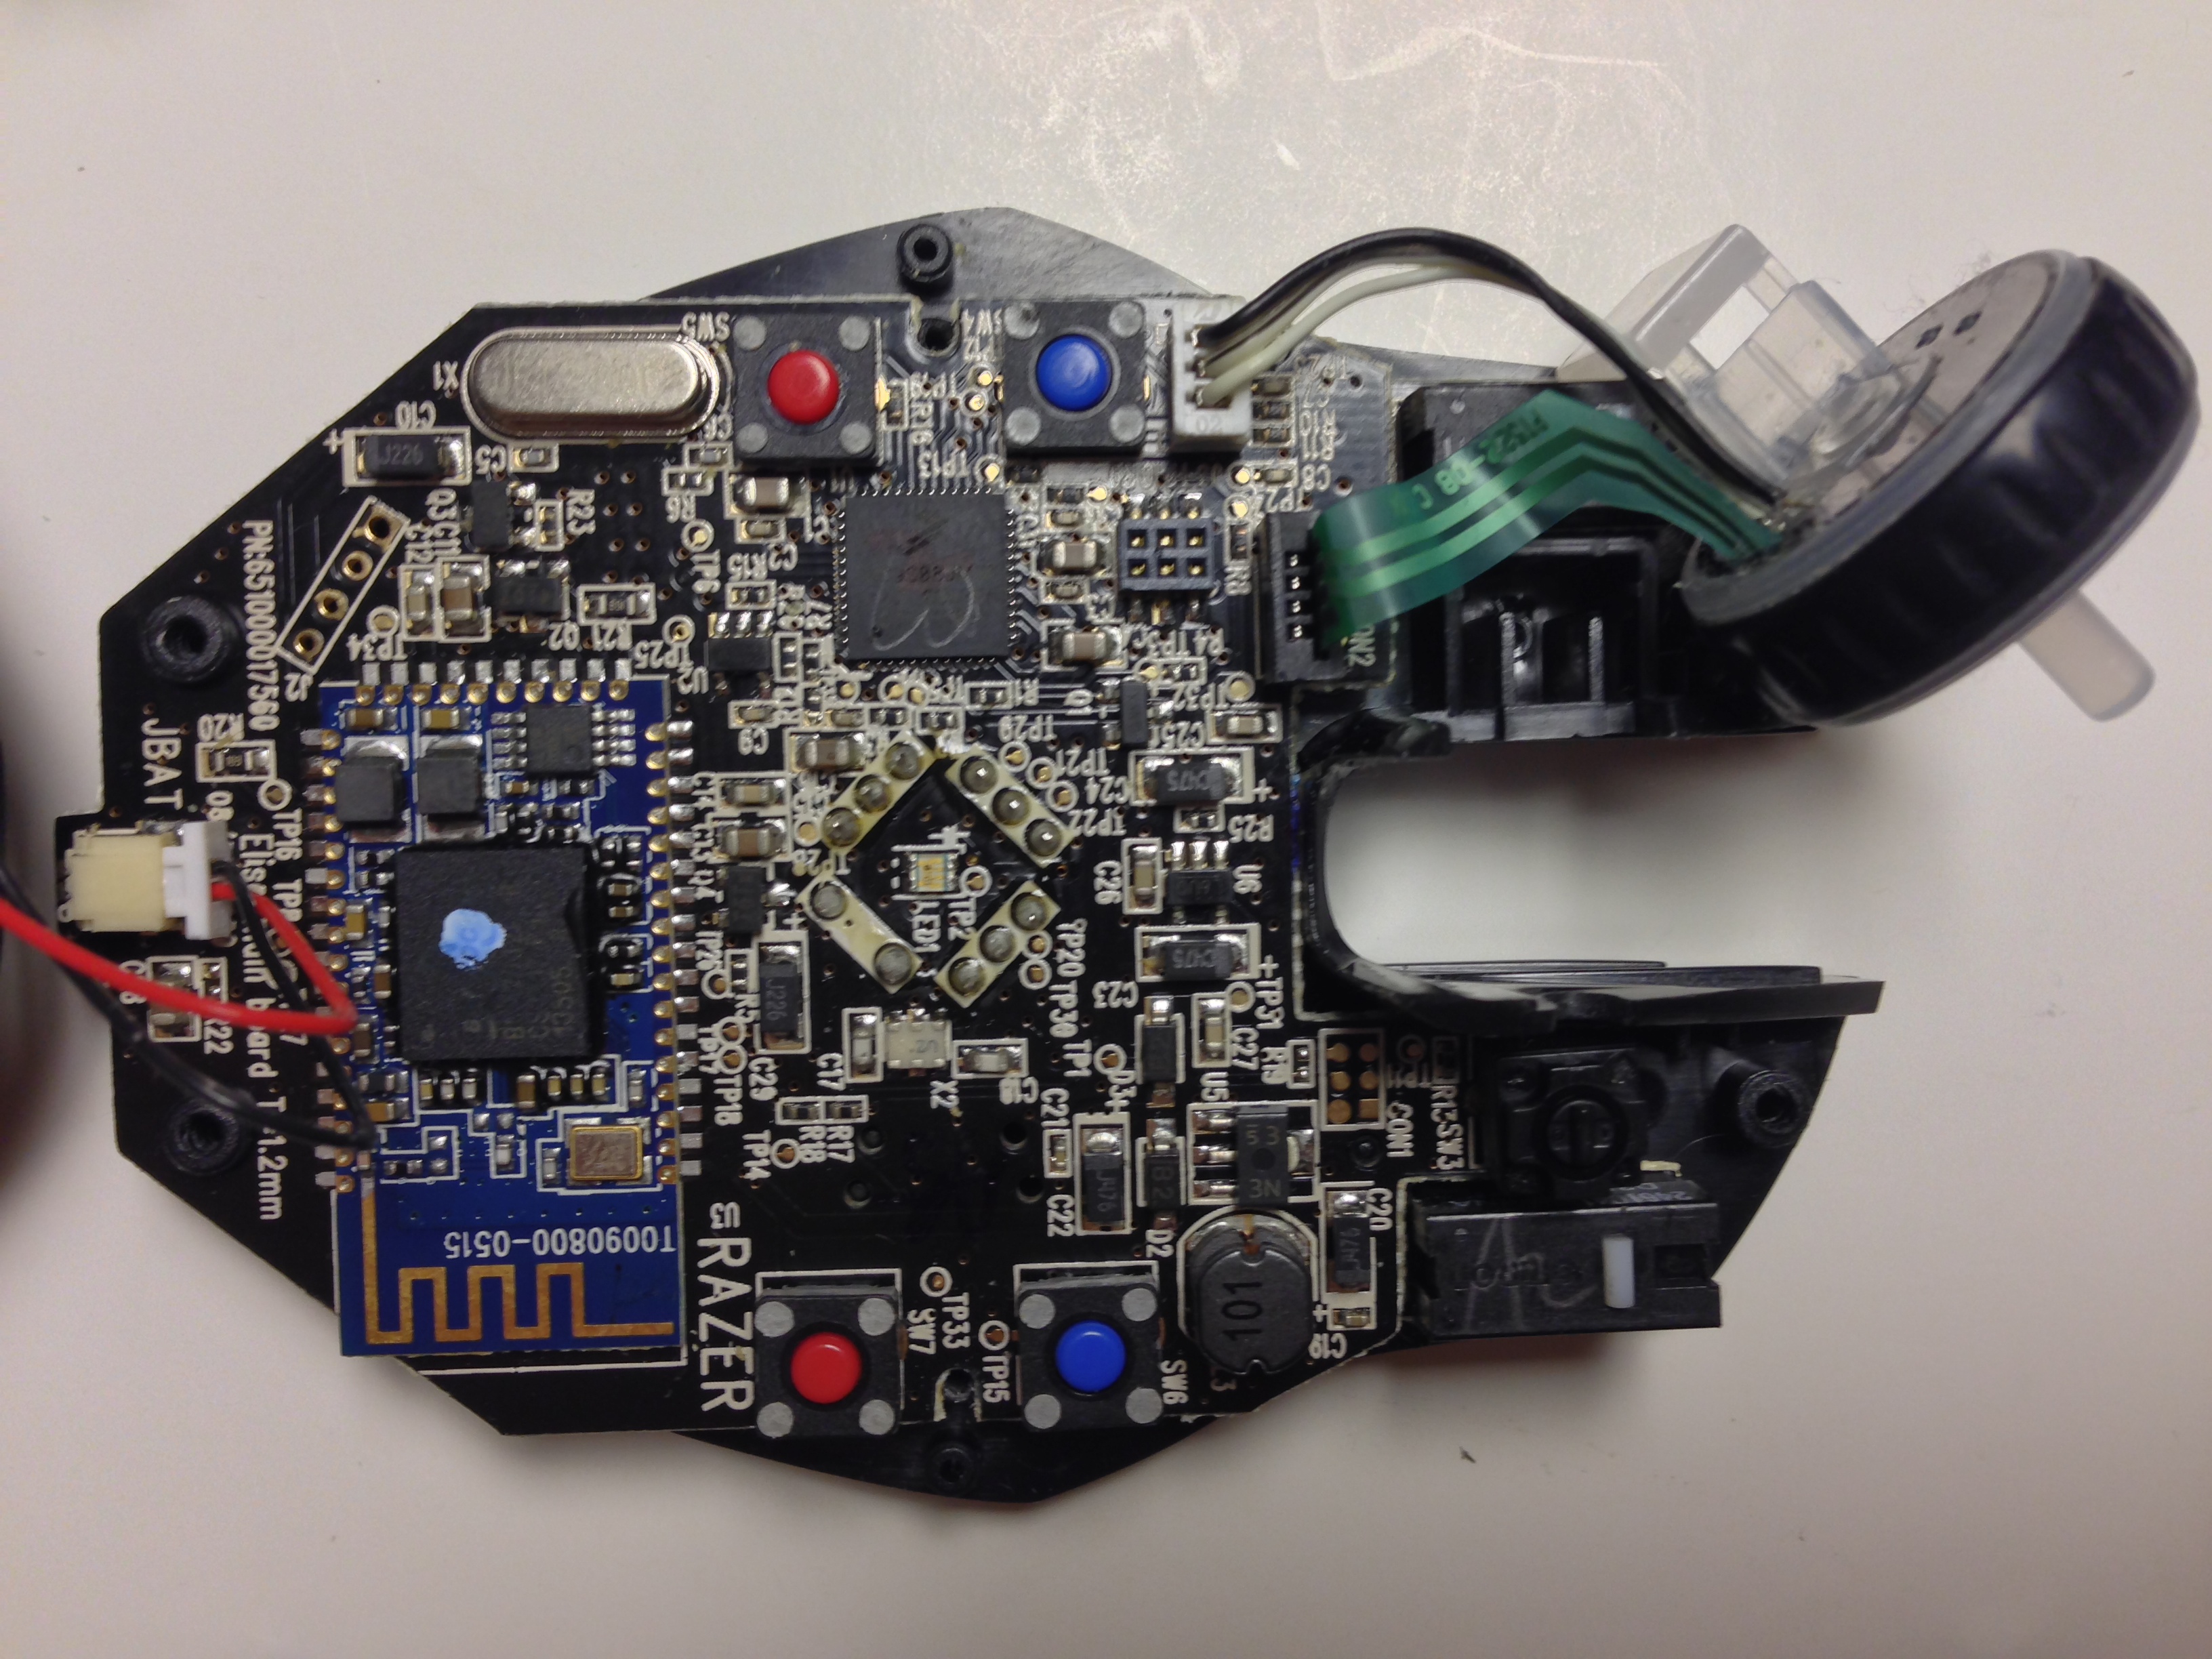
Every major switch of your mouse is now visible, as marked below. The red and blue side switches, the mouse wheel switch, and primary left/right click switches are just a few minutes of soldering away from being replaced.
In the below photos I'm going to focus on the side switches since they're the most complicated, but the same general idea applies to any of the switches that you're replacing. Basically, we flip the circuit board over, melt the solder holding each part in place, remove and replace. That's it.
For me, this red button up top was the one that was giving me trouble.

Step 1: Flip the whole thing over
Be careful of the battery cables as always (you could probably unclip the cable from the motherboard, but I didn't) and flip the entire thing over so you can see the solder joints below.
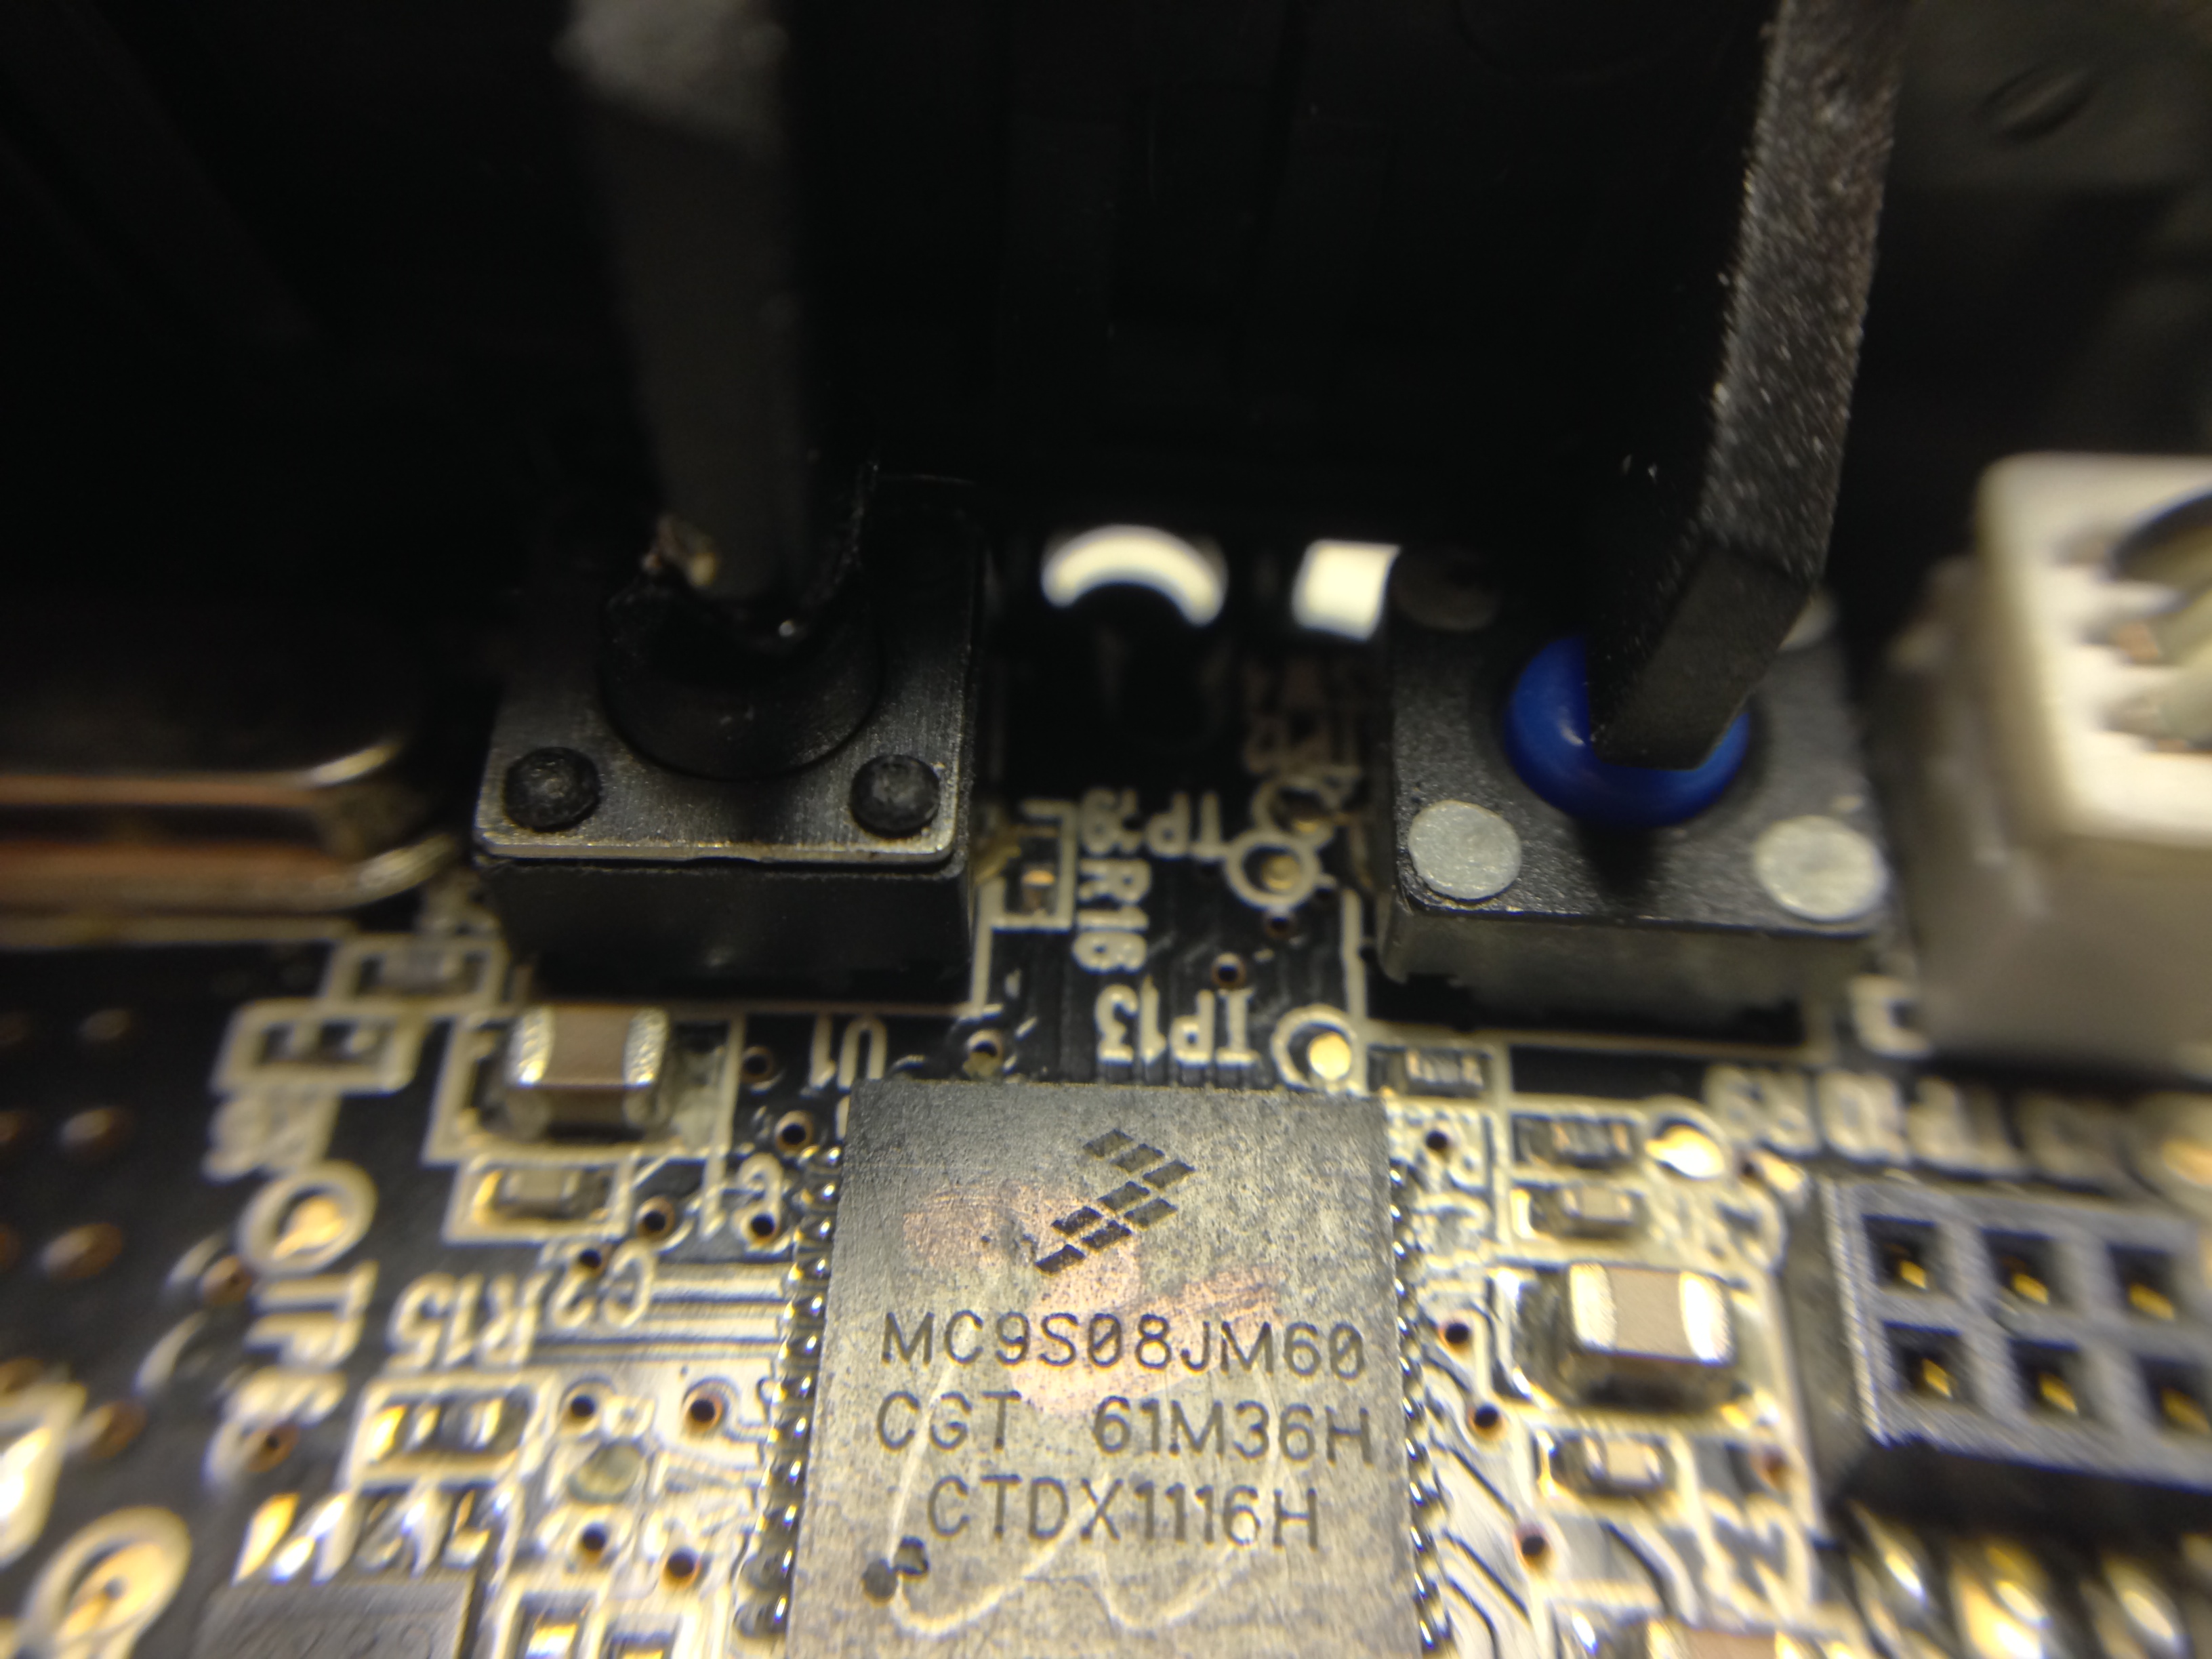
Step 2: Investigate and double check what you're doing
In the same way you "measure twice, cut once" in woodworking, you should double-check to make sure that you're looking at the right solder joints before heating things up.
Below, I'm targeting the two metal prongs on the top left. All other areas of the board - like the shiny silver area - should be avoided to prevent damage.
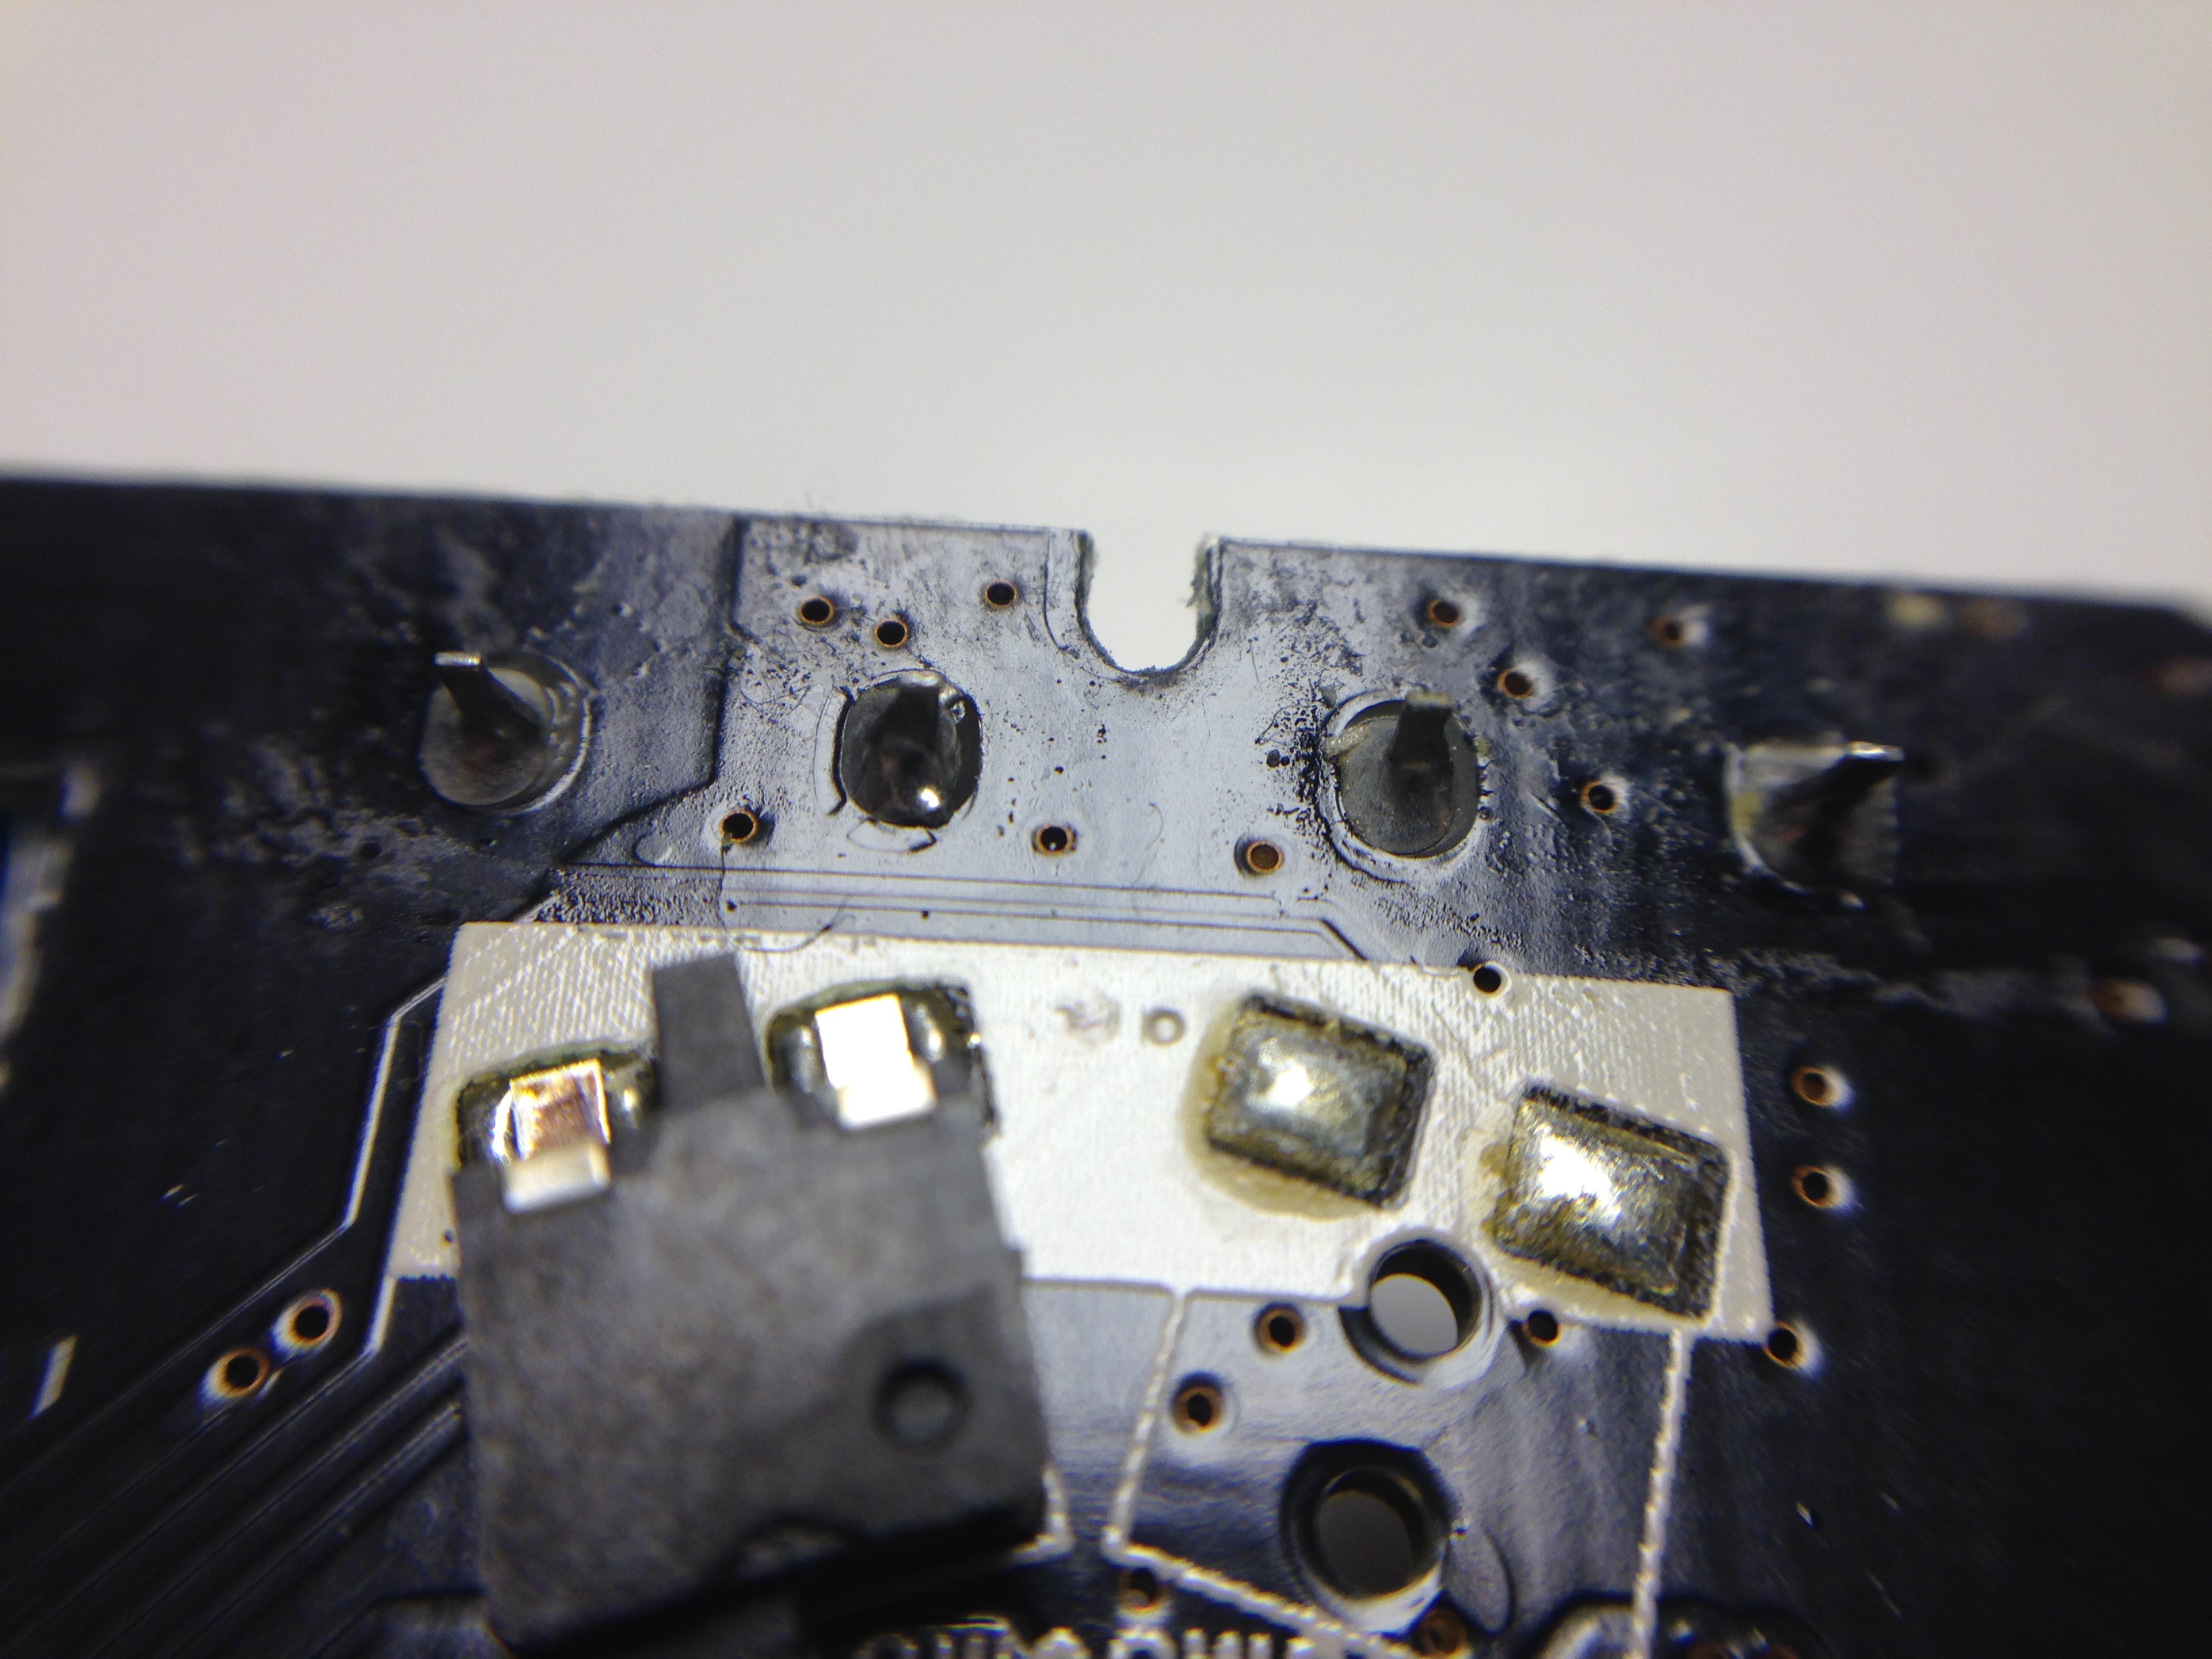
Here are the prongs for the bottom set of side switches.
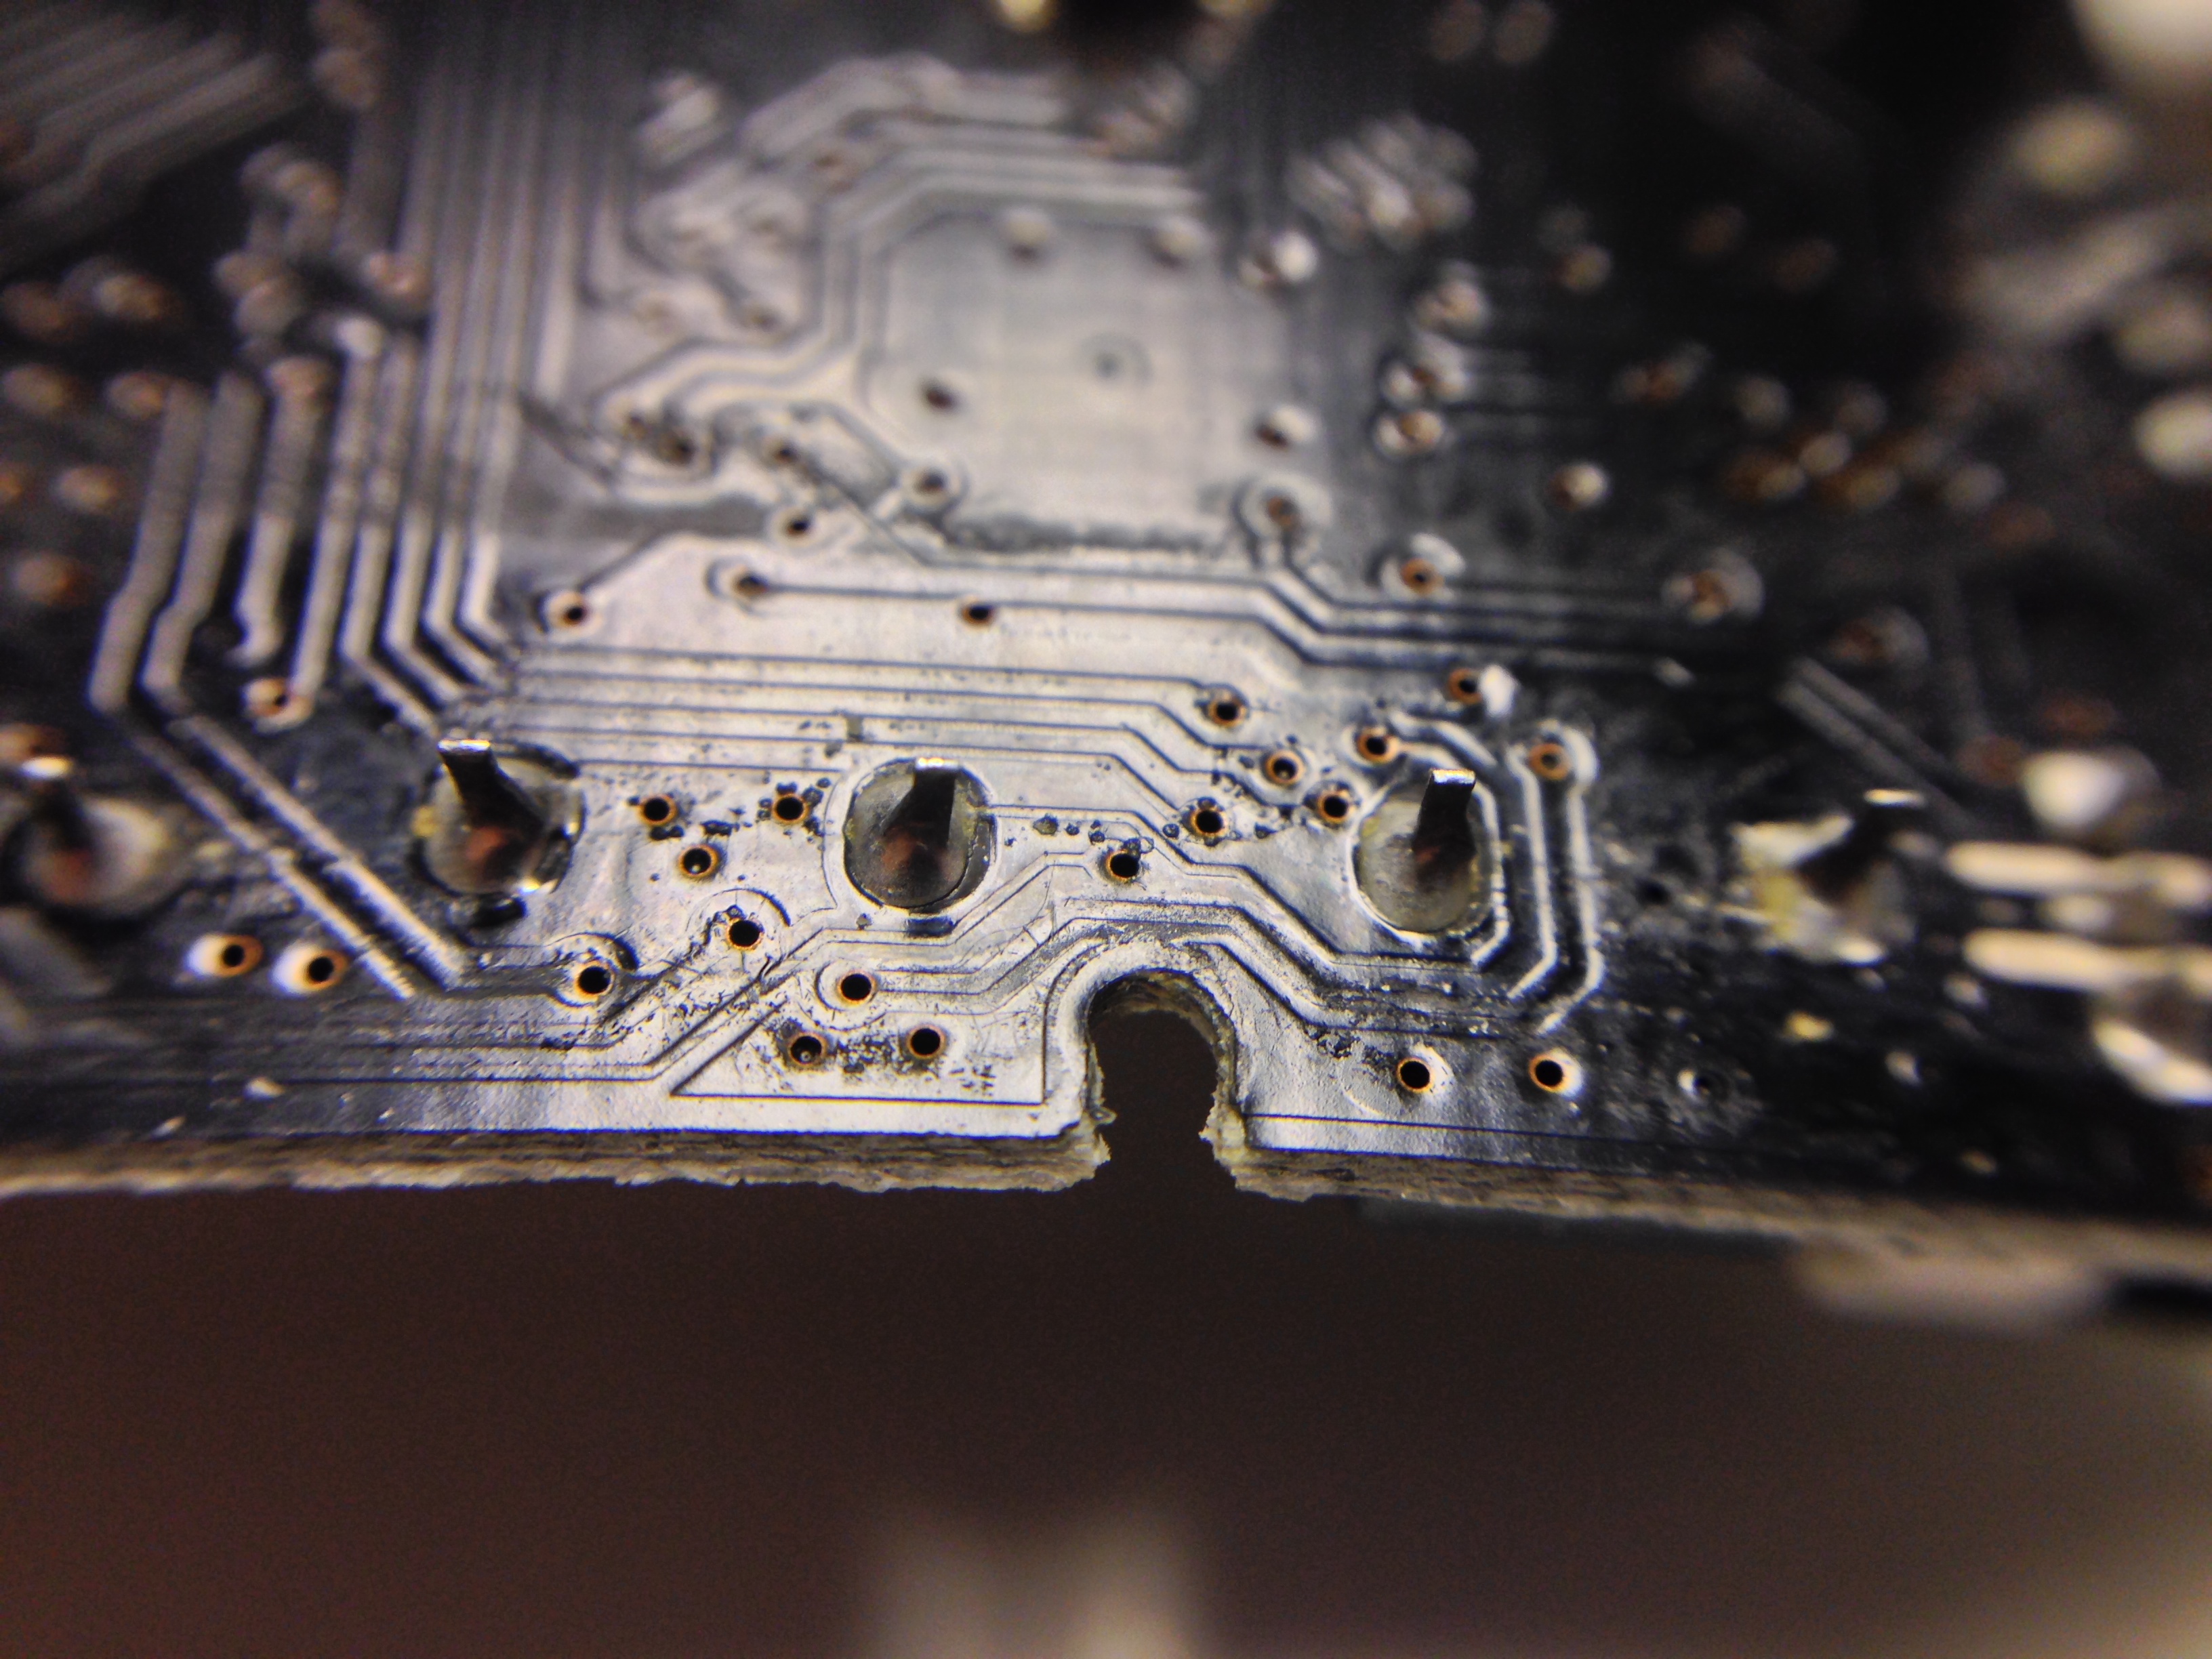
Step 3: Remove the broken switch
This is the hardest part of the whole thing. If you have a vice grip or an extra person around this process will be a lot easier.
Use your soldering iron to re-melt one of the solder joints at a time. Once a joint is melted, your other hand (or the other person) should shimmy the part away as much as they can away from the board, and then switch to the other joint and repeat. If things get too hot, wear gloves or wait for things to cool down.
It takes probably 3-4 shimmies before you'll get the component out, so keep trying. It's not required, but if you have a de-solderer (with a little balloon thing that sucks up melted solder) this process may be easier.
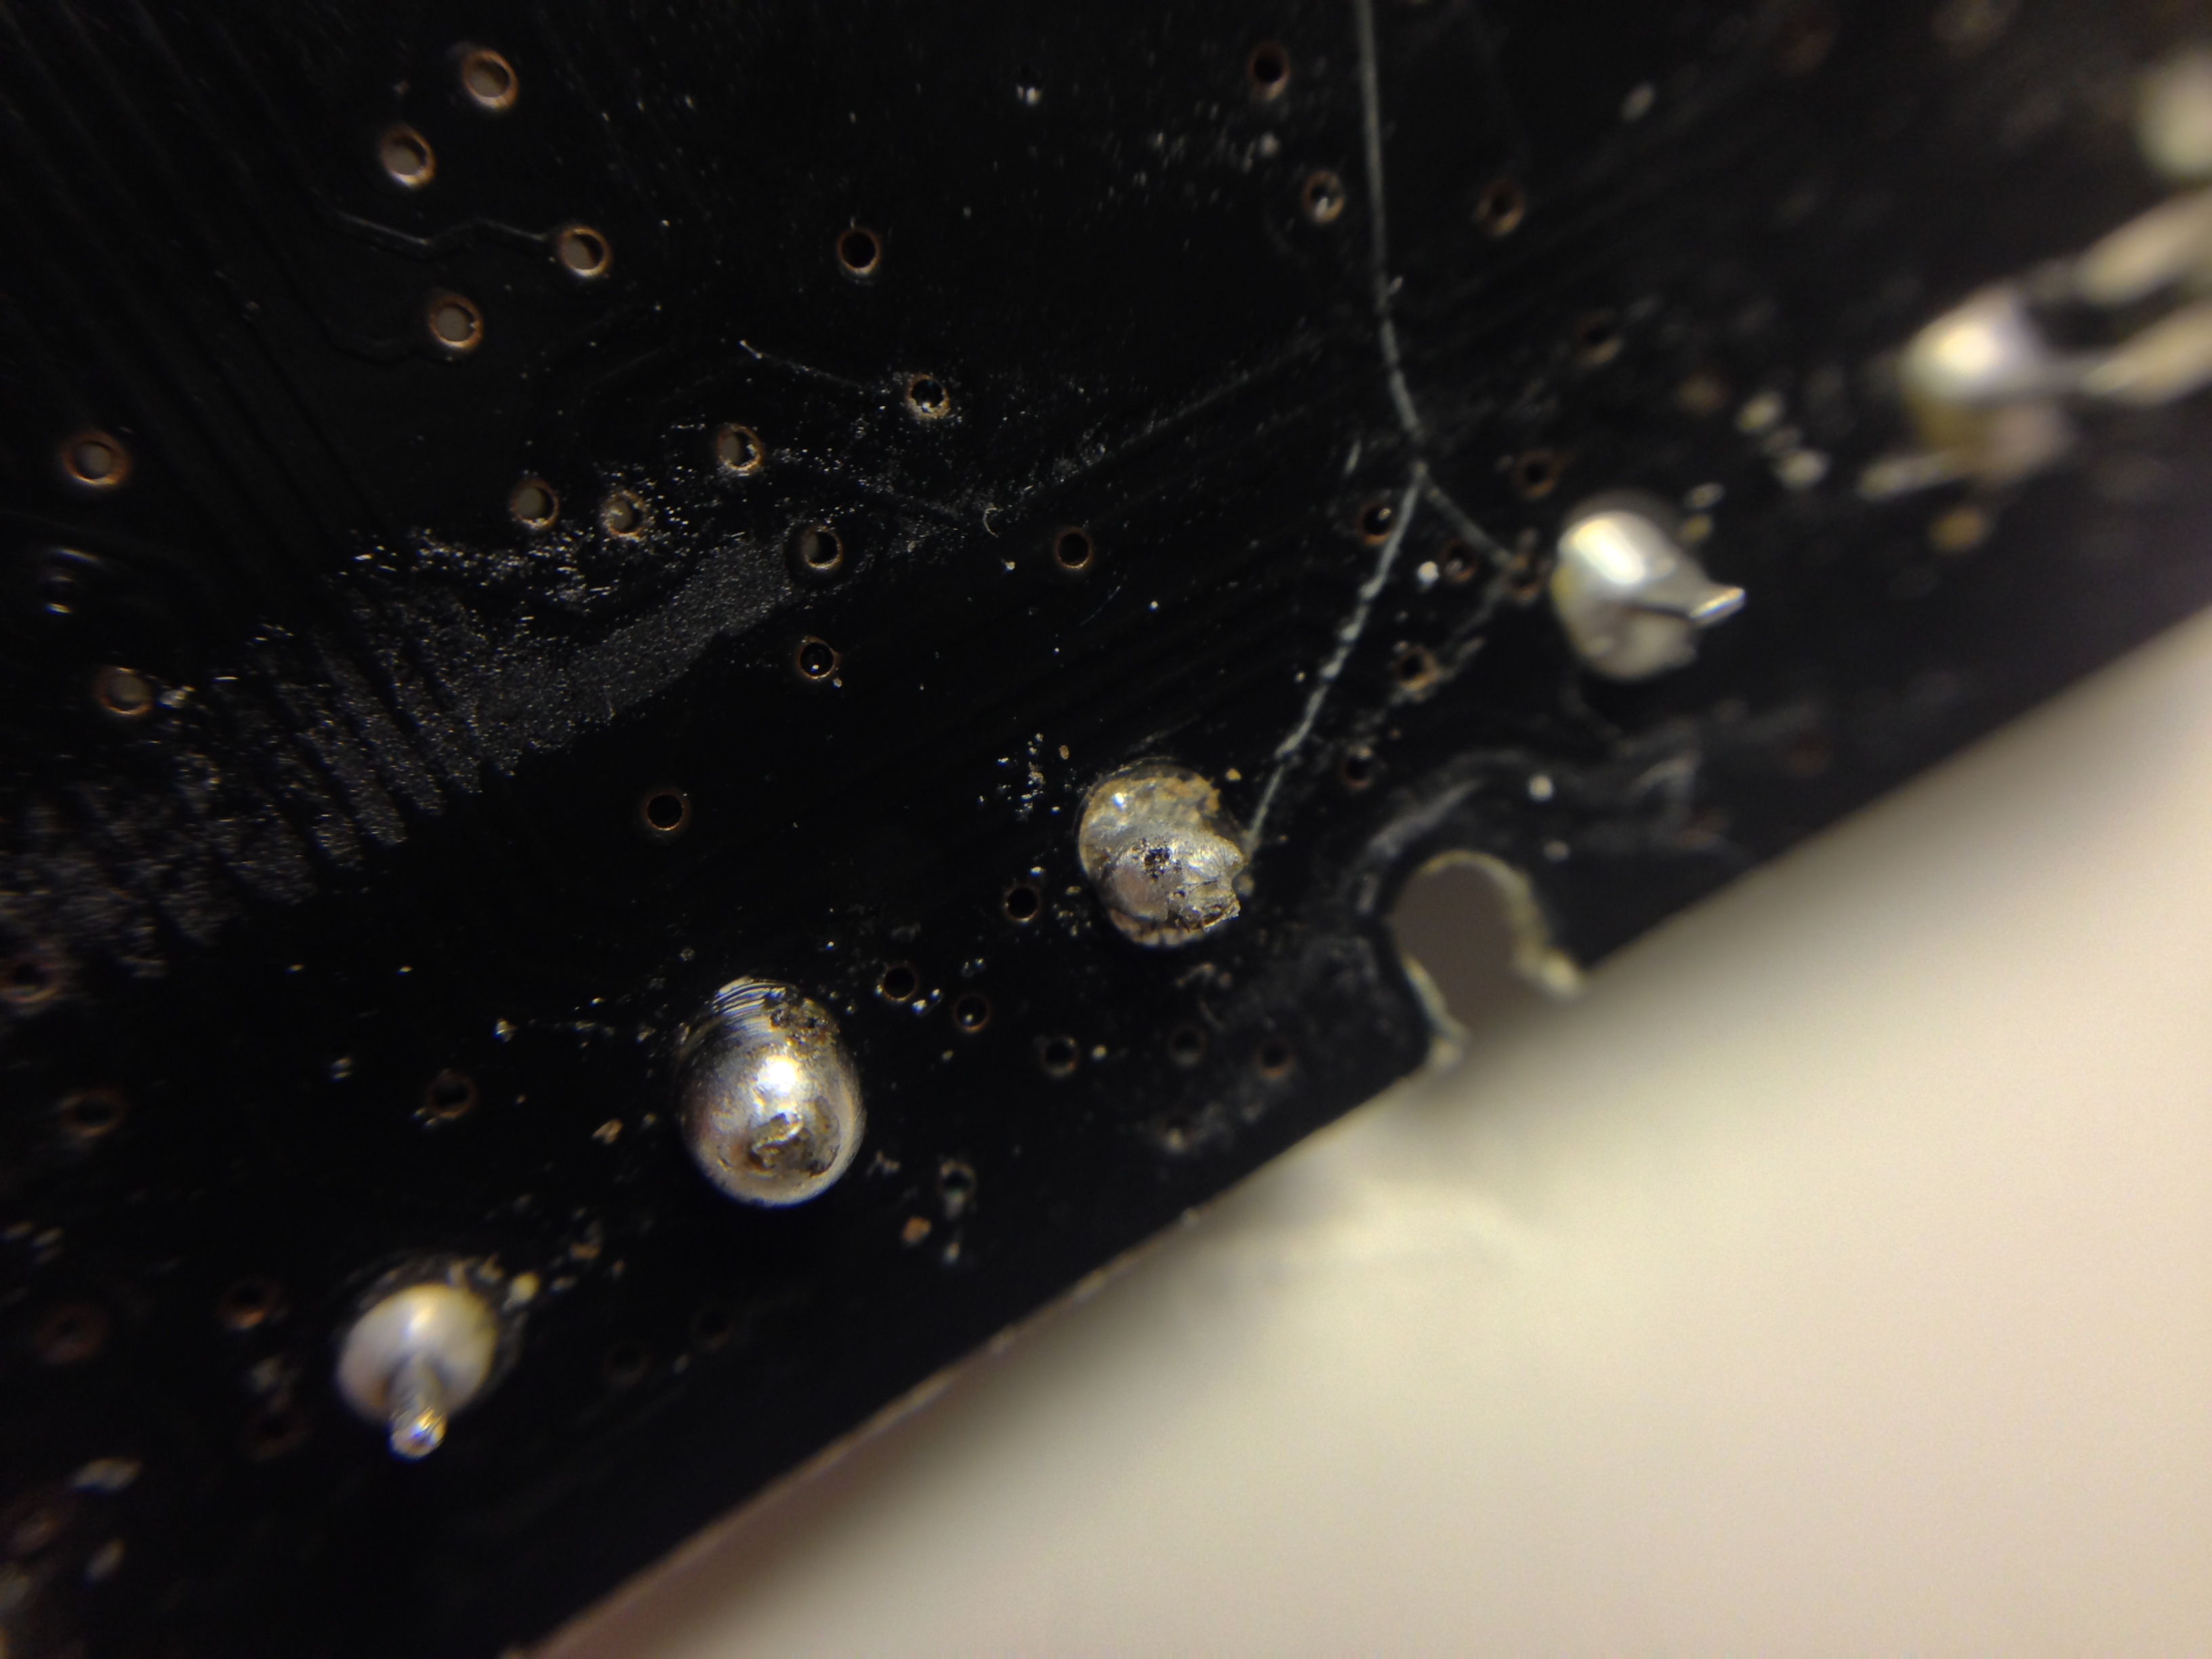
Step 4: Solder in the new switch
Once you remove the dead switch, grab the new one and do the reverse to put the new switch into the board. Be careful and go slow! Cut the new switch's metal prongs down to size if you need to. For the side switches it doesn't matter which direction you put them in. Also try not to heat up the new switch too much to prevent internal damage.
If some of the solder evaporated during the process, melt on some more until you have a solid connection. The joints shouldn't be able to move when you're done.
Don't feel bad if it doesn't look amazing. One of my joints turned out better than the other, seen below.
Here's what it should look like after the side switch is added.

Clearly there's a size difference between the old and the new switch. Try as I might, I couldn't find the exact right part anywhere on the internet. Sorry.
That's okay though, because this switch works just as well and, in my opinion, feels even better than the original when clicked.
We just have to get creative to make the side panel fit on again.
Step 5: Put the circuit board back
Flip everything back over again - we're done soldering metal.
Now do the reverse of step 9 in the disassembling process. Remember to lower the board back into place, and don't push - it should fall into place pretty easily with little pressure.
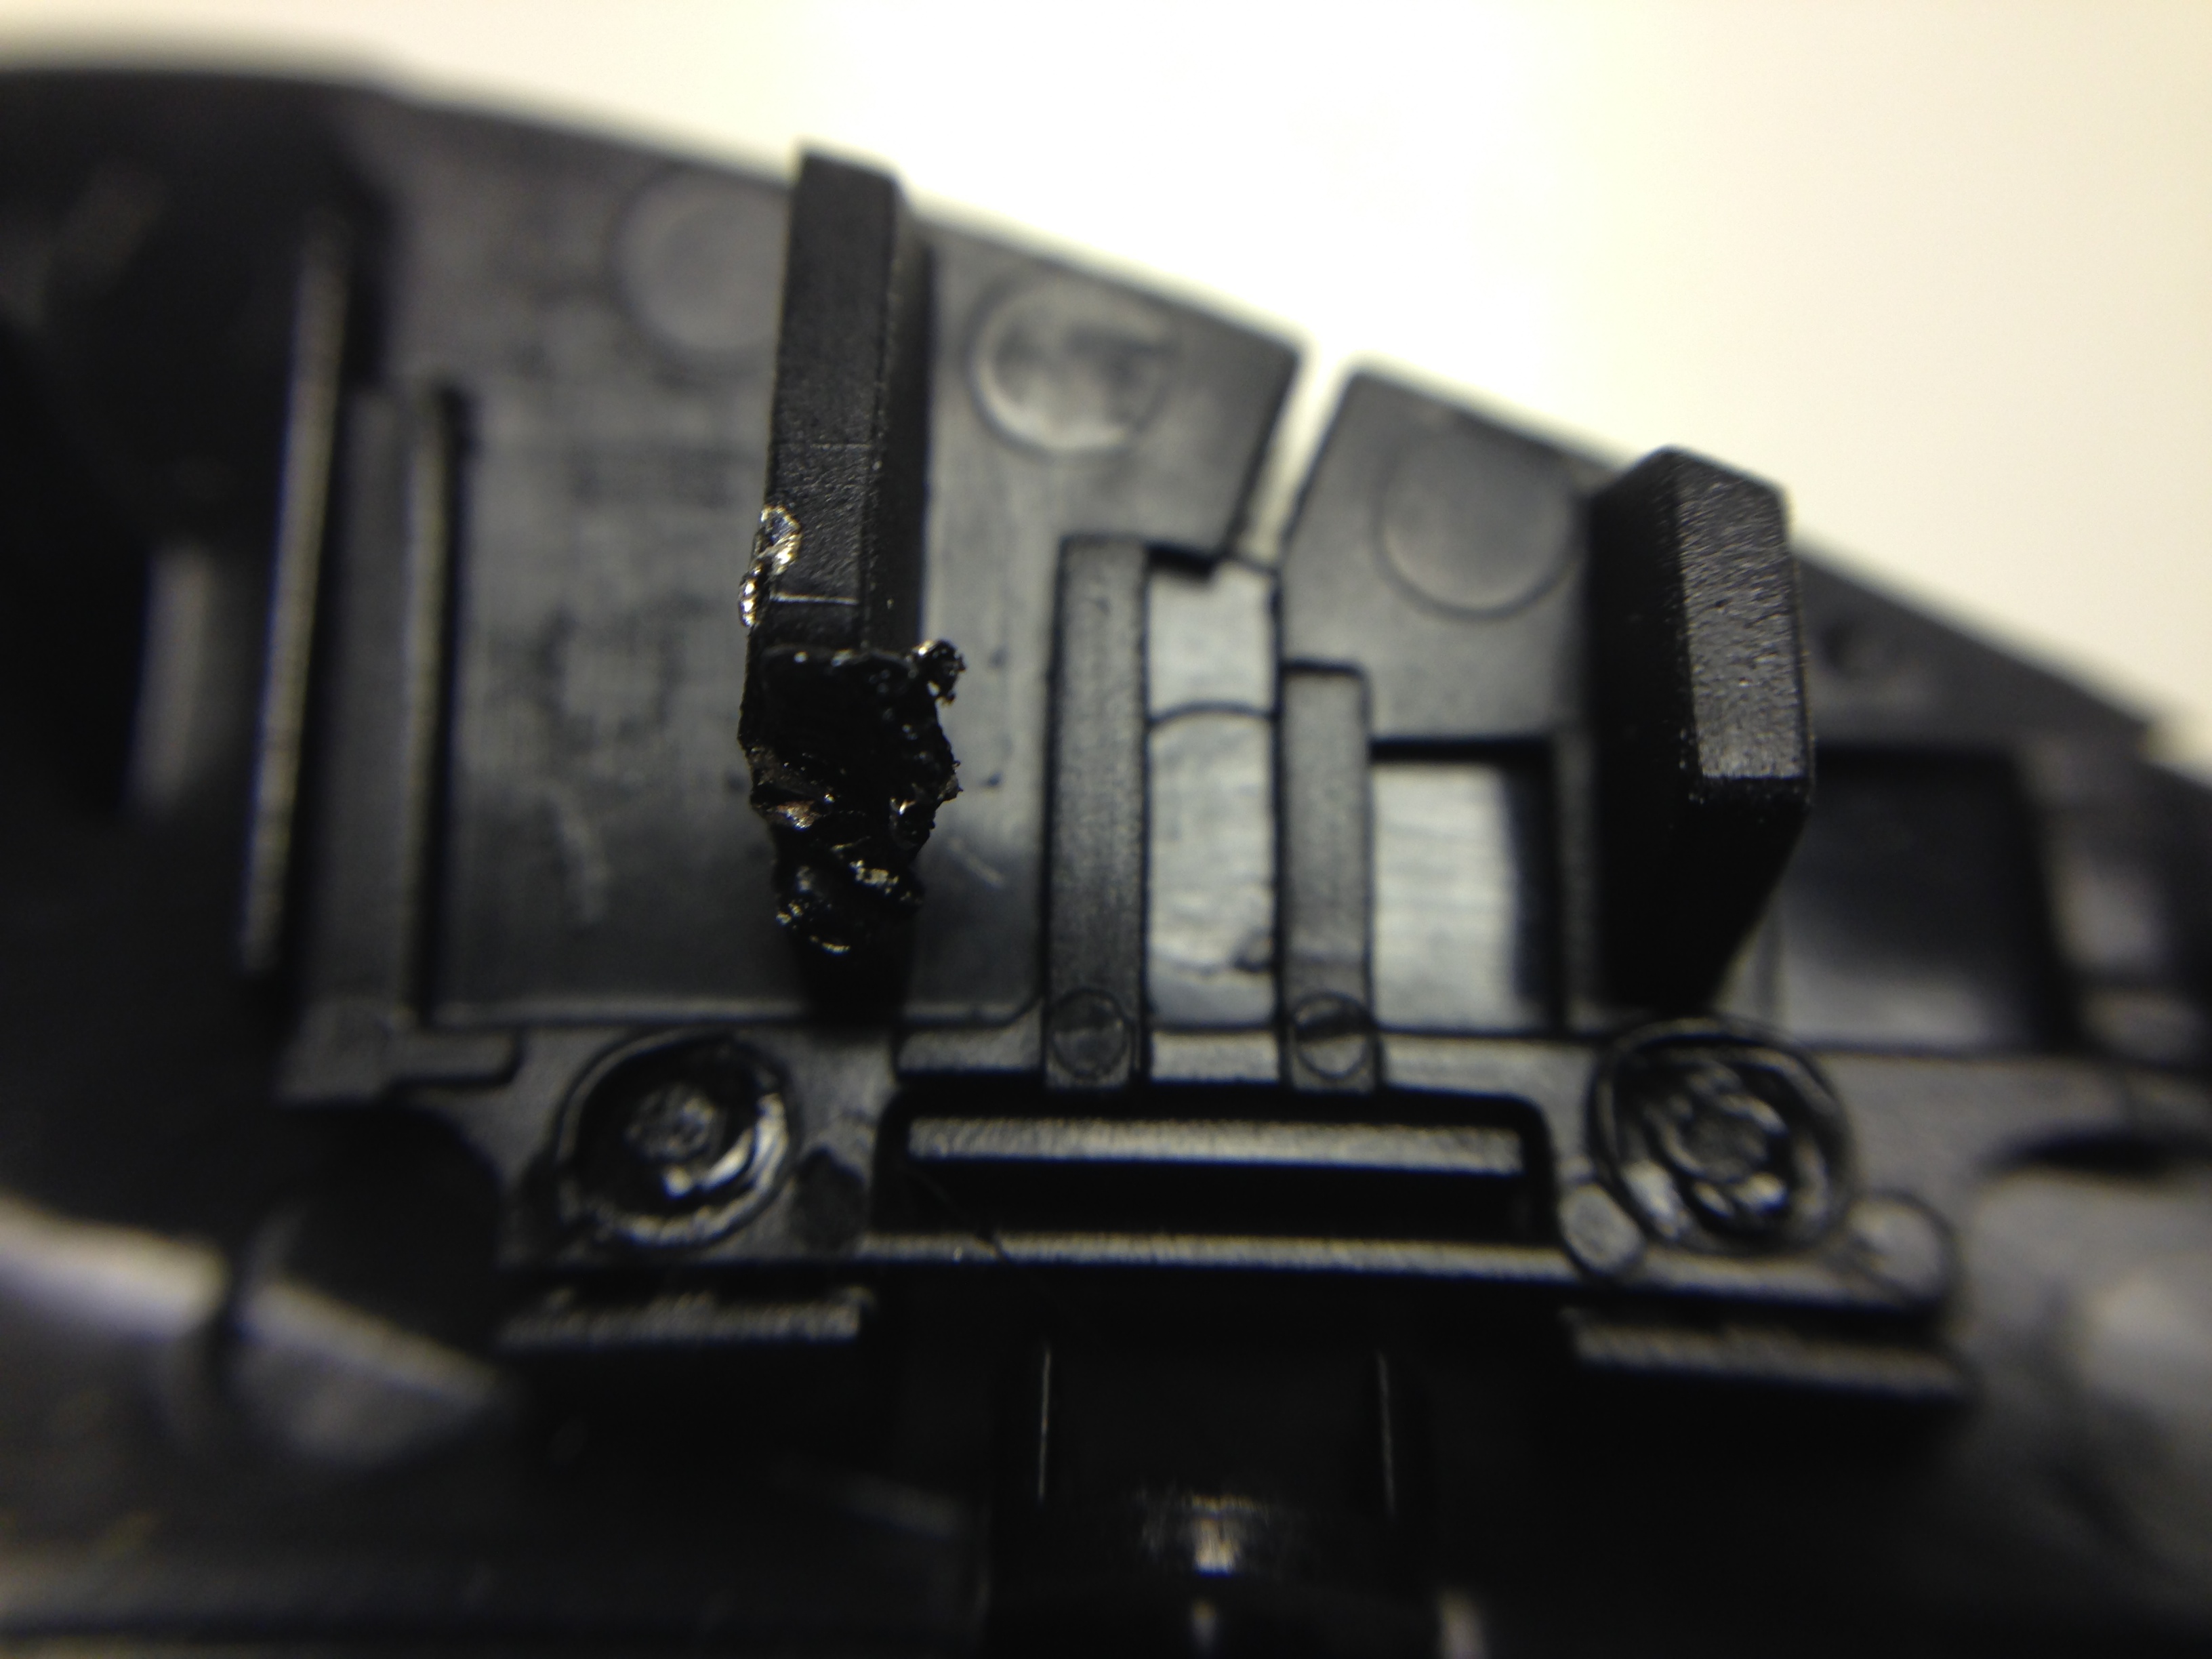
Step 6: Shave or melt off some plastic from the side panel
Get the glossy side panel piece for the side you added the new switch to, and look at the two rectangular pieces that jut out from the center. You'll notice that these pieces are what actually hit the switch when you push in from the outside.
Because the new side switch is a few millimeters taller than the old switch, we're going to need to either shave or melt off some of the plastic from one of these plastic rectangles.
This isn't really a precise process. I was impatient, so I used my soldering iron to melt the plastic away bit by bit and placed the panel back on the board to test it out. Eventually the plastic side should fit back into place easily and let you click the button from the outside. Be sure to clean your soldering iron well and use a fan to blow away any smoke. Using clippers is probably a smarter idea if you have them.
Again, it's a bit crude, but just shave/melt little by little until it feels about right. Make sure the bottom surface is mostly flat like it was before, as shown below.
Yeah, not too pretty. Here it is sitting on top of the switch though.
A bit hard to see, but it fits perfectly.
Phase 3: Reassembly
This is pretty easy. By now you already have the circuit board back in its place, so screw it back in, pop the plastic sides back on, put on the top, screw in the first 4 screws, pop the top shell piece back on and you're done!
Follow the reverse of Phase 2: Disassembly to make sure you don't miss any steps. No screws should be left over, obviously.
Phase 4: Feel good about yourself
Good job!
For about $15 ($40 if you needed to buy the screwdriver kit and soldering iron) you just fixed your mouse's switches and helped save Mother Earth at the same time. Captain Planet is pleased.

You also learned how to solder and can now fix many of your other gadgets if they break. Lots of electronics are fixable with a steady hand and a bit of googling, so congrats on that as well.
As I said in the beginning, I realize this process isn't for everyone. If you want to bring your Orochi back to life and use it for more than two years, however, the above may be your only choice. The circuit board should last for a decade - the mouse switches are destined to fail, and that's where your new skills come in.
It'd be interesting to see if a mouse with easily-replaceable mouse switches could be made. I wish this process were easier and didn't require soldering - a lot of mice have ended up in landfills because of this (possibly) planned obsolescence, which is a shame.
Congrats on fighting the power, and game on!